Camshaft — removal, inspection and installation
1. To check camshaft endplay:
- With the camshaft installed, reinstall the rocker arm assembly (with the rocker arms removed from it).
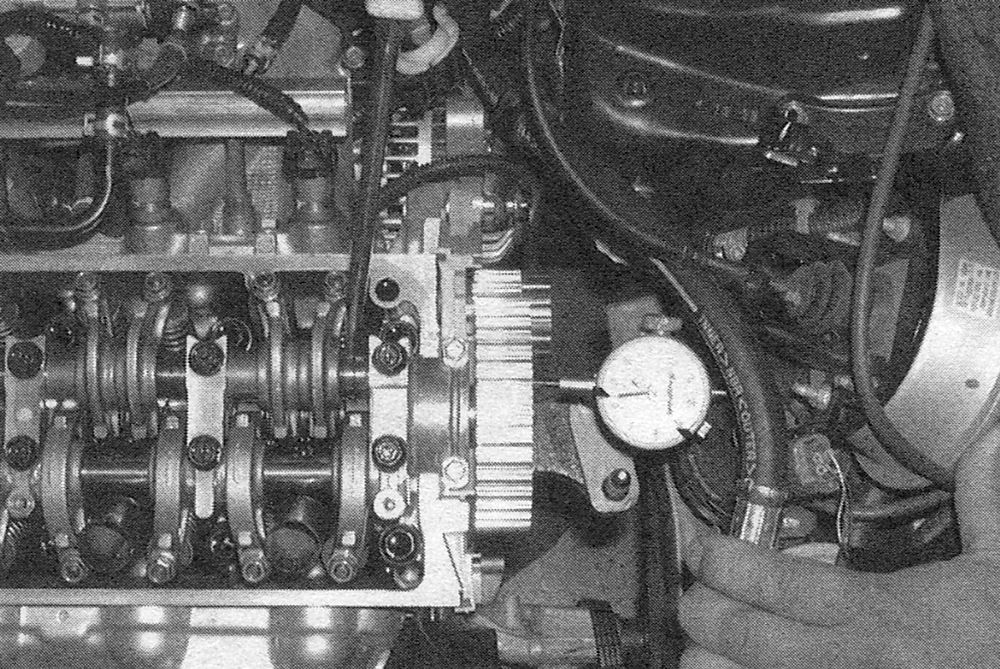
- Mount a dial indicator on the cylinder head with the pointer resting on the camshaft nose (see illustration). Using a large screwdriver as a lever at the opposite end, move the camshaft forward andbackward and note the dial indicator
- Compare the reading with the endplay listed in this Chapter’s Specifications.
- If the indicated reading is excessive, replace the thrust cover with a new one and recheck the endplay. If it’s still excessive, either the camshaftor the cylinder head is worn. Replace parts as
2. To check camshaft runout:
- Support the camshaft with a pair of V-blocks and set up a dial indicator with the plunger resting against the center bearing journal on the camshaft.
- Rotate the camshaft and note the indicated runout.
- Compare the results to the camshaft runout listed in this Chapter’s Specifica
- If the indicated runout exceeds the specified runout limit, replace the camshaft.
i.1 To check camshaft endplay, set a dial indicator like this, with the gauge plunger touching the nose of the camshaft — typical gauge setup shown
Removal
3. Remove the ignition coils (see Engine electrical systems).
4. Remove the valve cover (see Valve cover — removal and installation).
5. Set the engine at TDC for cylinder number one (see Top Dead Center TDC) for number one piston — locating) and remove the timing chain (see Timing chain and sprockets — removal, inspection and installation).
6. Remove the rocker arm assembly (see Rocker arm assembly — removal, inspection and installation).
7. Hold the camshaft from turning by placing an open-end wrench on the hex at the end of the camshaft opposite that of the sprocket, then unscrew the sprocket bolt and separate the sprocket from the camshaft.
8. Remove the camshaft position sensor (see Emissions and engine control systems), then remove the camshaft thrust cover from the end of the cylinder head. Slide the camshaft out of the head.
Inspection
9. Check the camshaft bearing journals and
caps for scoring and signs of wear. If they are worn, replace the cylinder head with a new or rebuilt assembly.
10. Check the cam lobes for wear:
- Check the toe and ramp areas of each cam lobe for score marks and uneven Also check for flaking and pitting.
- If there’s wear on the toe or the ramp, replace the camshaft, but first try to find the cause of the wear. Look for abrasive substances in the oil and inspectthe oil pump and oil passages for blockage. Lobe wear is usually caused by inadequate lubrication or dirty oil.
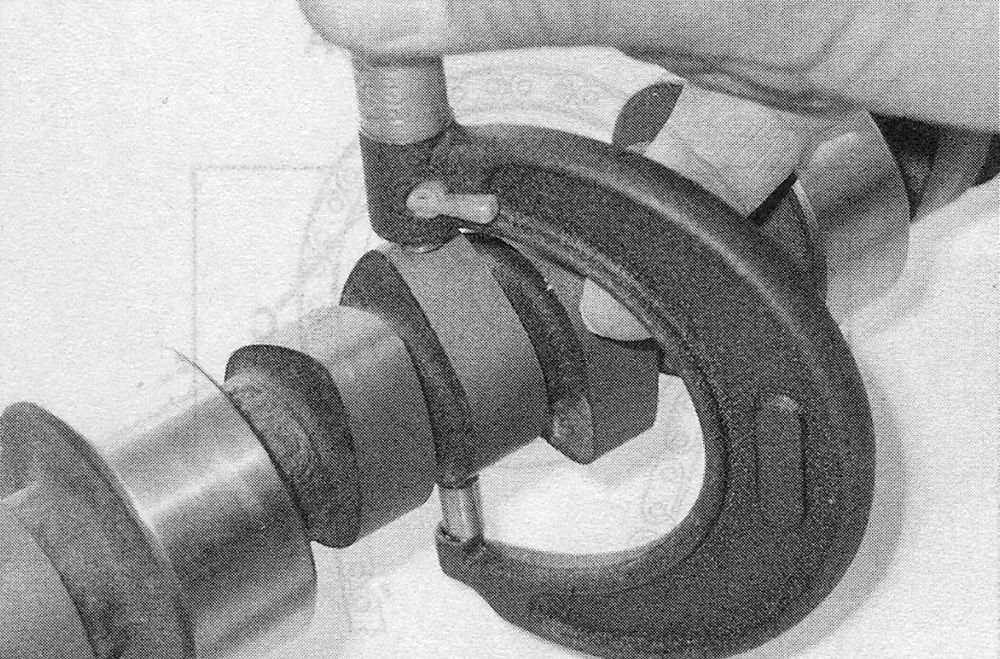
- Using a micrometer, measure the cam lobe height (see illustration). If lobe wear is indicated, replace the camshaft.
i.10 Measure the camshaft lobe heights with a micrometer
11. Inspect the rocker arms for wear, galling and pitting of the contact surfaces (see Rocker arm assembly — removal, inspection and installation).
12. If any of the conditions described above are noted, the cylinder head is probably getting insufficient lubrication or dirty oil. Make sure you track down the cause of this problem (low oil level, low oil pump capacity, clogged oil passage, etc.) before installing a new cylinder head, camshaft or rocker arm assembly.
Installation
13. Thoroughly clean the camshaft, the bearing surfaces in the head and caps and the rocker arms. Wipe off all components with a clean, lint-free cloth.
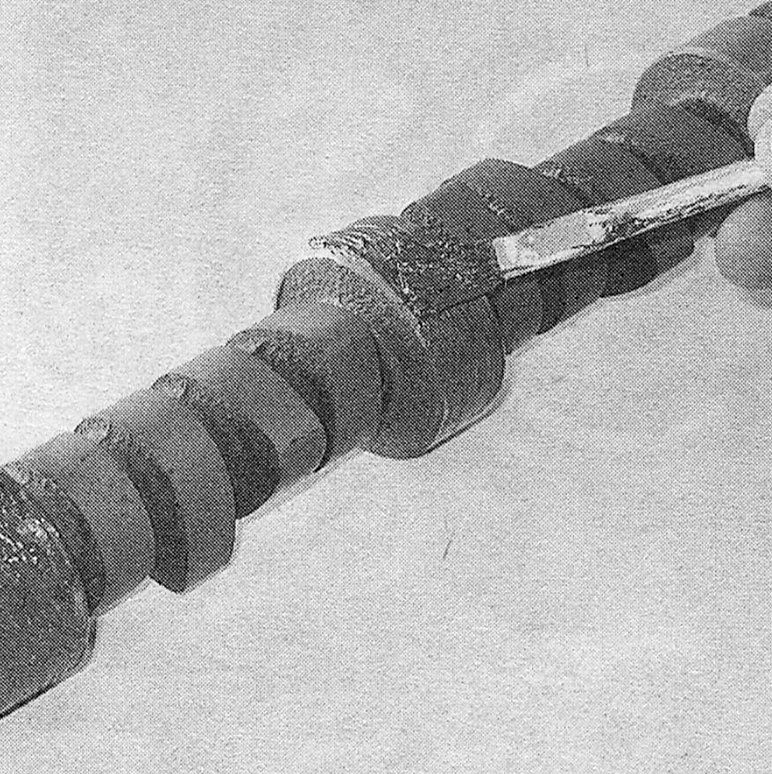
14. Lubricate the camshaft bearing surfaces in the head and the bearing journals and lobes on the camshaft with camshaft assembly lubricant (see illustration).
i.14 Be sure to apply camshaft assembly lubricant to the lobes and bearing journals before installing the camshaft
Caution: Failure to adequately lubricate the camshaft and related components can cause serious damage to bearing and friction surfaces during the first few seconds after engine start-up, when the oil pressure is low or nonexistent.
15. Install the camshaft.
16. Install the camshaft thrust cover and camshaft position sensor, then install the camshaft sprocket, tightening the bolt to the torque listed in this Chapter’s Specifications.
17. Rotate the camshaft as necessary and position the camshaft sprocket with the «UP» mark stamped on the sprocket at the twelve o’clock position.
18. Make sure the camshaft and crankshaft marks are still set to TDC for cylinder number 1, then install the rocker arm assembly (see Rocker arm assembly — removal, inspection and installation).
19. Install the timing chain and related components as described in Timing chain and sprockets — removal, inspection and installation.
20. Rotate the crankshaft clockwise, slowly by hand through two complete revolutions and recheck the alignment marks on the sprockets. The timing marks should still be aligned. If they’re not, reset all the timing marks again.
Caution: If you feel resistance while rotating the crankshaft, stop immediately!
21. The remainder of installation is the reverse of removal.