Engine mounts — check and replacement
1. Engine mounts seldom require attention,but broken or deteriorated mounts should be replaced immediately or the added strain placed on the driveline components may cause damage or wear.
Check
2. During the check, the engine must beraised slightly to remove the weight from the mounts.
3. Raise the vehicle and support it securelyon jack stands, then position a jack under the engine oil pan. Place a large wood block between the jackhead and the oil pan, then carefully raise the engine just enough to take the weight off the mounts.
Warning: DO NOT place any part of your body under the engine when it’s supported only by a jack!
4. Check the mount insulators to see if therubber is cracked, hardened or separated from the metal in the center of the mount.
5. Check for relative movement between the mount plates and the engine or frame (use a large screwdriver or pry bar to attempt to move the mounts). If movement is noted, lower the engine and tighten the mount fasteners.
Replacement
6. Disconnect the cable from the negativeterminal of the battery (see Engine electrical systems). If the lower torque rod is being replaced, raise the vehicle and support it securely on jack stands (if not already done). Support the engine as described in Step 3.
Engine mounts
7. Remove the fasteners, raise the enginewith the jack and detach the mount from the frame bracket and engine.
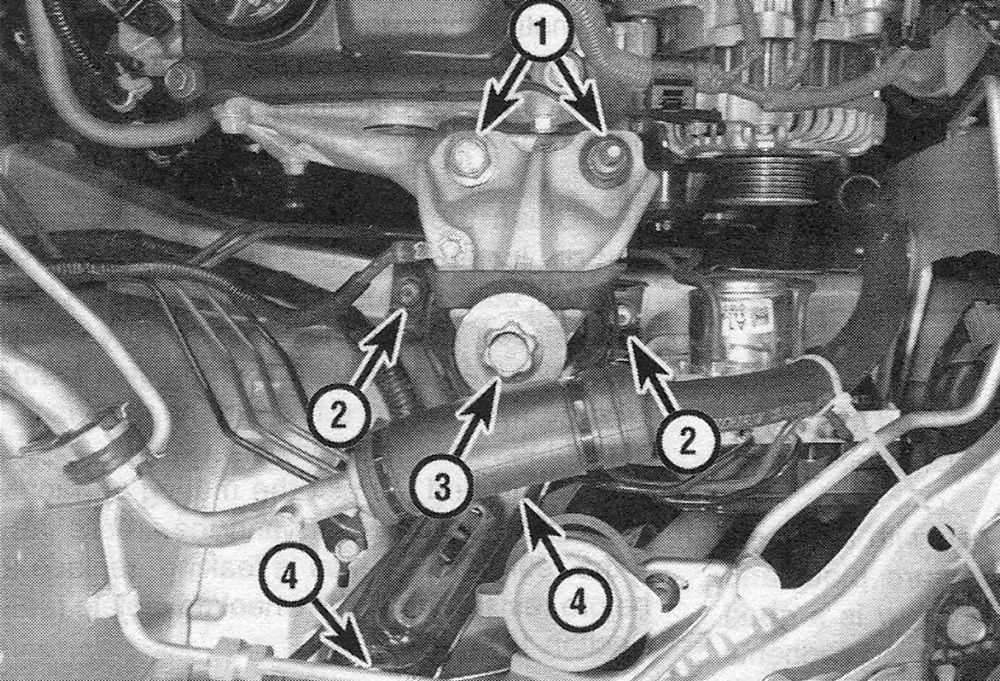
8. Install the new mount, making sure it iscorrectly positioned in its bracket (see illustrations). Install the fasteners and tighten them securely.
i.8a Engine mount bracket fasteners
1 Mount bracket-to-engine bolts
2 Mount-to-body bolts
3. Mount through-bolt
4. Mount side bracket bolt/nut
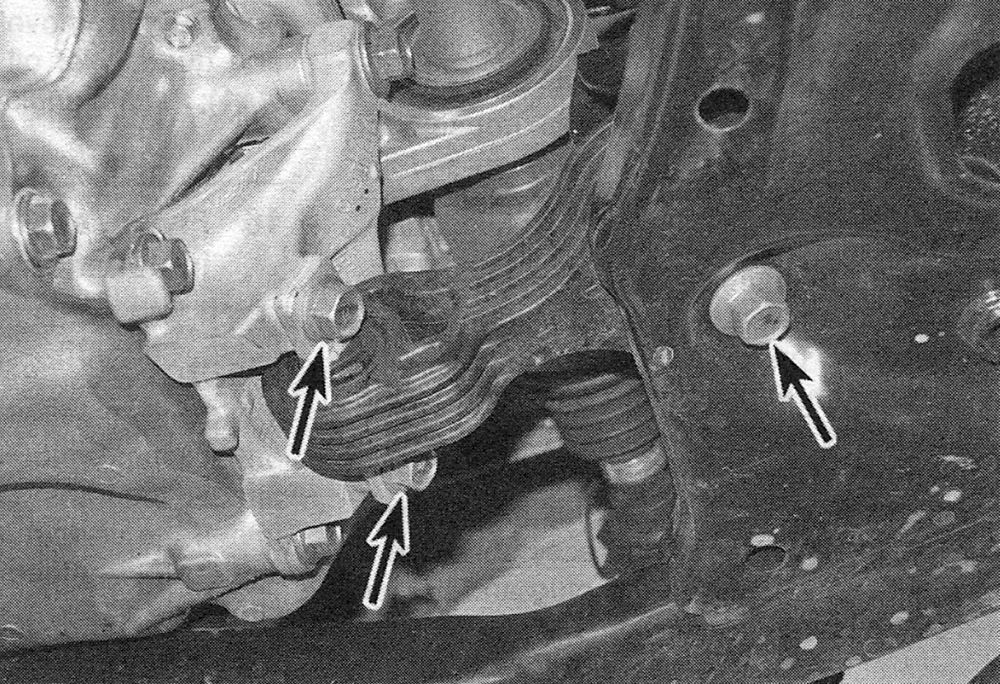
i.8b Lower torque rod mounting bolt locations — R18Z1 model shown
9. Remove the air filter housing (see Fuel and exhaust systems).
10. Remove the PCM (see Emissions and engine control systems).
11. Remove the PCM and air filter housing bracket mounting bolts (see illustration) and remove the bracket.
i.11 Air filter housing bracket bolts

12. Support the transaxle with the jack.
13. Remove the transaxle mount fasteners (see illustration) and remove the mount.
i.13 Transaxle mount fastener locations — automatic transaxle shown, manual transaxle similar
1 Mount bracket-to-body bolts
2 Mount bracket-to-transaxle nuts/bolt
3 Mount through-bolt

14. Installation is the reverse of removal, tighten all the mount fasteners to the torque listed in this Chapter’s Specifications.