Oil pan — removal and installation
Removal
1. Drain the engine oil and replace the oilfilter (see Tune-up and routine maintenance).
2. Disconnect the cable from the negativeterminal of the battery (see Engine electrical systems).
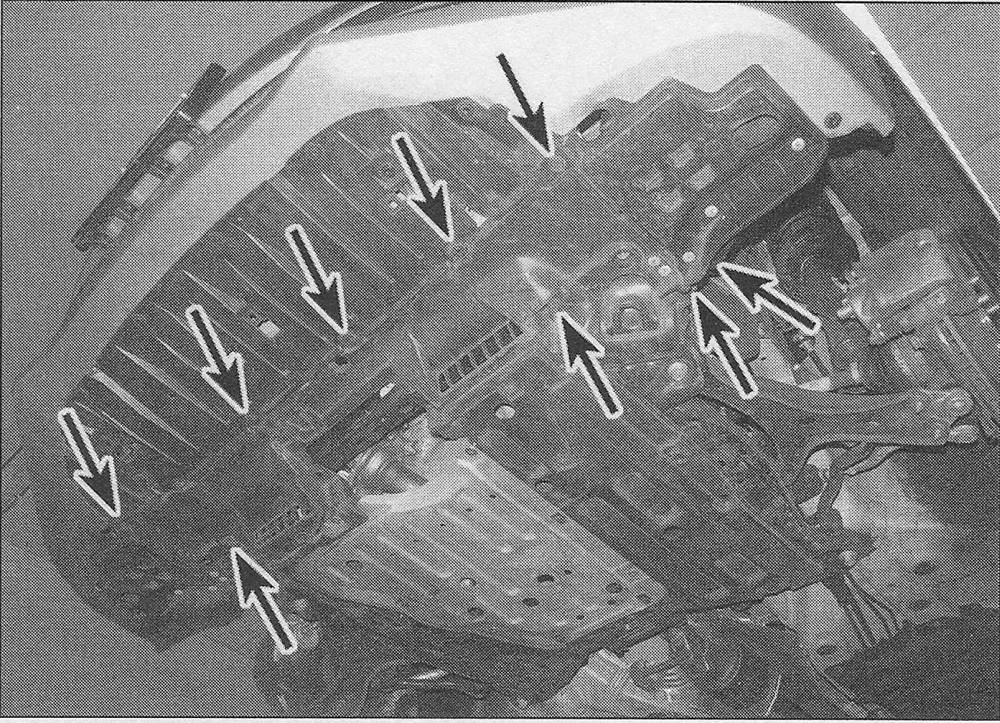
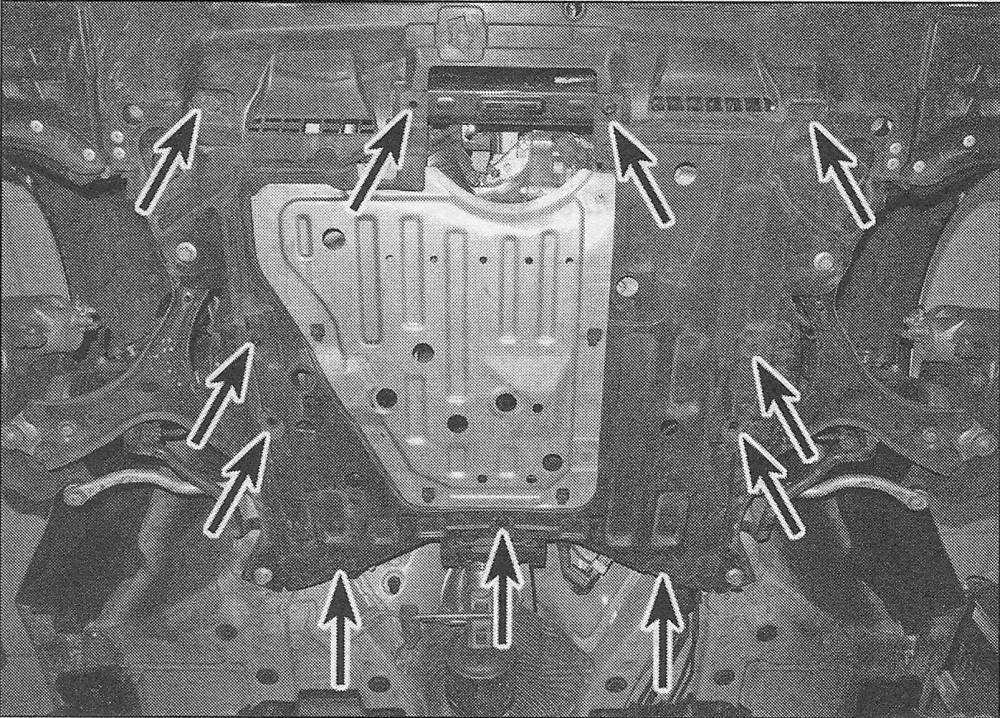
3. Raise the vehicle and support it securelyon jack stands. Remove the splash shields from under the engine (see illustrations).
i.3a Radiator splash shield fastener locations
i.3b Engine splash shield fastener locations
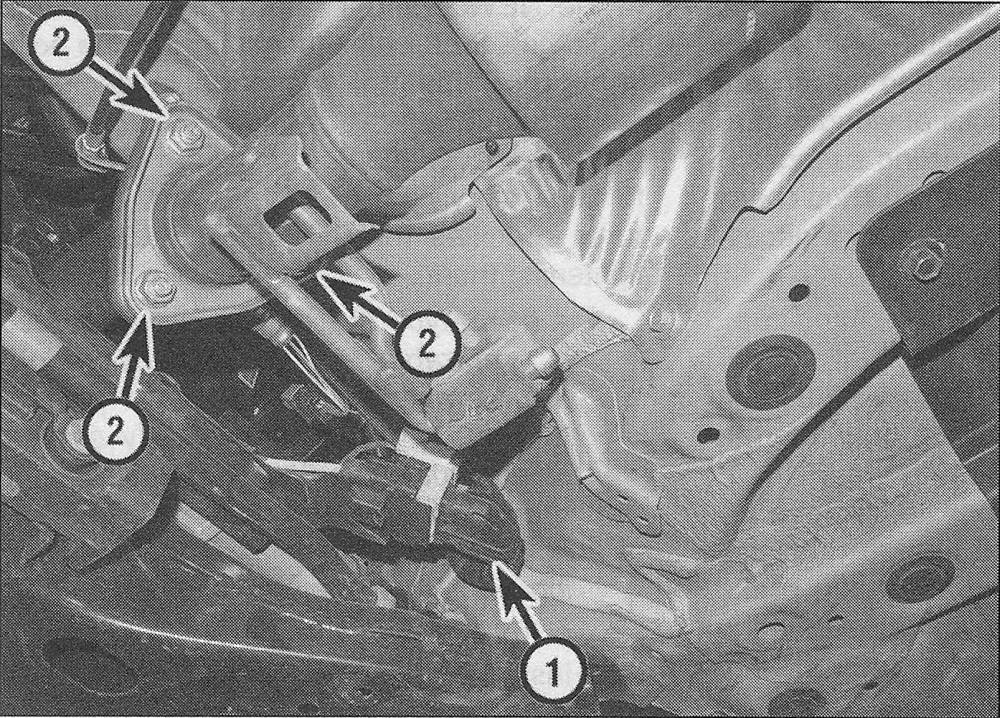
4. On CVT models, disconnect the CVT harness electrical connector (see illustration).
i.4 Disconnect the CVT harness connector (1), then the exhaustpipe nuts (2)
5. Remove the front section of the exhaust pipe (see Fuel and exhaust systems).
6. Remove the lower torque rod (see Engine mounts — check and replacement).
7. Remove the lower torque rod bracketbolts and bracket.
8. Remove the air conditioning compressorbracket (see Cooling, heating and air conditioning systems).
9. On models equipped with an automatic transmission, remove the shift cable cover bolts, torque converter cover bolts and remove the covers.
10. On models equipped with a manual transmission, remove the clutch cover bolts and cover.
11. Remove the bottom two transmission mounting bolts.
12. Remove the bolts securing the oil pan to the engine block.
13. Tap on the pan with a soft-face hammer to break the gasket seal and detach the oil pan from the engine.
Note: Pull the dowel pins out from the block once the pan has been removed.
Installation
14. Using a gasket scraper, remove all traces of old gasket and/or sealant from the engine block and the oil pan. Also make sure the threaded bolt holes in the block are clean.
15. Clean the oil pan with solvent and dry it thoroughly. Check the gasket flanges for distortion, particularly around the bolt holes. If necessary, place the pan on a wood block and use a hammer to flatten and restore thegasket surface.
16. Clean the mating surfaces on the engine block and the oil pan with brake system cleaner to remove any oil residue which will prevent the new gasket from sealing properly.
17. Replace the 0-rings and apply a 1/8-inch-wide bead of RTV sealant to the perimeter of the oil pan, along the inboard side of the bolt holes.
18. Carefully place the oil pan in position and install the bolts finger-tight.
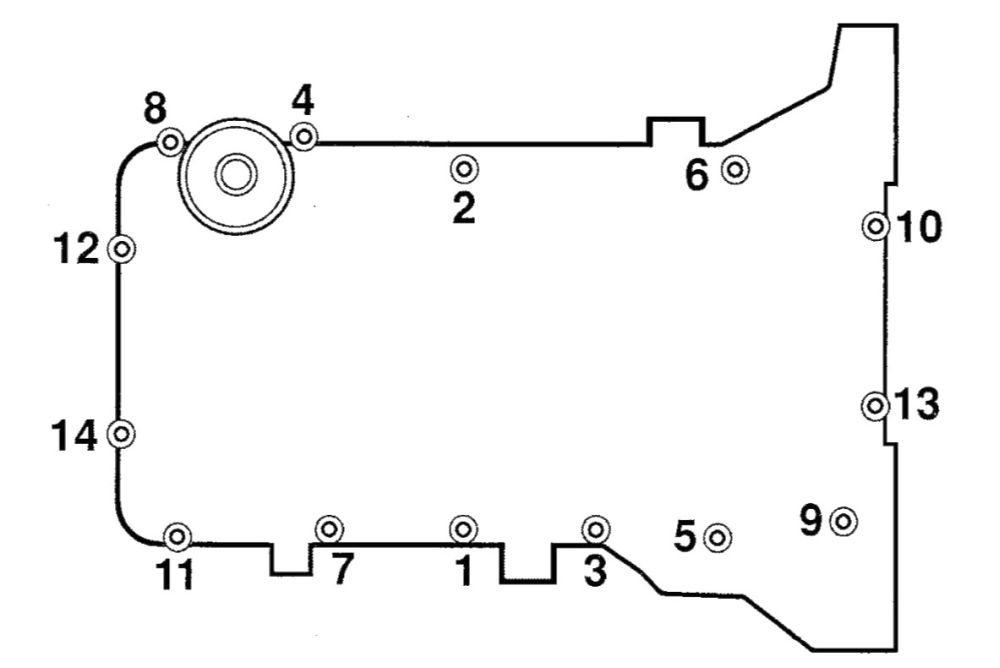
19. Tighten the oil pan bolts in the correct sequence (see illustration) and to the torque listed in this Chapter’s Specifications.
i.19 Engine oil pan bolt tightening sequence
20. The remainder of installation is the reverse of removal.
21. Reconnect the battery (see Engine electrical systems).
22. Wait at least one hour before adding oil (see Tune-up and routine maintenance), then run the engine and check for oil leaks.