Timing chain and sprockets — removal, inspection and installation
Caution: The timing system is complex. Severe engine damage will occur if you make any mistakes. Do not attempt this procedure unless you are highly experienced with this type of repair. If you are at all unsure of your abilities, consult an expert. Double-check all your work and be sure everything is correct before you attempt to start the engine.
Removal
1. Disconnect the cable from the negativebattery terminal (see Engine electrical systems).
2. Remove the lower splash shields.
3. Set the engine to TDC number 1 (see Top Dead Center TDC) for number one piston — locating).
4. emove the valve cover (see Valve cover — removal and installation).
5. Remove the timing chain cover (see Timing chain cover/oil pump housing — removal and installation …).
6. Rotate the crankshaft counterclockwiseslightly to compress the chain tensioner. Install a 0.040-inch (1.0 mm) pin into the alignment holes (see illustration), then rotate the crankshaft slightly clockwise to secure the pin. The timing mark (triangle) on the crankshaft sprocket must align with the pointer on the engine block.
i.6 Align the hole on the lock with the hole in the tensioner, then insert a 0.040-inch (1.0 mm) pin or drill bit through both components to lockthe tensioner
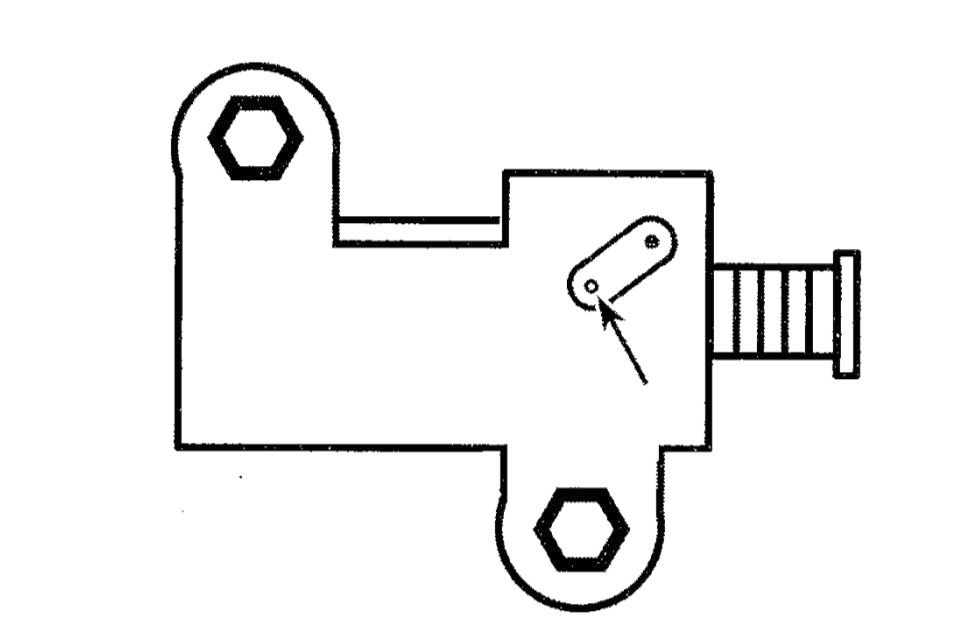
Note: Before removing the tensioner, measure the tensioner rod length between the tensioner body and flat surface on the tensioner rod at the bottom. If the length is more than 0.571inch (14.5 mm) the timing chain should be replaced.
7. emove the mounting bolts and the timing chain tensioner.
8. emove the cam chain (forward) guide.
9. emove the camshaft chain tensionerarm (rear guide).
10. Remove the timing chain.
Caution: Do not turn the crankshaft or camshaft once the timing chain has been removed.
Inspection
11. Clean all parts with clean solvent. Dry with compressed air.
12. Inspect the chain tensioner for excessive wear or other damage. Be sure to drain all the oil out of the chain tensioner if it is to be reused.
13. Inspect the timing chain guides for deep grooves, excessive wear, or other damage.
14. Inspect the timing chain for excessive wear or damage.
15. Inspect the crankshaft and camshaft sprocket for chipped or broken teeth, excessive wear, or damage. Replace any component that is in questionable condition.
Installation
16. Make sure the timing mark (triangle) on the crankshaft sprocket is still aligned with the pointer on the engine block.
17. Make sure the «UP» mark on the camshaft sprocket is at the top and the two index marks are in line with the top edge of the cylinder head (see illustration).
i.17 Timing chain installation details (engine at TDC compression for cylinder No. 1)
A Plated links on the timing chain
B Sprocket marks
C TDC marks aligned with cylinder head upper surface
D Crankshaft sprocket TDC marks
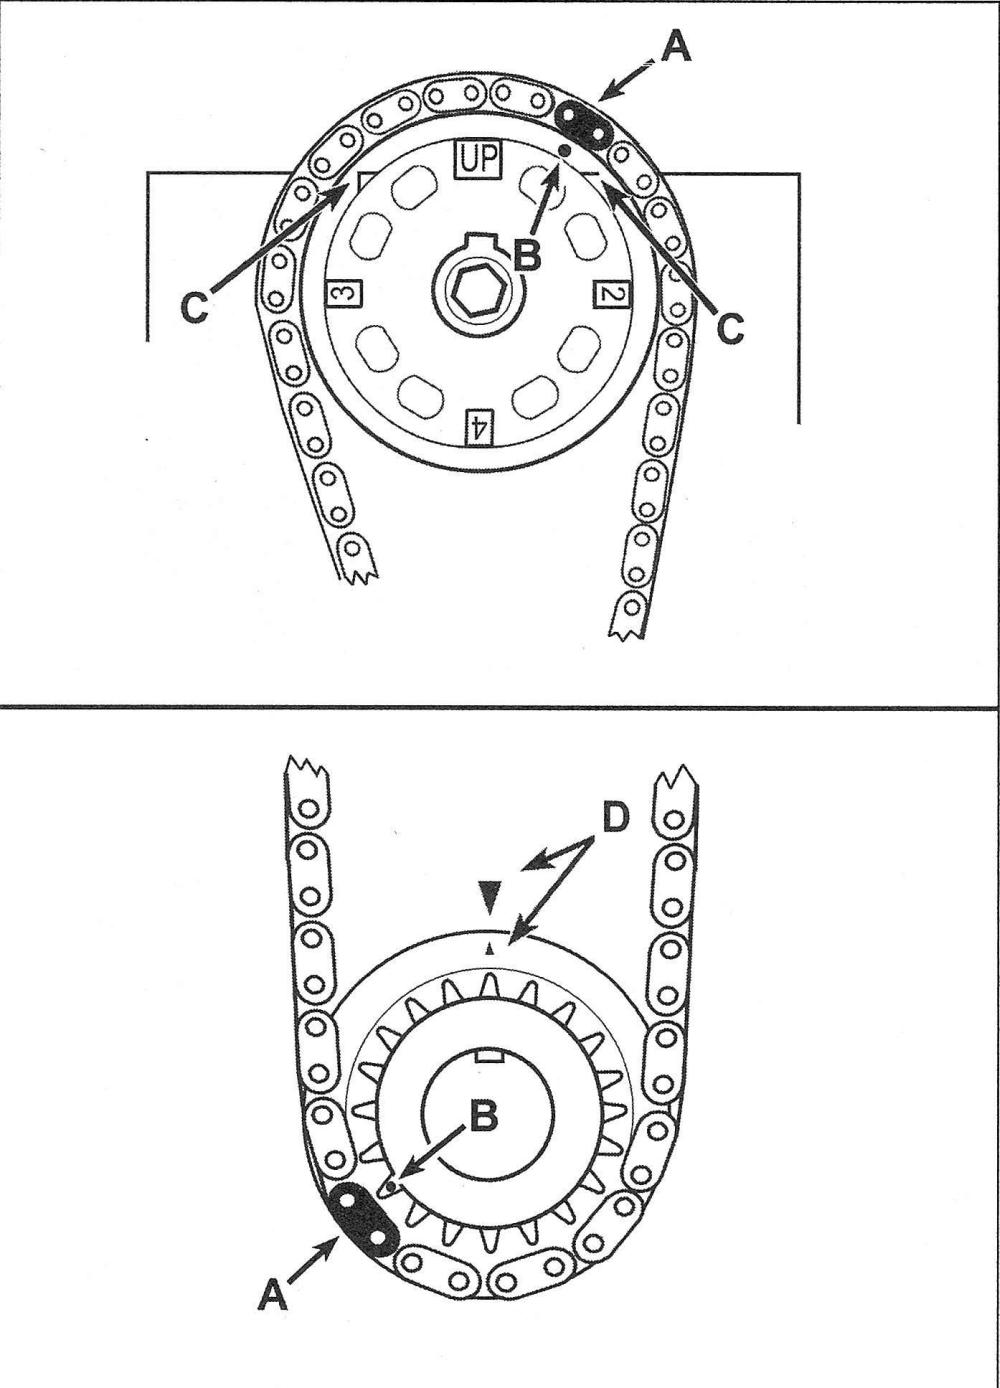
18. Install the timing chain around the crankshaft sprocket with the plated link on the chain aligned with the dot (indentation) on the crankshaft sprocket.
19. Install the timing chain over the camshaft sprocket with the dot (circular indentations) aligned with the colored chain link.
20. Install the camshaft timing chain guide and the tensioner arm. Tighten the bolts to the torque listed in this Chapter’s Specifications.
21. Install the timing chain tensioner. Tighten the bolts to the torque listed in this Chapter’s Specifications.
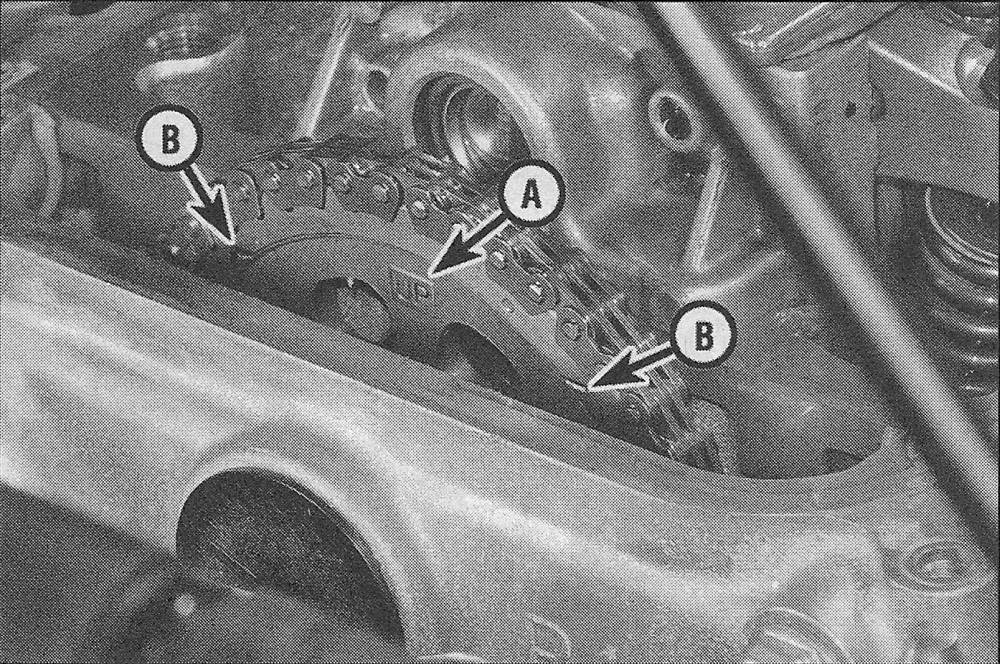
22. Remove the pin from the timing chain tensioner and verify the marks are aligned (see illustration).
i.22 Verify the sprocket «UP» mark is at the 12 o’clock position (A). The TDC lines (B) on the camshaft sprocket should line up with the top edge of the cylinder head
23. Slowly turn the crankshaft clockwise two revolutions and recheck the timing marks and camshaft sprocket index marks for proper alignment.
Caution: If the crankshaft binds or seems to hit something, do not force it, as the valves may be hitting the pistons. If this happens, valve timing is incorrect. Remove the chain and repeat the installation procedure and verify that the installation is correct.
24. Install the valve cover (see Valve cover — removal and installation).
25. Install the timing chain cover (see Timing chain cover/oil pump housing — removal and installation …).
26. The remainder of installation is the reverse of the removal steps.
27. Reconnect the battery (see Engine electrical systems).
28. Run the engine and check for leaks.