Balance shaft assembly and balance shafts — removal, inspection and installation
Removal
Note: The oil pump housing mounts directly to the front of the balance shaft housing.
1. Remove the oil pan (see Oil pan — removal and installation).
2. To prevent the sprocket from turning,insert a 6 mm guide pin into the maintenance hole of the balance shaft housing and through the rear balance shaft, directly behind the oil pump housing.
3. Rotate the crankshaft counterclockwiseto compress the oil pump chain tensioner, then remove the crankshaft pulley (see Crankshaft pulley and front oil seal — removal and installation).
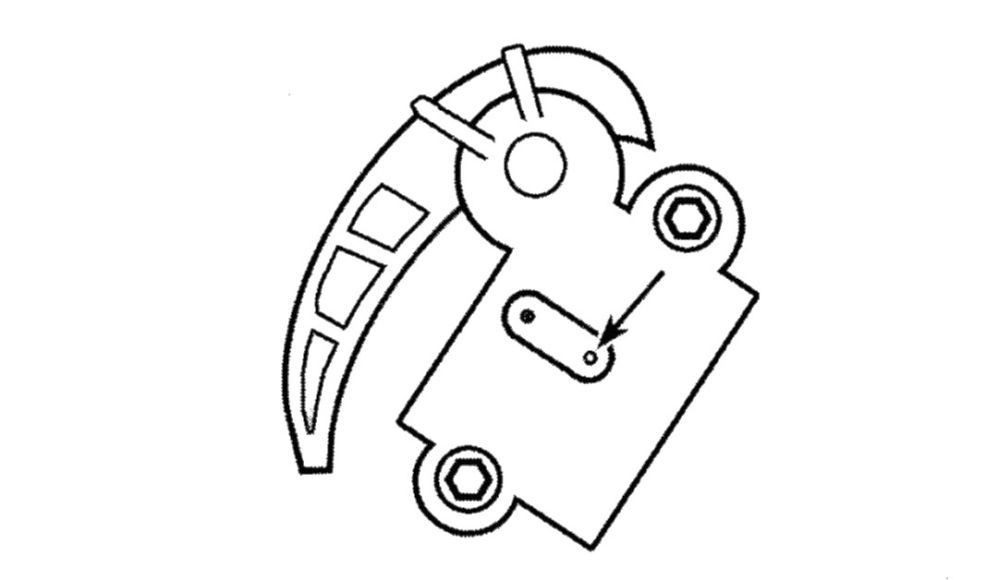
4. Rotate the crankshaft slightly clockwise and insert a 7/64-inch (3 mm) pin into the holes of the oil pump chain tensioner (see illustration).
i.4 Insert a pin through the hole in the lock and into the oil pump chain tensioner body
5. On Civic models, place a jack under thetransaxle and raise the transmission approximately 1.18 to 1.57 inches (30 to 40 mm) then remove the oil pump chain tensioner.
6. Remove the oil pump sprocket bolt andsprocket.
7. Remove oil pump housing bolts then thebalance shaft assembly mounting bolts and separate the assembly from the lower engine block.
Inspection
8. Remove the balance shaft assemblymounting bolts and separate the upper and lower cases.
9. Clean all parts with clean solvent. Drywith compressed air.
10. Inspect the oil pump/balance shaft chain for excessive wear or damage.
11. Inspect the oil pump/balance shaft chain sprocket for chipped or broken teeth, excessive wear, or damage.
12. Inspect the balance shaft gears for chipping, scoring or missing teeth. Replace the assembly if necessary.
Installation
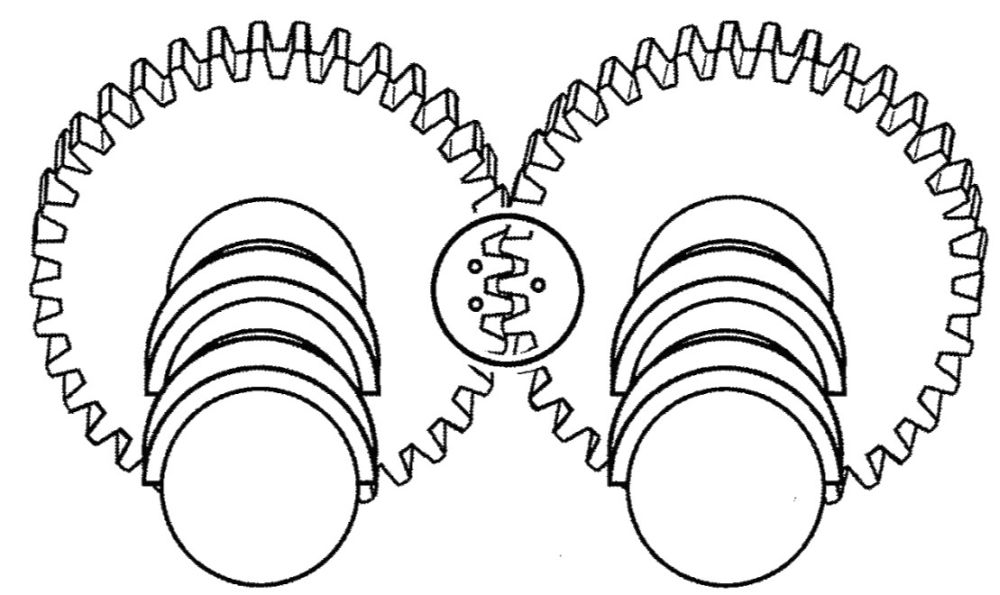
13. Working on the two balance shafts, align the center punch mark on the rear (drive) balance shaft with the two marks on the front balance shaft (driven) (see illustration).
i.13 Align the center punch mark on the rear (drive) balance shaft with the two marks on the front balance shaft (driven)
14. Apply engine oil to the threads and install the balance shaft case mounting bolts. Tighten the bolts to the torque listed in this Chapter’s Specifications.
15. Install the oil pump housing (see Oil pump — removal, inspection and installation).
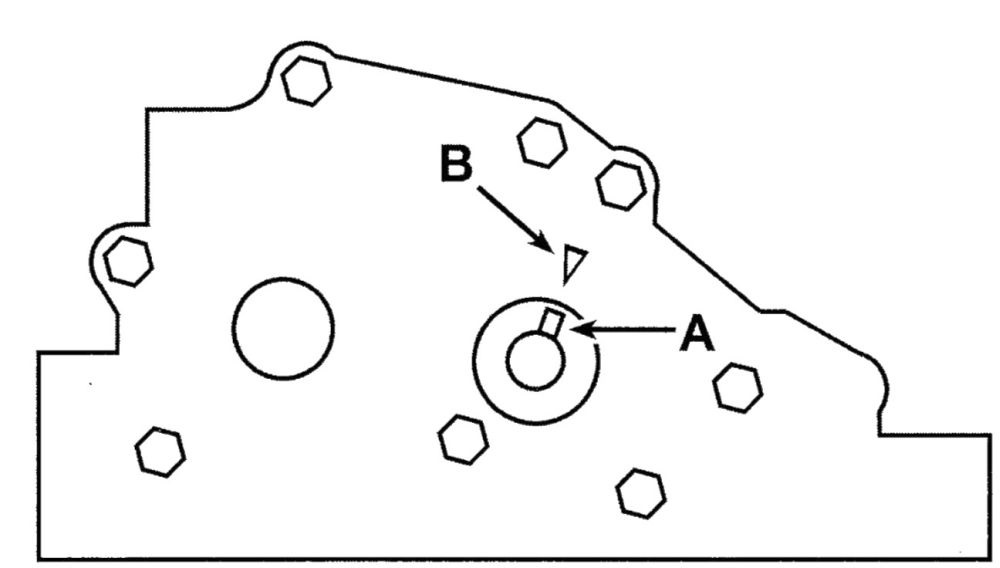
16. Align the dowel pin on the rear balance shaft with the mark on the oil pump housing (see illustration).
i.16 Align the dowel pin on the rear balance shaft (A) with the mark on the oil pump housing (B)
17. Install the balance shaft assembly onto the lower engine block and install the bolts finger-tight.
18. Insert a 6 mm guide pin into the maintenance hole directly behind the oil pump housing (see Step 2).
19. Engage the oil pump sprocket with the chain, then with the balance shaft. Install the oil pump sprocket bolt. Tighten the bolt to the torque listed in this Chapter’s Specifications.
20. Remove the guide pin.
21. Tighten the balancer assembly mounting bolts to the torque listed in this Chapter’s Specifications.
22. Working with a new balance shaft chain tensioner, make sure the tensioner holder clip is installed onto the tensioner and install the tensioner onto the lower engine block.
23. Tighten the balance shaft chain tensioner bolts to the torque listed in this Chapter’s Specifications.
24. Remove the holder clip from the tensioner to apply tension to the chain.
25. Install the oil pan (see Oil pan — removal and installation).
26. Reconnect the battery (see Engine electrical systems).
27. Run the engine and make sure oil pressure comes up to normal quickly. If it doesn’t, stop the engine and find out the cause. Severe engine damage can result from running an engine with insufficient oil pressure!