Thermostat — replacement
Warning: Do not remove the radiator cap, drain the coolant or replace the thermostat until the engine has cooled completely.
1. Disconnect the cable from the negativebattery terminal (see Engine electrical systems).
2. Drain the cooling system (see Chapter 1). If the coolant is relatively new or in good condition, save it and reuse it.
3. If you’re working on a Civic with a 2.4Lengine or a 2014 and earlier CR-V, access to the thermostat is from the underside of the engine compartment. Raise the front of the vehicle and support it securely on jack stands, then remove the under-vehicle splash shield (see Oil pan — removal and installation illustrations .3a and .3b).
4. If you’re working on a 1.8L Civic or a2015 and later CR-V, access to the thermostat is from the top of the engine compartment. On CR-V models remove the PCM and bracket (see Emissions and engine control systems).
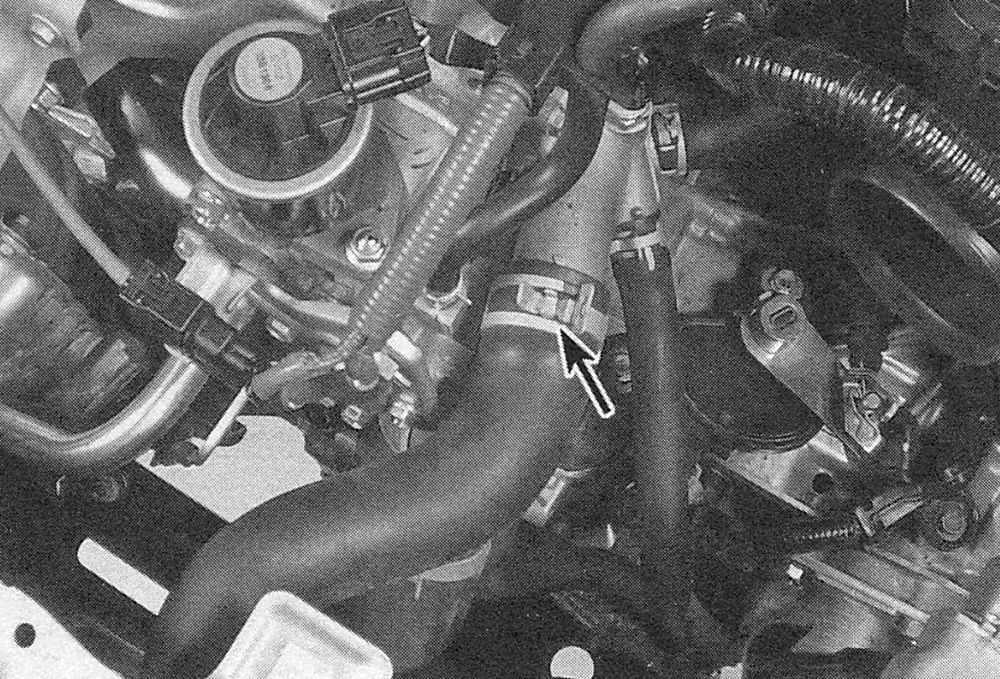
5. On 1.8L models, use a pair of pliers tosqueeze the upper radiator hose clamp (see illustration), slide the hose clamp up the hose, then remove the hose. If it’s stuck, grasp it near the end with a pair of adjustable pliers and twist it to break the seal, then pull it off. If the hose is old or deteriorated, cut it off and install a new one.
i.5 On 1.8L models remove the upper hose clamp and hose
6. Follow the lower radiator hose to theengine to locate the thermostat housing cover.
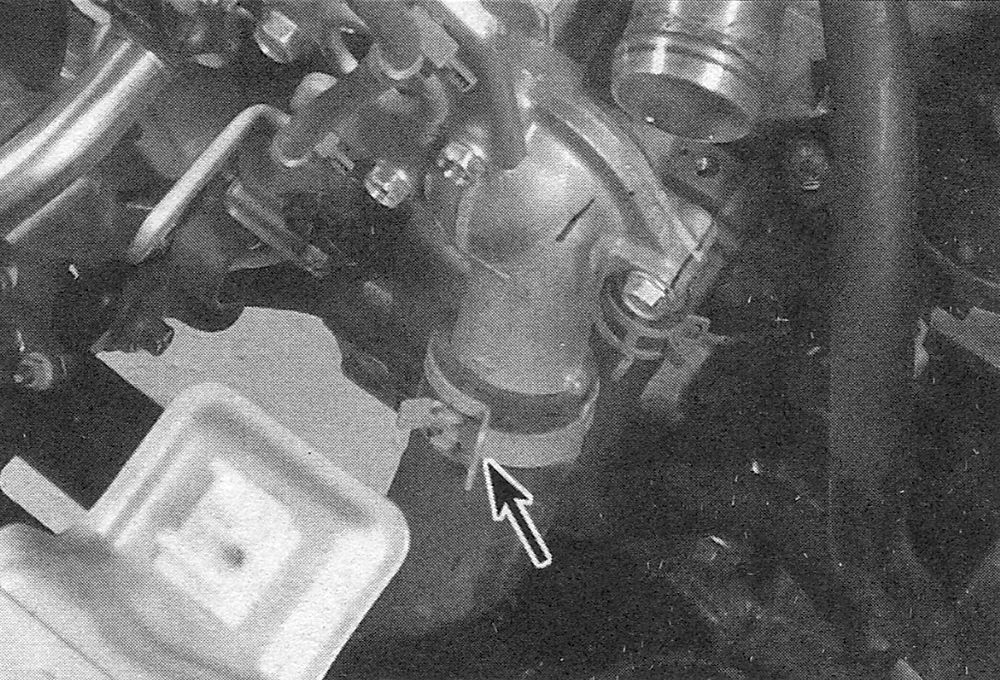
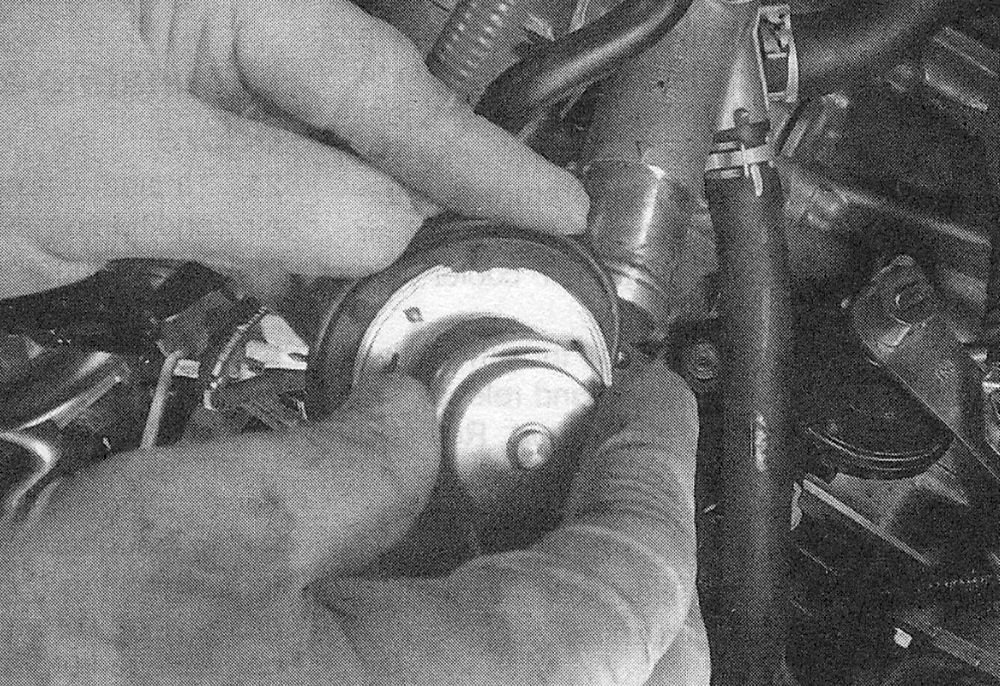
7. Loosen the hose clamp, then detachthe hose from the fitting (see illustration). If it’s stuck, grasp it near the end with a pair of adjustable pliers and twist it to break the seal, then pull it off. If the hose is old or deteriorated, cut it off and install a new one.
i.7 Use pliers to squeeze the coolant hose clamp and slide the clamp away from the thermostat housing
8. If the outer surface of the large fittingthat mates with the hose are deteriorated (corroded, pitted, etc.), it may be damaged further by hose removal. If it is, the thermostat housing cover will have to be replaced.
9. On 1.8L models, remove the harnessbracket bolts (see illustration 4.14) and move the bracket out of the way.
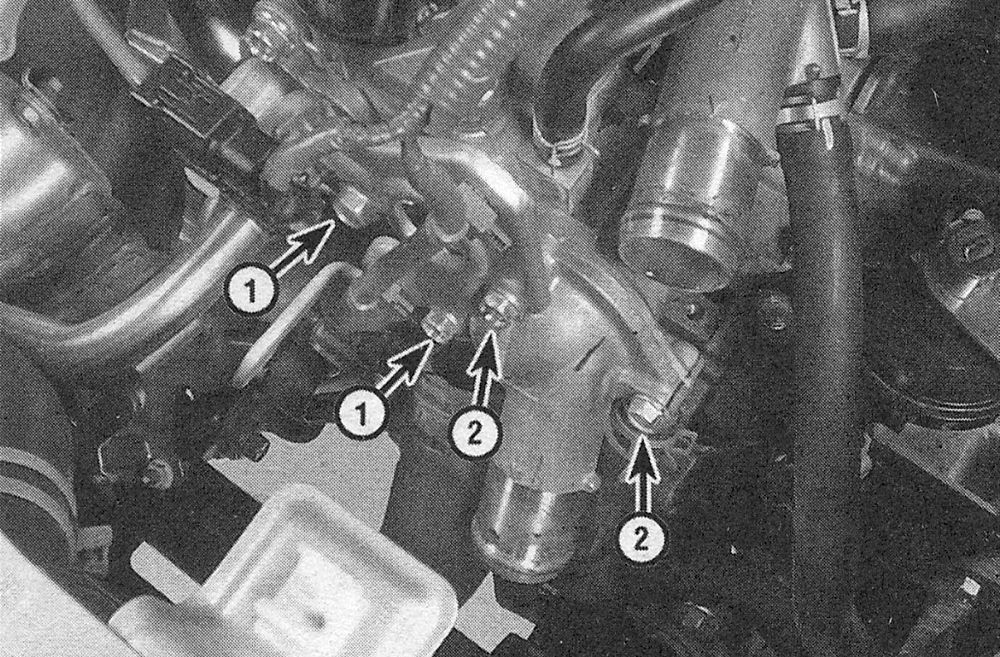
10. Remove the thermostat cover bolts (see illustration) and detach the housing cover. If the cover is stuck, tap it with a soft-face hammer to jar it loose. Be prepared for some coolant to spill as the gasket seal is broken.
i.10 Location of the thermostat housing cover bolts — 1.8L engine shown, 2.4L models have three bolts
1 Harness bracket bolts — 1.8L models
2. Thermostat housing bolts
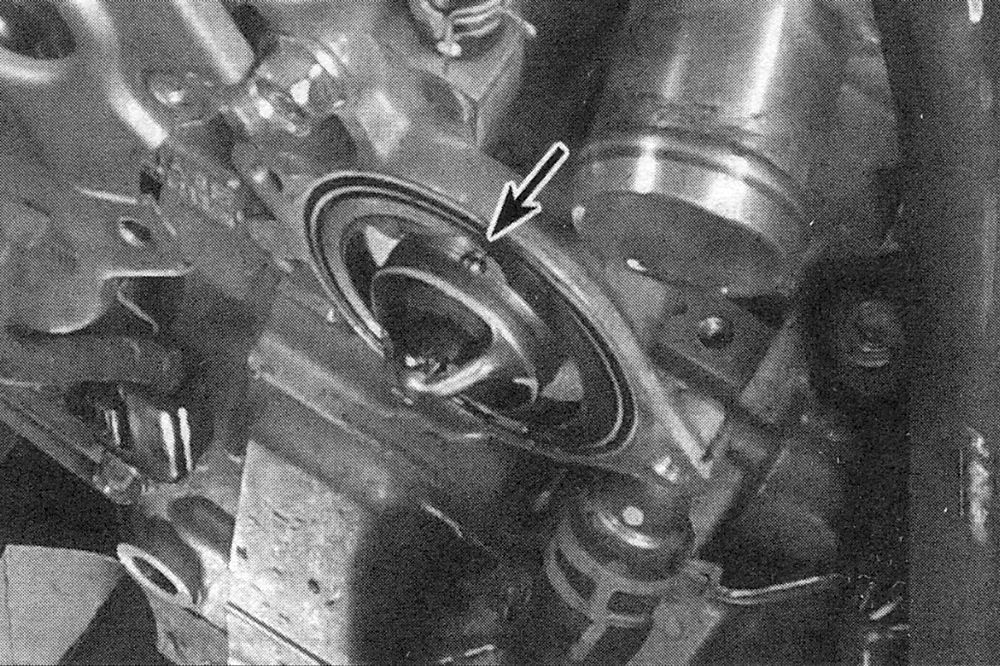
11. On 1.8L engines, note how it’s installed — with the jiggle pin up — then remove the thermostat (see illustration).
i.11 Note the location of the jiggle valve (it should be at the top) —1.8L engine shown, others similar
Note: The thermostat on 2.4L engine is an integral component of the thermostat cover. Replace the cover and thermostat as one complete assembly.
12. Remove all traces of old gasket material and/or sealant from the housing and cover.
13. On 1.8L engines, install a new rubber seal over the thermostat (see illustration). Make sure the cutout is aligned correctly with the jiggle valve.
i.13 Install a new rubber seal over the thermostat
Note: On 2.4L engines, install a new 0-ring into the housing before installation.
14. On 1.8L engines, install the new thermostat in the housing without using sealant.Make sure the jiggle pin is at the top and the spring end is directed into the engine.
Note: On 2.4L engines, the thermostat is positioned correctly by the manufacturer. Make sure the mating surfaces on the thermostat housing are perfectly clean to ensure a tight seal before installing the thermostat assembly.
15. Install the thermostat housing cover (1.8L) or the thermostat assembly (2.4L) and bolts. Tighten the bolts to the torque listed in this Chapter’s Specifications.
16. Reattach the hose and tighten the hose clamp securely. Install all components that were removed for access.
17. Refill the cooling system (see Tune-up and routine maintenance).
18. Reconnect the battery (see Engine electrical systems).
19. Start the engine and allow it to reach normal operating temperature, then check for leaks and proper thermostat operation (as described in Steps 2 through 4).