Water pump — replacement
Warning: Wait until the engine is completely cool before beginning this procedure.
1. Disconnect the cable from the negativebattery terminal (see Engine electrical systems).
2. Drain the cooling system (see Tune-up and routine maintenance). If the coolant is relatively new or in good condition, save it and reuse it.
3. Remove the drivebelts (see Tune-up and routine maintenance).
4. On 2.4L engines, remove the drivebelttensioner and idler pulley with bracket (see Tune-up and routine maintenance).
5. Remove the alternator (see Engine electrical systems).
6. On 1.8L engines, remove the waterpump pulley bolts and pulley (see illustration).
i.6 On 1.8L models, hold the water pump pulley and remove the three mounting bolts
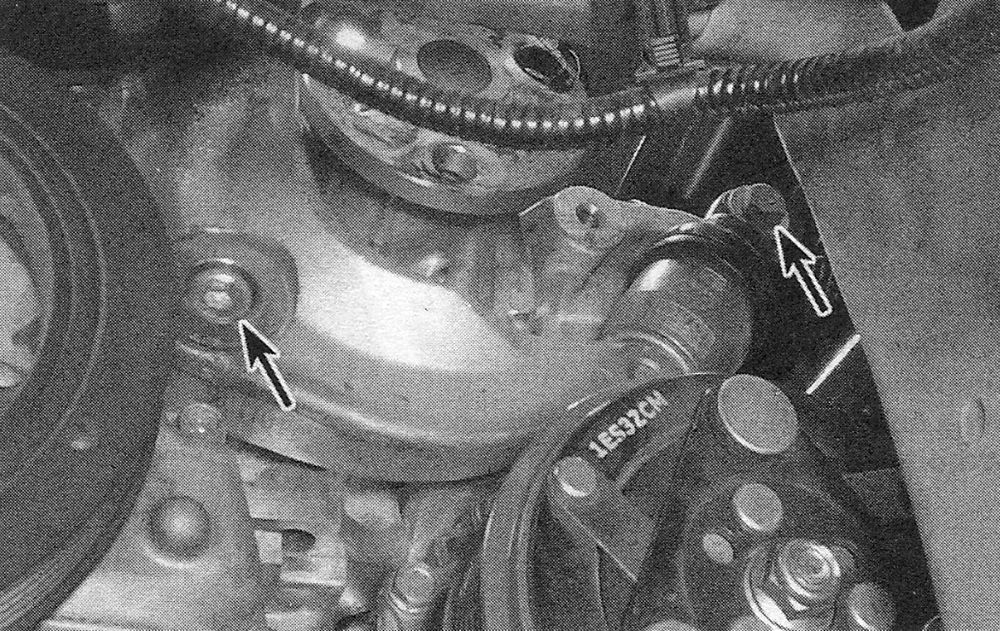
7. Remove the drivebelt tensioner (see illustration).
i.7 Drivebelt tensioner mounting bolt locations — 1.8L models
8. On 2.4L engines, remove the crankshaftpulley (see 2.4L double overhead camshaft (DOHC) engines).
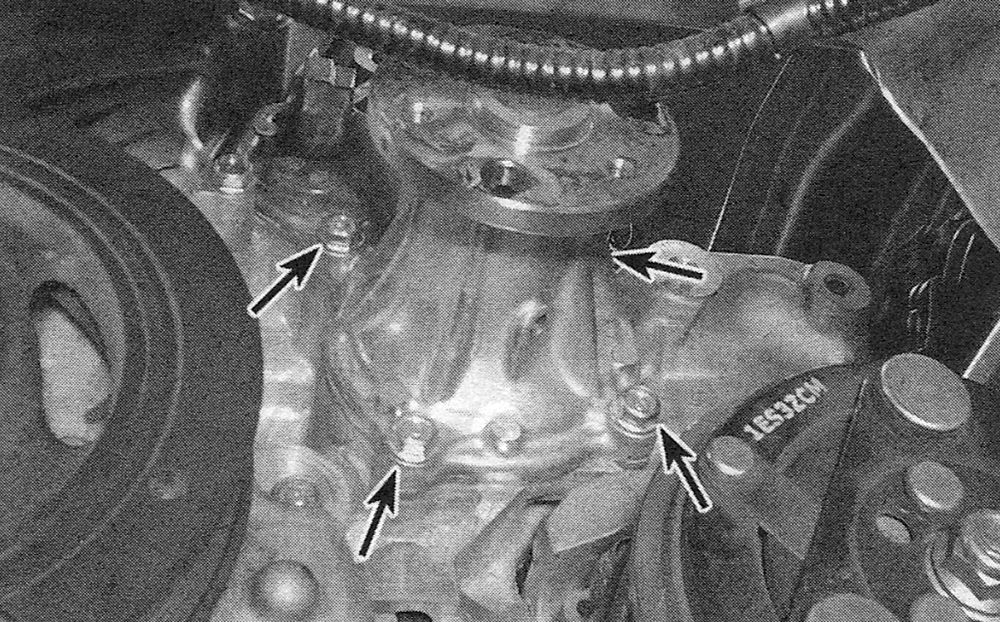
9. Remove the bolts and detach the waterpump from the engine (see illustration). Check the impeller on the backside for evidence of corrosion or missing fins.
i.9 Water pump mounting bolt locations — 1.8L engine shown, fourof five bolts shown
10. Clean the bolt threads and the threaded holes in the engine to remove corrosion and sealant.
11. Compare the new pump to the old one to make sure they’re identical.
12. Remove all traces of old gasket sealant and 0-ring from the engine.
13. Clean the engine and new water pump mating surfaces with brake system cleaner.
14. Apply a thin layer of RTV sealant to the 0-ring groove of the new pump, then carefully set a new 0-ring in the groove.
15. Carefully attach the pump to the engine and thread the bolts into the holes finger-tight. Use a small amount of RTV sealant on the boltthreads, and make sure that the dowel pins are in their original locations.
16. Tighten the bolts, a little at a time, to the torque listed in this Chapter’s Specifications. Don’t overtighten the bolts or the pump may be distorted.
17. Reinstall all parts removed for access to the pump.
18. Refill the cooling system and check the drivebelt tension (see Tune-up and routine maintenance).
19. Reconnect the battery (see Engine electrical systems). Run the engine and check for leaks.