Air conditioning compressor — removal and installation
Warning: The air conditioning system is under high pressure. Do not loosen any hose fittings or remove any components until after the system has been discharged. Air conditioning refrigerant must be properly discharged into an EPA-approved recovery/recycling unit at a dealer service department or an automotive air conditioning repair facility. Always wear eye protection when disconnecting air conditioning system fittings.
Caution: When replacing entire components, additional refrigerant oil should be added equal to the amount that is removed with the component being replaced. Be sure to read the can before adding any oil to the system, to make sure it is compatible with the R-134a system.
Note: The receiver-drier should be replaced whenever the compressor is replaced.
Removal
1. Have the air conditioning system refrigerant discharged and recovered by an air conditioning technician.
2. Disconnect the cable from the negativebattery terminal (see Engine electrical systems).
3. Set the parking brake, block the rearwheels and raise the front of the vehicle, supporting it securely on jack stands, then R move the under-vehicle splash shield (see 1.8L single overhead camshaft (SOHC) engine, illustrations 14.3a and 14.3b).
4. Remove the engine cooling fans (see Engine cooling fans — replacement).
5. On 1.8L models and 2015 and laterCR-V models, remove the alternator (see Engine electrical systems).
6. Disconnect the compressor clutch wiring harness.
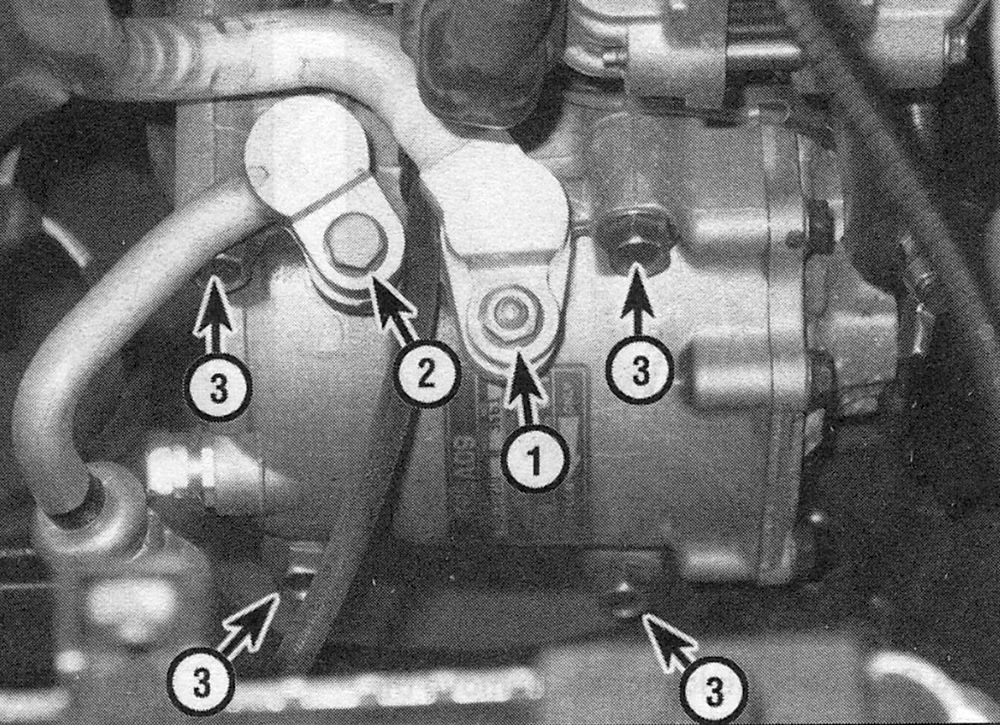
7. Disconnect the refrigerant lines from thecompressor. Plug the open fittings to prevent entry of dirt and moisture (see illustration).
i.7 Air conditioning compressor mounting details
1 Suction line (Low side)
2 Discharge line (High side)
3 Compressor mountingbolts
8. Remove the compressor mounting bolts.
9. On all models except 2015 and laterCR-V models, carefully guide the compressor through the opening below the engine compartment. On 2015 and later CR-V models, remove the compressor from the top.
Installation
10. The clutch may have to be transferred from the old compressor to the new unit. Note: Since the oil separator is equipped inside the A/C compressor on these models, oil drainage is unnecessary at the time of compressor replacement when installing a newcompressor. This applies to compressors supplied by Honda. Be sure to follow any specific instructions that come with a replacement compressor.
11. Installation is the reverse of removal, using new 0-rings where the line fittings attach to the compressor.
12. Have the system evacuated, recharged and leak tested by an air conditioning technician.
13. Reconnect the battery (see Engine electrical systems).