Fuel pump/fuel gauge sending unit module — removal and installation
Warning: Gasoline is extremely flammable, so take extra precautions when you work on any part of the fuel system. See the Fuel system warnings in Fuel and exhaust systems.
In-tank pump
1. Relieve the fuel system pressure (see Fuel pressure relief procedure), then remove the fuel filler cap to relieve any pressure inside the fuel tank.
2. Disconnect the cable from the negative battery terminal (see Engine electrical systems).
3. On Civic models, remove the trunk carpet, rear seat cushion and rear seat backs (see Body). On CR-Vs, fold the rear seats forward and pull back the carpet to expose the fuel pump access cover.
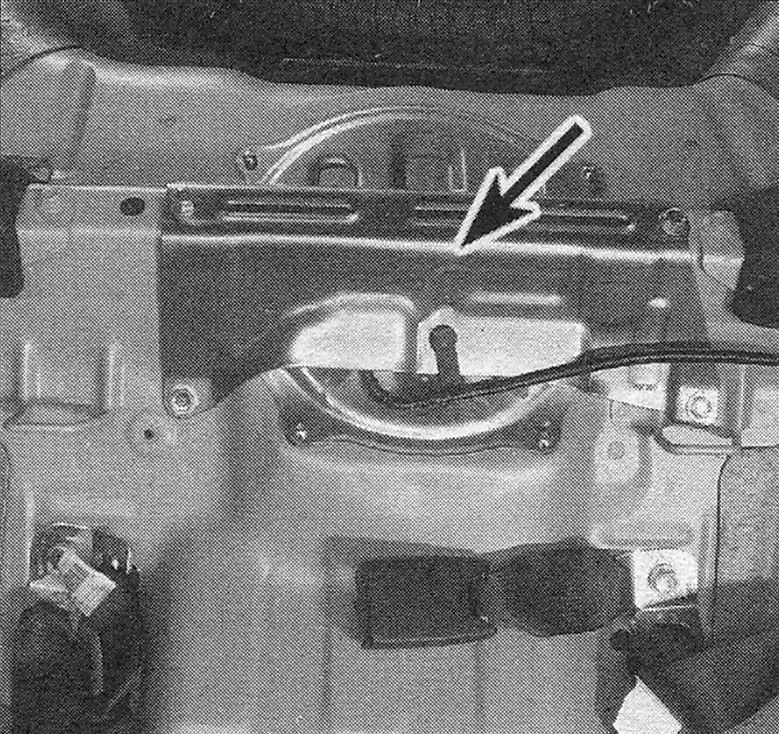
4. If equipped, remove the crossmember over the fuel pump access cover (see illustration).
i.4 If equipped, remove the crossmember
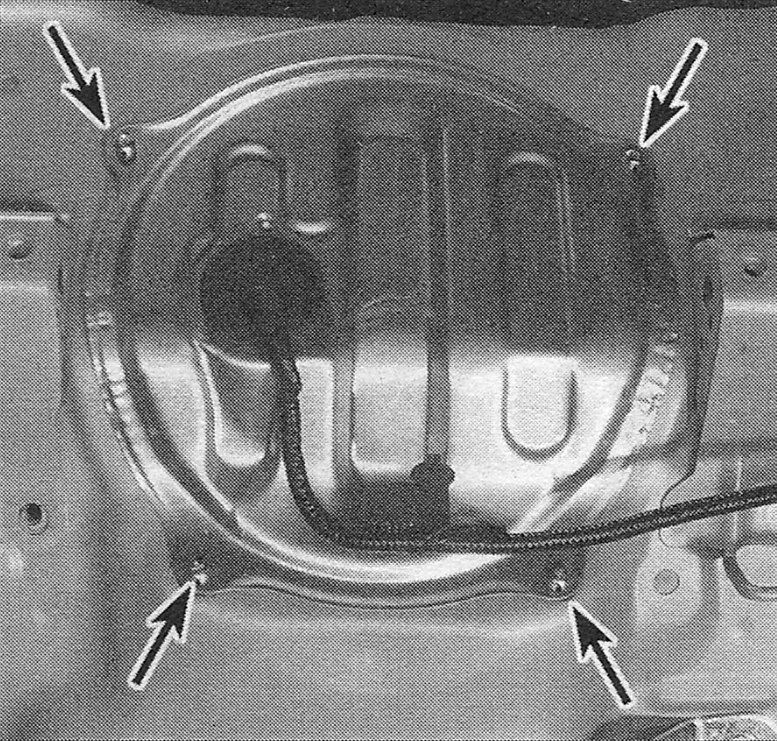
5. Remove the fuel pump access cover screws (see illustration) and remove the fuel pump access cover.
i.5 Remove these screws to remove the fuel pump access cover (2014 Civic shown)
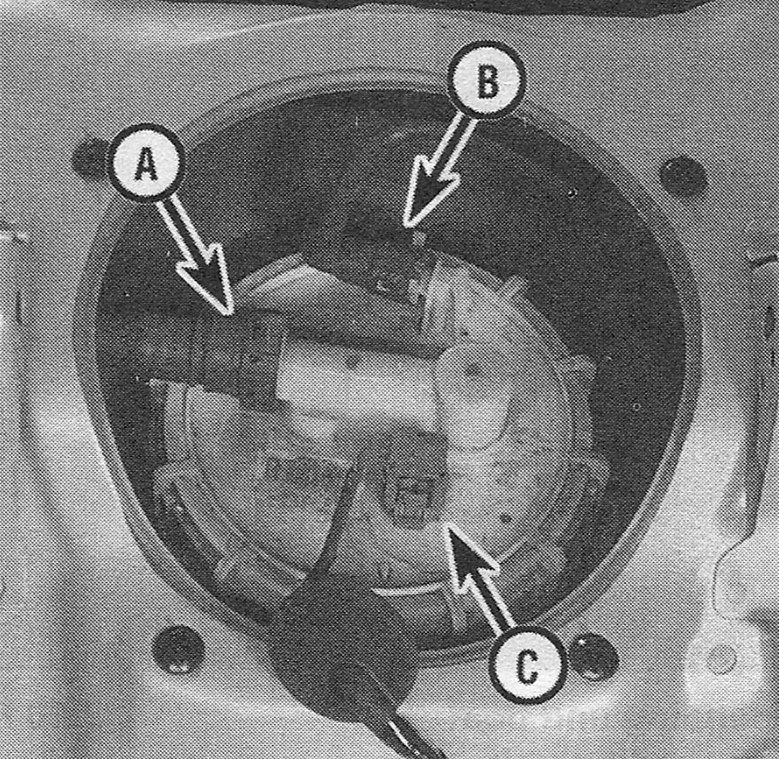
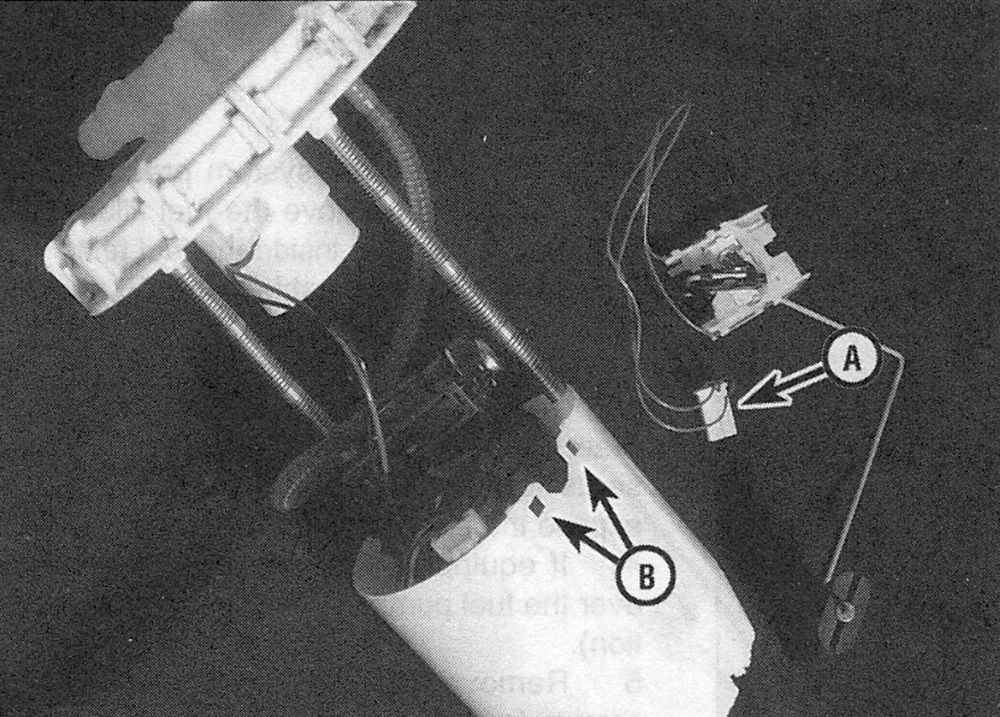
6. Disconnect the quick-connect fitting for the fuel supply and EVAP lines and set them aside (see Fuel lines and fittings — general information and disconnection) and disconnect the fuel pump/fuel gauge sending unit electrical connector (see illustration).
i.6 Disconnect the fuel supply line (A), EVAP line (B) and the electrical connector from the fuel pump/fuel gauge sending unit (C) (2014 Civic shown
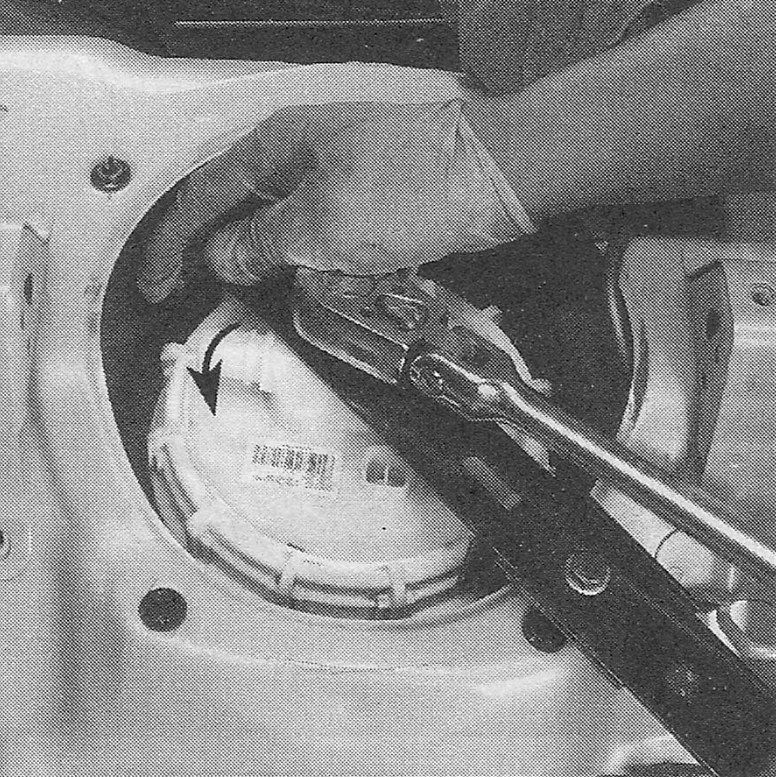
7. Remove the fuel pump/fuel gauge sending unit locknut (see illustration).
i.7 This special tool for loosening and tightening the fuel pump/fuel gauge sending unit locknut is available at most auto parts stores (2014 Civic shown)
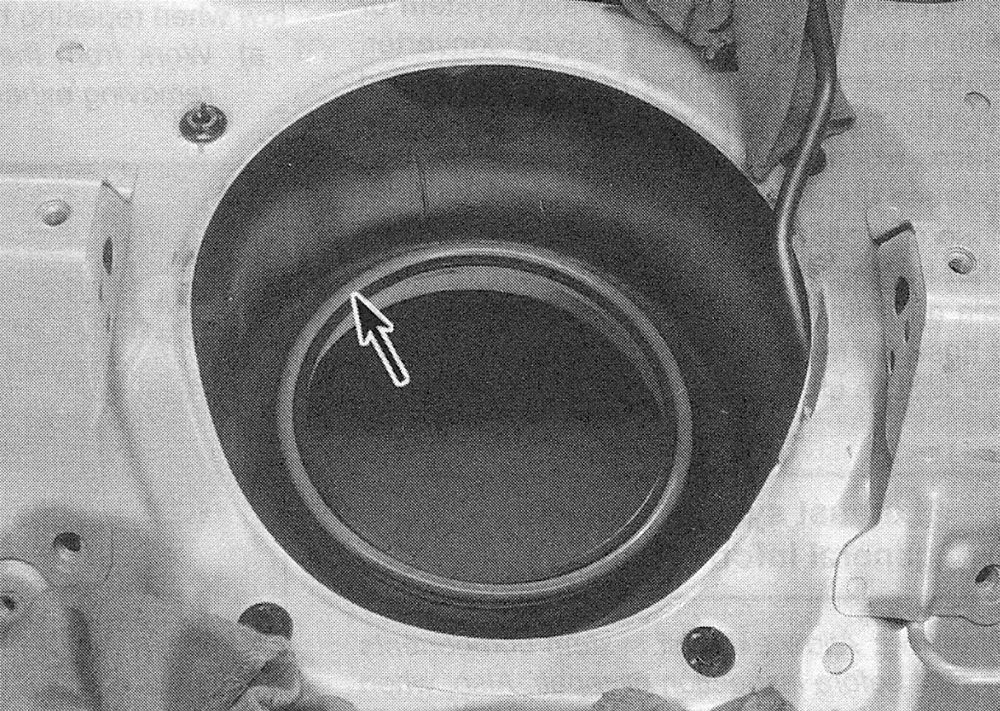
8. Remove the fuel pump/fuel gauge sending unit module from the tank. When removing the pump/sending unit from the tank, carefully angle the module to protect the float arm and float from damage (see illustration). After removing the pump/sending unit module, inspect the seal for cracks, tears and deterioration. If it’s damaged, replace it.
i.8 Angle the fuel pump module when removing to prevent damage to the fuel level sending unit

9. Disconnect the fuel gauge sending unit connector from the module. Depress the tabs and remove the fuel gauge sending unit from the fuel pump module housing (see illustration).
i.9 Being careful not to damage the fuel gauge sending unit float arm and float, remove the fuel pump/fuel gauge sending unit module from the tank by disconnecting the connector (A) and disengaging the tabs (B). After removing the pump/sending unit,
inspect the condition of the seal around the top of the module; if the seal is cracked, torn or deteriorated, replace it
10. Before installing the fuel pump/fuel gauge sending unit module in the fuel tank, install the seal in the hole first. Don’t try to install it with the module, which might cause it to become pinched or distorted (see illustration).
i.10 Replace the 0-ring with a new one.
11. When installing the fuel pump/fuel gauge sending unit module, be sure to align the index mark on top of the module between the two marks on the edge of the hole.
12. Installation is otherwise the reverse of removal. Be sure to tighten the module lock-nut securely.
13. Installation is otherwise the reverse of removal, but before installing the fuel pump access cover, be sure to connect the cable to the negative battery terminal (see Engine electrical systems), start the engine and check for fuel leaks at the pump fuel line connection. If there are no leaks, install the access cover, the carpet and the rear seat (CR-V) or the seat cushion (coupe, sedan and hatchback).
High-pressure pump
Note: Only 2015 and later CR-V models equipped with direct injection have a high-pressure fuel pump.
Warning: The fuel delivery system on 2015 and later CR-V models is made up of a low-pressure system and a high-pressure system. This procedure relieves the pressure in both the low and high-pressure systems; however, wait at least two hours after relieving the pressure before disconnecting any fitting in the low or high-pressure systems.
14. Relieve the fuel system pressure (see Fuel pressure relief procedure), then remove the fuel filler cap to relieve any pressure inside the fuel tank.
15. Set the engine to Top Dead Center (TDC) (see 1.8L single overhead camshaft (SOHC) engine or 2.4L double overhead camshaft (DOHC) engines). Once at TDC, rotate the engine counterclockwise 105 degrees.
16. On 2015 and later CR-V models, remove the PCM bracket bolts from the vehicle and position the PCM out of the way (see Powertrain Control Module (PCM) — removal and installation).
17. Remove the cover from the high-pressure fuel pump located at the end of the cylinder head, above the transaxle. Remove the bracket and EVAP canister purge valve (see Evaporative Emissions Control (EVAP) system — component replacement).
18. Remove the intake manifold (see Intake manifold — removal and installation).
19. Disconnect the quick-connect fitting for the fuel feed hose. Remove the fuel pipe connecting the high-pressure fuel pump to the fuel rail (discard this pipe as it is not to be reused).
20. Disconnect the high-pressure fuel pump electrical connector. Alternately loosen the two high-pressure fuel pump bolts until they can be removed.
21. Carefully remove the high-pressure fuel pump, 0-ring, and roller.
22. If the high-pressure fuel pump is to be replaced, remove the fuel feed pipe from the pump and discard the washers, as they are not to be reused.
23. Installation is the reverse of removal, noting the following points:
- ) Before installing the high-pressure fuel pump, ensure the engine is at 105 degrees counterclockwise from TDC.
- ) Use NEW washers when installing the fuel feed pipe to the pump.
- ) Use a NEW 0-ring when installing the pump.
- ) Coat the roller with clean engine oil before installation.
- ) Use a new fuel pipe between the pump and fuel rail.
24. Remainder of installation is reverse of removal. Tighten all fasteners and fuel pipe fittings to the proper torque found in this Chapter’s Specifications. Start the engine and check for fuel leaks at the pump fuel line connections.