Starter motor — removal and installation
1. Disconnect the cable from the negative terminal of the battery (see Battery — disconnection and reconnection).
2. Raise and support the front of the vehicle on jack stands.
Civic 1.8L and 2015 and later CR-V models
3. On Civic models, remove the passenger front wheel.
4. On Civic, remove the engine under cover.
5. On CR-V, remove the exhaust pipe from under the engine.
6. On all models, remove the intake manifold bracket bolts and remove the bracket.
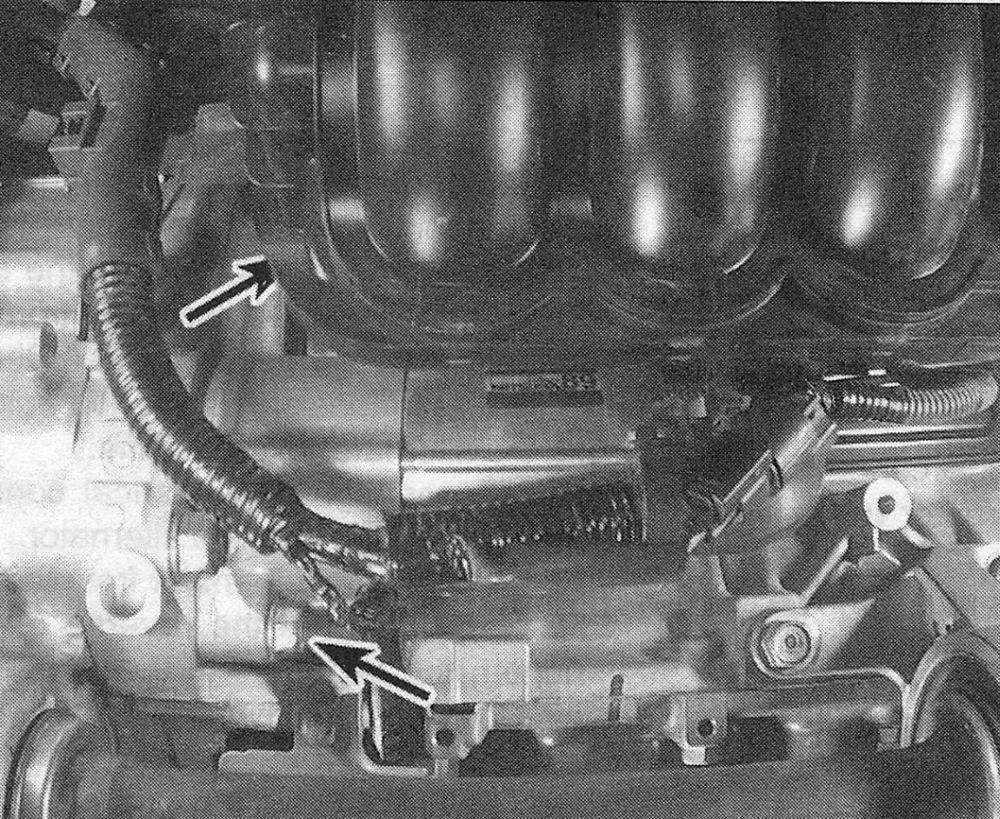
7. Remove the bolts attaching the starter to the transaxle (see illustration).
i.7 Starter mounting bolts (upper bolt not visible; location given)
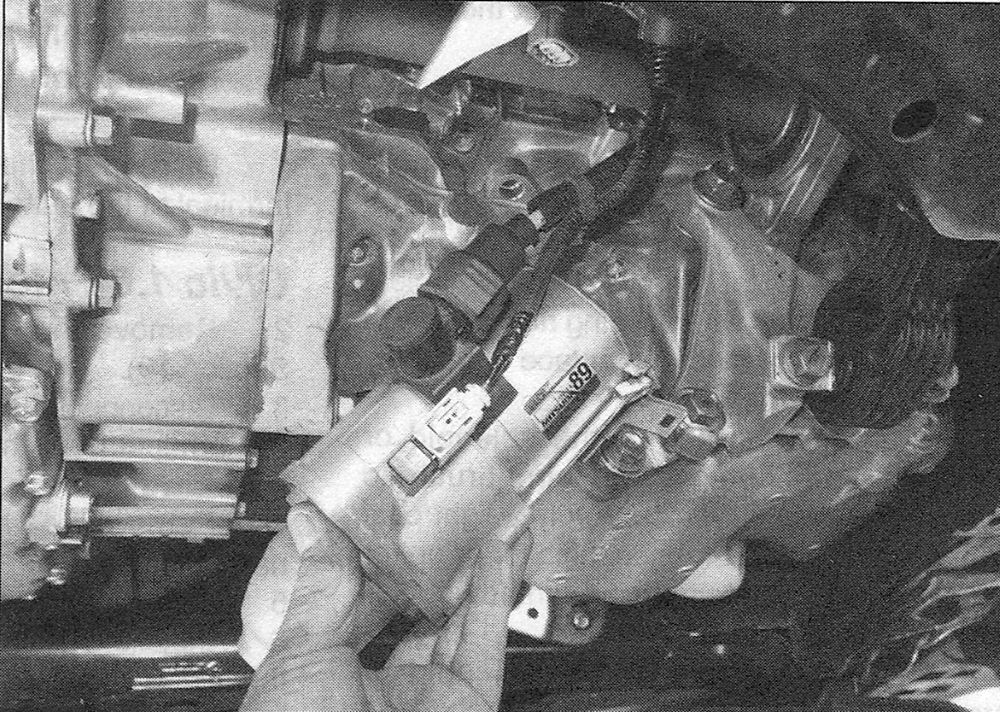
8. Disconnect the starter electrical connector and battery cable (see illustration).
i.8 Remove the starter and disconnect the electrical connector and cable
9. To install, reverse removal procedure. Tighten the starter bolts to the torque listed in this Chapter’s Specifications.
Civic 2.4L and 2014 and earlier CR-V models
10. Remove the engine undercover.
11. Remove the bolts attaching the starter to the transaxle.
12. Disconnect the starter electrical connector and cable.
13. To install, reverse removal procedure. Tighten the starter bolts to the torque listed in this Chapter’s Specifications.
open all | close all