Differential oil seals (4WD CR-V models) — replacement
Pinion oil seal
1. Raise the rear of the vehicle and support it securely on jack stands. Place the transaxle in Neutral with the parking brake off. Block the front wheels to prevent the vehicle from rolling.
Note: The pinion seal can be replaced without draining the differential fluid, but some may leak out during the process. Have some rags and a drain pan ready as well as some new oil to replace what was lost.
2. Mark the relationship of the driveshaft to the pinion flange, then unbolt the driveshaft from the flange (see Driveshaft (4WD CR-V models) — removal and installation). Suspend the driveshaft with a piece of wire (don’t let it hang by the center support bearing).
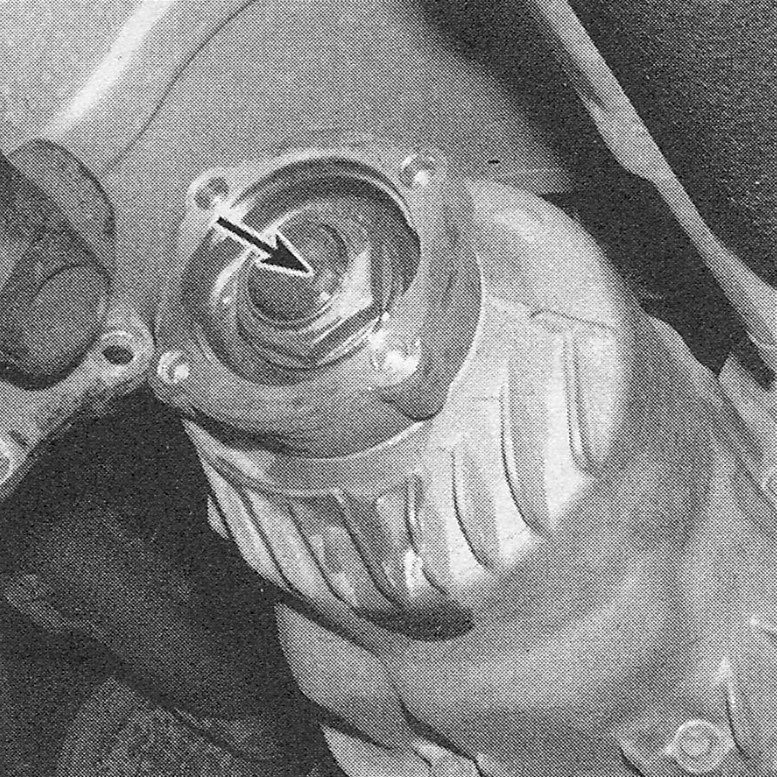
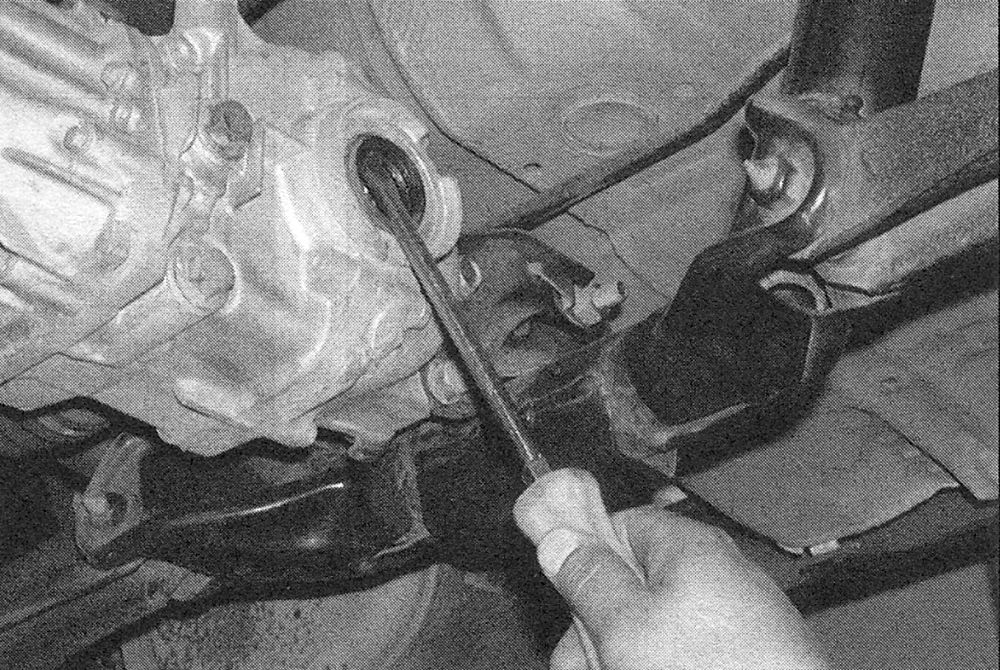
3. Using a hammer and a punch, unstack the pinion flange nut (see illustration).
i.3 Insert a punch into the slot and unstack the pinion flange nut before unscrewing it
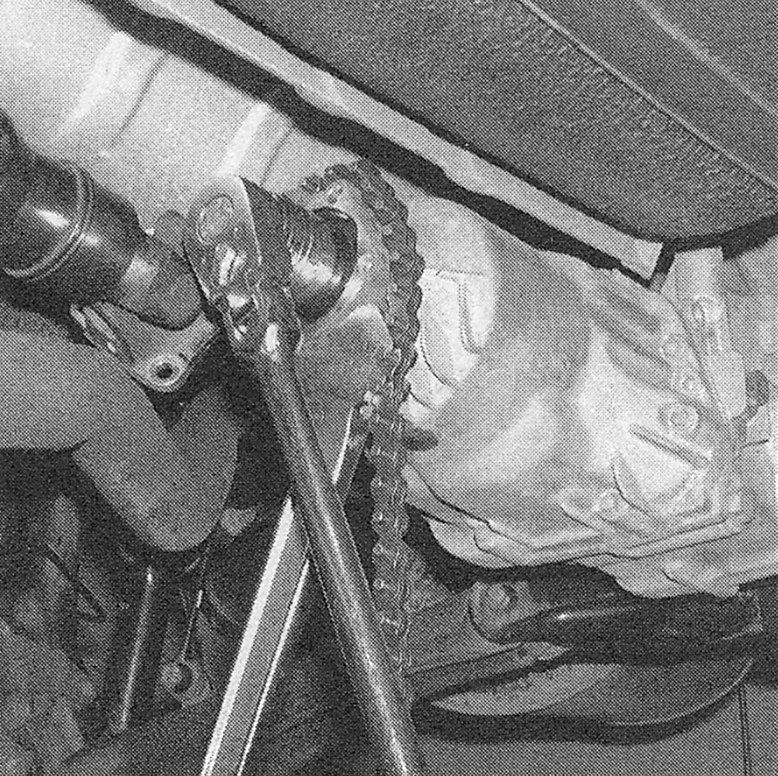
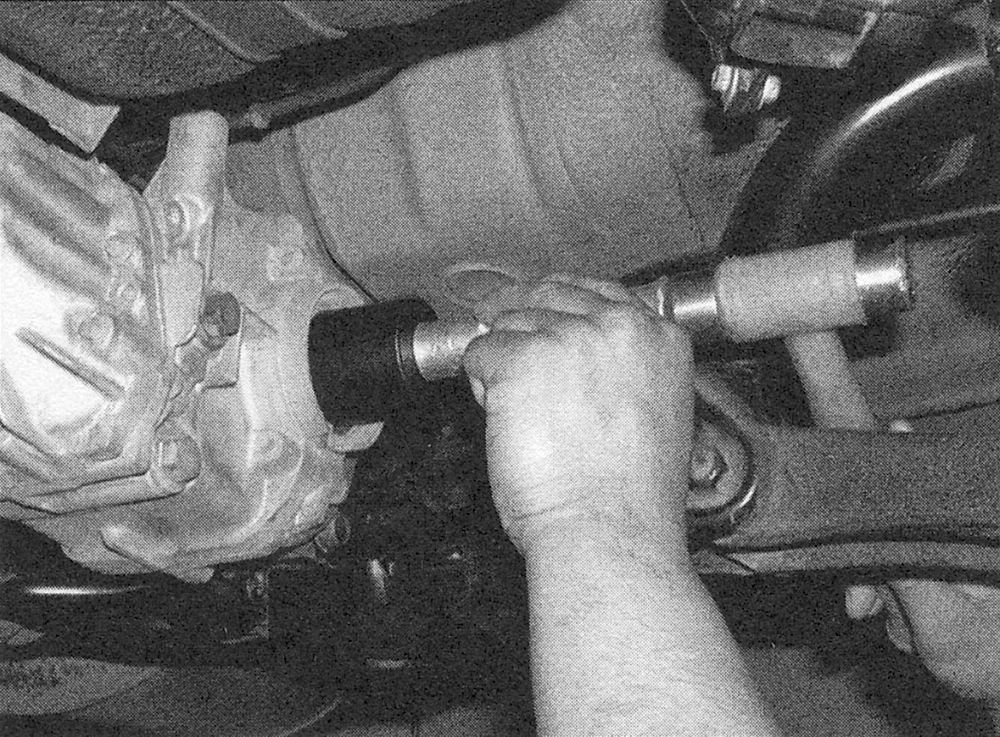
4. A flange holding tool will be required to keep the companion flange from moving while the self-locking pinion nut is loosened. A chain wrench will also work (see illustration).
i.4 A chain wrench can be used to prevent the pinion flange from turning when loosening the nut
5. Loosen the locking nut slightly then tighten again to align it with the groove the on the shaft. Carefully clean any dirt from the groove.
6. Remove the locking nut, spring washer, back-up ring and 0-ring. Discard the 0-ring and the back-up ring. You will need a new locking nut as well but keep the old one for now to use in the installation steps.
7. Withdraw the flange. It may be necessary to use a two-jaw puller engaged behind the flange to draw it off. Do not attempt to pry or hammer behind the flange or hammer on the end of the pinion shaft.
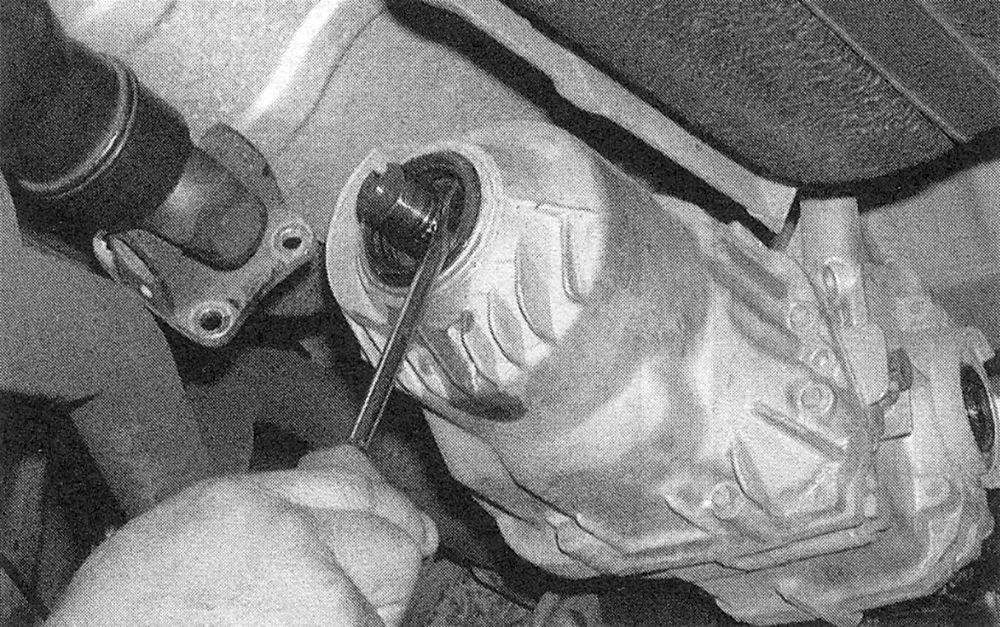
8. Pry out the old seal and discard it (see illustration).
i.8 Carefully pry out the old seal …
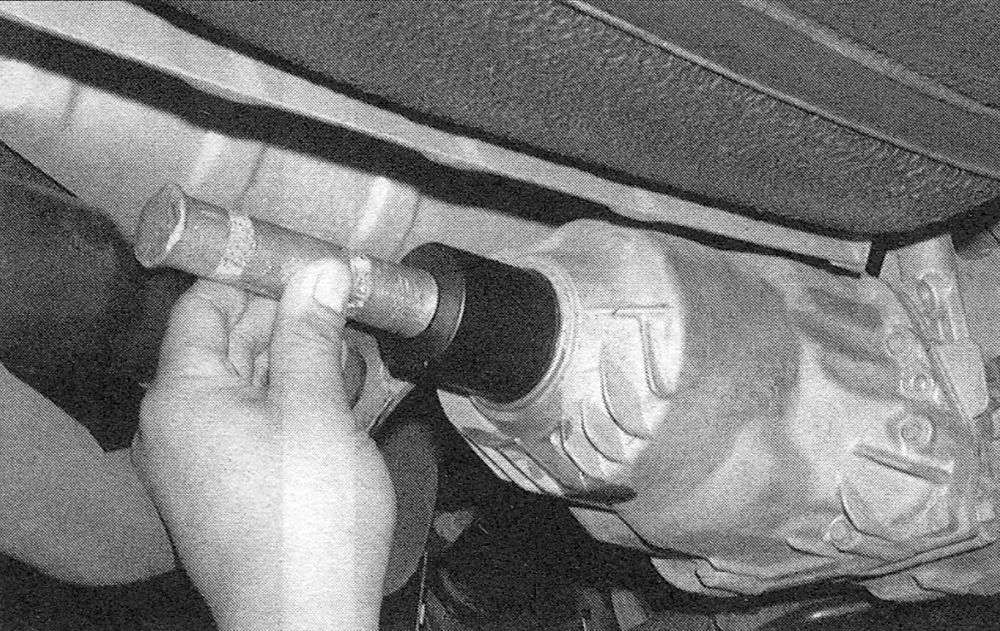
9. Lubricate the lips of the new seal and fill the space between the seal lips with wheel bearing grease, then tap it evenly into position with a seal installation tool or a large socket (see illustration). Make sure it enters the housing squarely and is driven in until its flush with the end of the housing.
12.9… and drive the new one in with a seal installation tool or a socket with an outside diameter slightly smaller than that of the seal socket with an outside diameter slightly smaller than that of the seal
10. Install the pinion flange onto the shaft. Use a seal installation tool or large socket to evenly drive on the flange until two or three threads appear.
Note: Do not hammer directly on the pinion flange. Doing so will result in a damaged flange and could ruin the new seal.
11. Apply a thin film of oil to the old pinion flange nut and install it on the shaft. Tighten the nut (you will need the flange holding tool or chain wrench again) until the flange is fully seated. Remove and discard the old pinion flange nut.
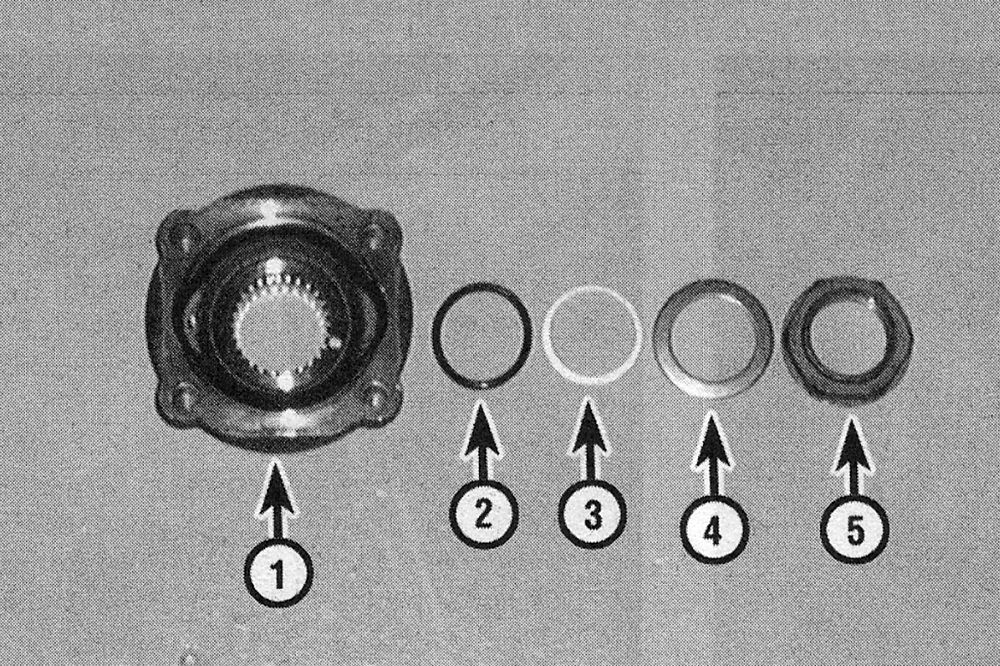
12. Install a new 0-ring, (lubricated with clean differential lubricant), new back-up ring, spring washer (with the concave side facing the flange), and a new nut (see illustration).
i.12 Differential pinion flange details (4WD CR-V models)
1 Pinion flange
2 0-ring 5 Nut
3 Back-up rings
4 Spring washers
5. Nut
13. Tighten the new nut to the torque listed in this Chapter’s Specifications, then stake the collar of the nut into the slot in the pinion shaft.
14. Reconnect the driveshaft to the pinion flange (see Driveshaft (4WD CR-V models) — removal and installation).
15. Check the differential lubricant level and add some, if necessary, to bring it to the appropriate level (see Tune-up and routine maintenance).
Drive axle oil seals
16. Raise the rear of the vehicle and support it securely on jack stands. Place the transaxle in Neutral with the parking brake off. Block the front wheels to prevent the vehicle from rolling.
17. Remove the drain plug and drain the fluid from the rear differential housing.
18. Remove both drive axles from the rear differential housing (see Driveaxles — removal and installation). There is no need to remove the outer drive axle nuts, the outer ends of the drive axles can stay in the hubs. Do not allow the drive axles to hang unsupported on the outer CV joints. Use wire to hold the inner ends of the driveaxles.
19. Remove and discard the set-ring from the inner ends of both drive axles.
20. With the differential housing lowered, remove and discard the bolts that secure the upper mounting bracket to the differential housing, remove the bracket from the housing. It may be easier to do this with the differential housing pulled out from under the vehicle.
21. Use a seal removal tool to pry the seal (s) from the case (see illustration).
i.21 Carefully pry out the drive axle oil seal with a seal removal tool or a large screwdriver; make sure you don’t scratch the seal bore
22. Using a seal installer or a large deep socket as a drift, install the new oil seal. Drive it into the bore squarely until the outer face of the seal is flush with the machined outer surface of the seal bore (see illustration).
12.22 Use a seal installer or a large socket to install the new seal — whatever type of tool you use, make sure it doesn’t contact the raised seal lip
23. Installation is the reverse of removal. See Driveaxles — removal and installation and note the following:
24. Use new bolts when installing the upper bracket to the differential housing.
25. Install new set-rings to the inner ends of both drive axles.
26. Lubricate the lip of the drive axle seals with multi-purpose grease before installing the drive axles. Be careful not to damage the lip of the seals.
27. Use new sealing washers on the fluid drain and fill plugs. Refill the differential lubricant to bring it to the appropriate level (see Tune-up and routine maintenance).