Disc brake caliper — removal and installation
Warning: The dust created by the brake system is harmful to your health. Never blow it out with compressed air and don’t inhale any of it. An approved filtering mask should be worn when working on the brakes. Do not, under any circumstances, use petroleum-based solvents to clean brake parts. Use brake system cleaner only!
Note: Always replace the calipers in pairs -never replace just one of them.
Front Removal
1. Loosen — but don’t remove — the lug nuts on the front wheels. Raise the front of the vehicle and support it securely on jack stands. Remove the front wheels.
2. Disconnect the brake line from the caliper and plug it to keep contaminants out of the brake system and to prevent losing any more brake fluid than is necessary.
Note: If you’re simply removing the caliper for access to other components, don’t disconnect the hose.
3. Remove the caliper mounting bolts.
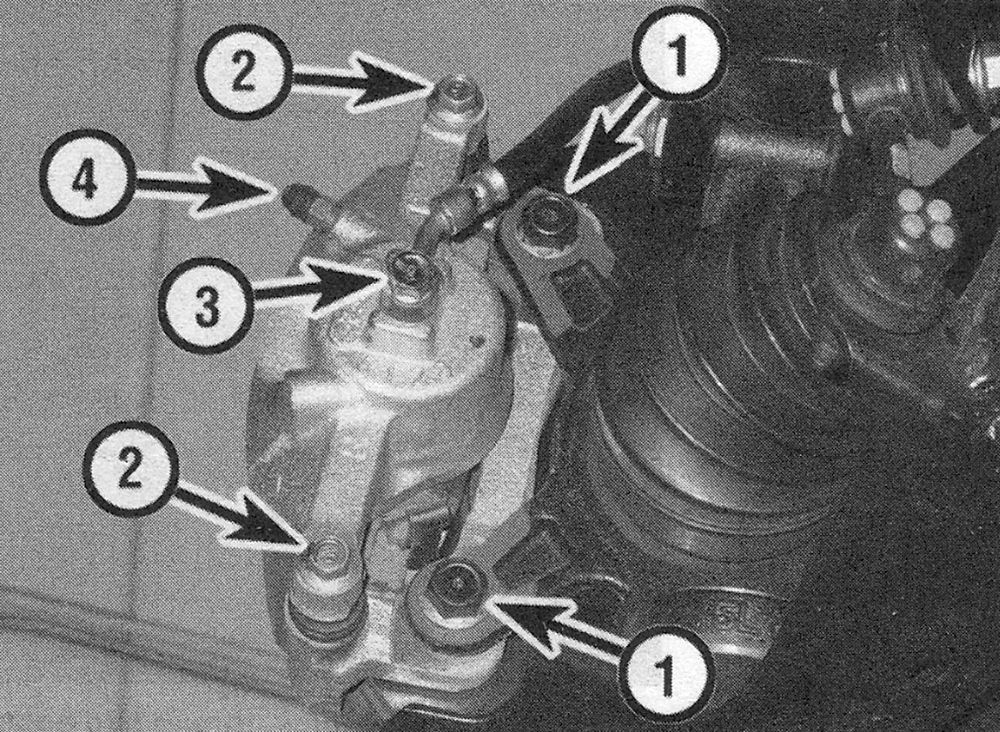
4. Detach the caliper from its mounting bracket (see illustration).
i.4 Brake caliper details
1 Caliper mounting bracket-to-steering knuckle bolts
2 Caliper mounting bolts
3 Brake hose banjo fitting bolts
4 Caliper bleeder screw
Installation
5. Install the caliper by reversing the removal procedure. Remember to replace the sealing washers on either side of the brake line fitting with new ones. Tighten the caliper mounting bolts and the banjo bolt to the torque listed in this Chapter’s Specifications.
6. Bleed the brake system (see Brake hydraulic system — bleeding).
7. Install the wheels and lug nuts and lower the vehicle. Tighten the lug nuts to the torque listed in the Tune-up and routine maintenance Specifications.
Rear Removal
8. Loosen — but don’t remove — the lug nuts on the rear wheels. Raise the rear of the vehicle and place it securely on jack stands. Remove the rear wheels. 9 On Civic models, remove the clip securing the parking brake cable to the caliper parking brake lever, then separate the cable from the caliper.
10. Unscrew the banjo bolt and detach the brake line from the caliper. Plug the fitting to prevent fluid loss and contamination.
Note: If you’re simply removing the caliper for access to other components, don’t disconnect the hose.
11. Remove the caliper mounting bolts while holding the caliper pins with a second wrench.
12. Detach the caliper from its mounting bracket.
Installation
13. Install the caliper by reversing the removal procedure. Remember to replace the sealing washers on either side of the brake line fitting with new ones. Tighten the caliper mounting bolts and the banjo bolt to the torque listed in this Chapter’s Specifications.
14. Bleed the brake system (see Brake hydraulic system — bleeding).
15. Install the wheels and lug nuts. Lower the vehicle and tighten the lug nuts to the torque listed in the Tune-up and routine maintenance Specifications.