Drum brake shoes/parking brake shoes — replacement
Warning: Drum brake shoes must be replaced on both wheels at the same time — never replace the shoes on only one wheel. Also, the dust created by the brake system is harmful to your health. Never blow it out with compressed air and don’t inhale any of it. An approved filtiring mask should be worn when working on the brakes. Do not, under any circumstances, use petroleum-based solvents to clean brake parts. Use brake system cleaner only!
Caution: Whenever the brake shoes are replaced, the return and hold-down springs should also be replaced. Due to the continuous heating/cooling cycle the springs are subjected to, they can lose tension over a period of time and may allow the shoes to drag on the drum and wear at a much faster rate than normal.
1. Loosen the wheel lug nuts, raise the rear of the vehicle and support it securely on jack stands. Block the front wheels to keep the vehicle from rolling.
Note: All four rear brake shoes must be replaced at the same time, but to avoid mixing up parts, work on only one brake assembly at a time.
2. Release the parking brake.
3. Remove the wheel.
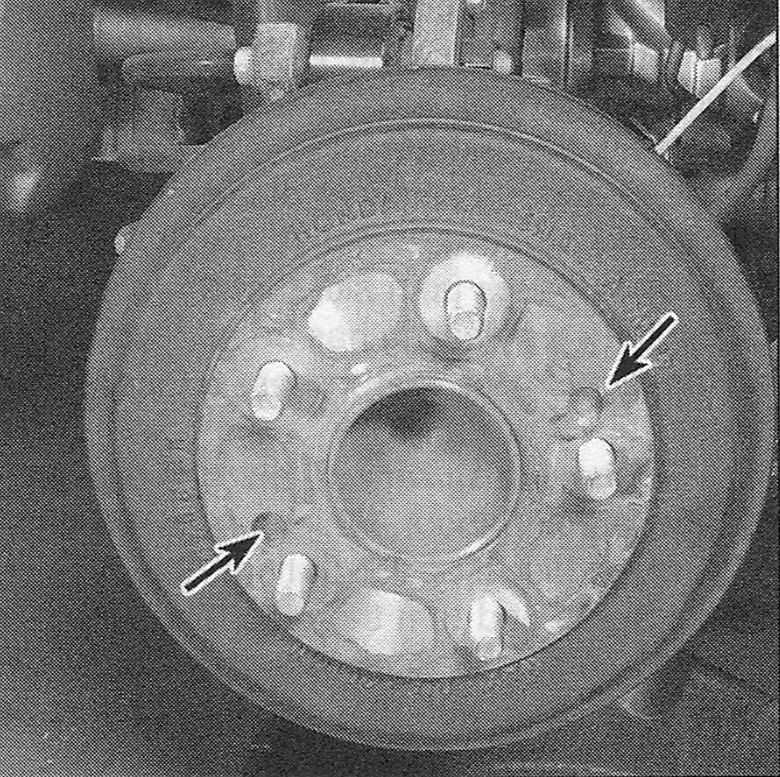
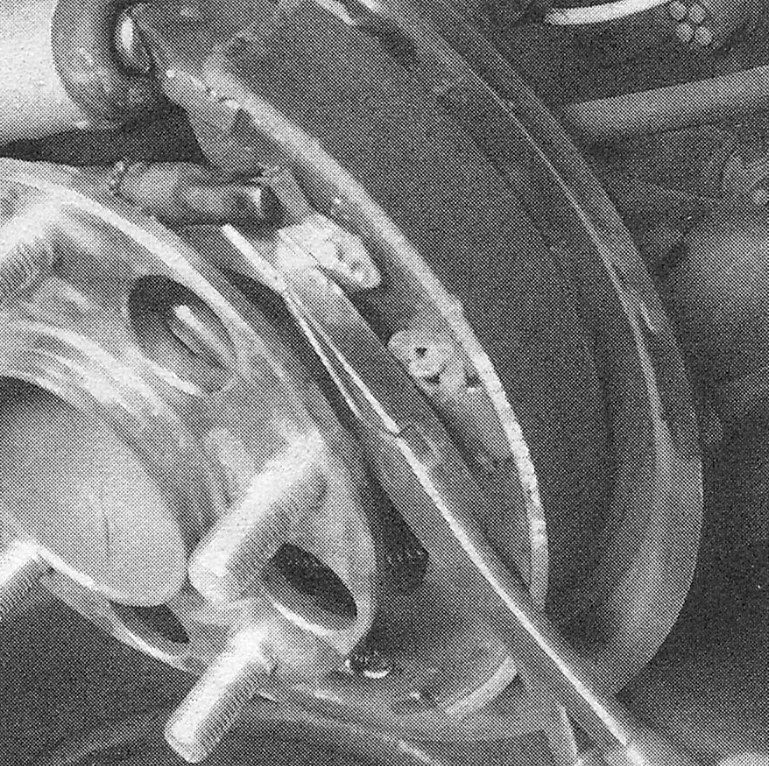
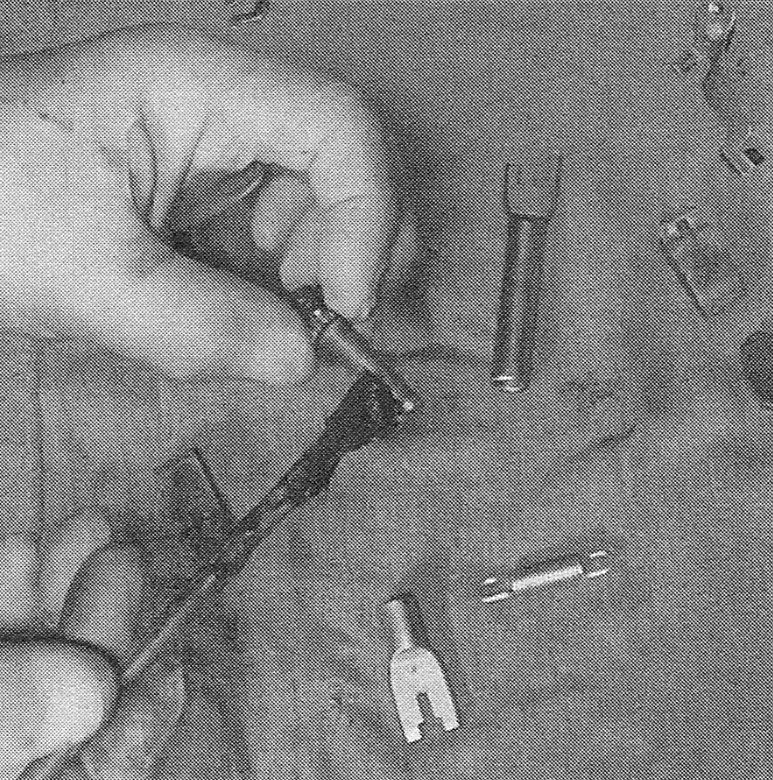
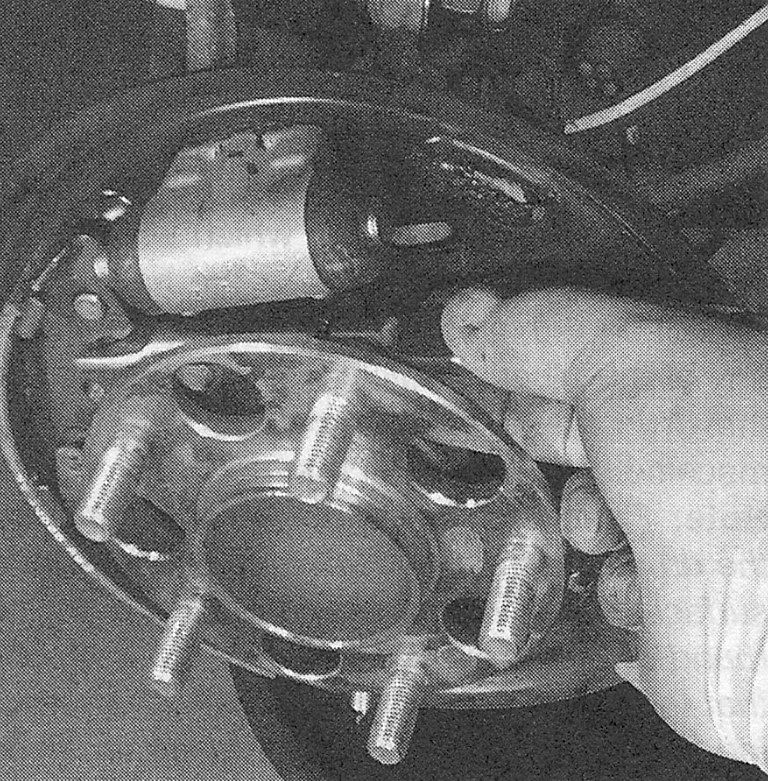
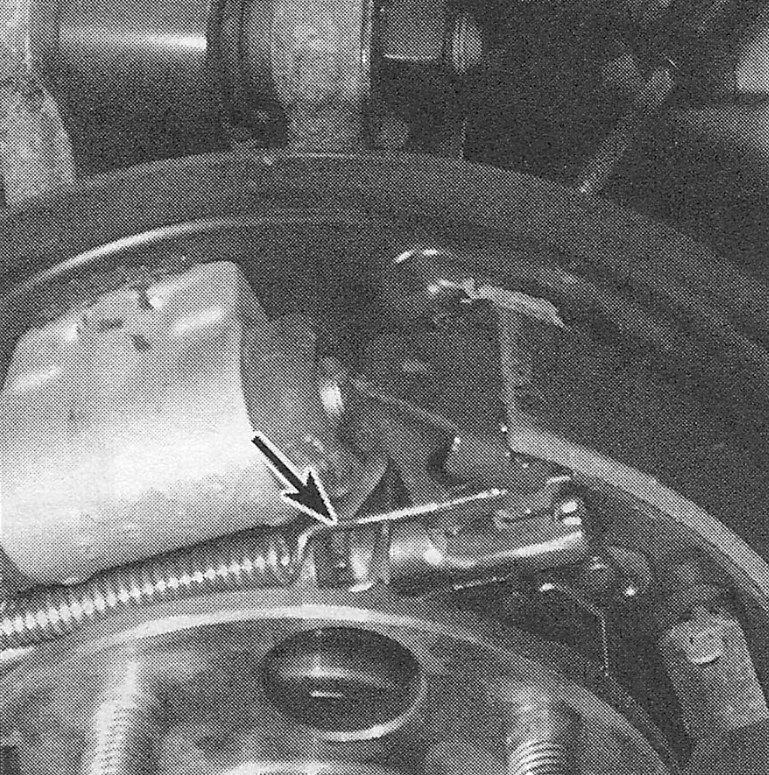
4. Using two 8 X 1.25 mm bolts, thread the bolts in the two holes on the face of the drum. As you alternate from one screw to the other the drum will slowly separate from the hub (see illustration).
i.4 Insert an 8 x 1.25 mm bolt in these holes to draw the drum off
5. Remove the brake drum.
Note: If the brake drum cannot be easily pulled off the axle and shoe assembly, make sure the parking brake is completely released. If the drum still cannot be pulled off, the brake shoes will have to be retracted. This is done by first removing the plug from the backing plate. With the plug removed, push the lever off the adjuster star wheel with a screwdriver while turning the adjuster wheel with another screwdriver, moving the shoes away from the drum. The drum should now come off.
Note: Inspect the drum for any coarse marks or heavy grooves left by the shoes or brake hardware. Have the drum machined or if severe enough, replace the drum.
Drum brake shoes
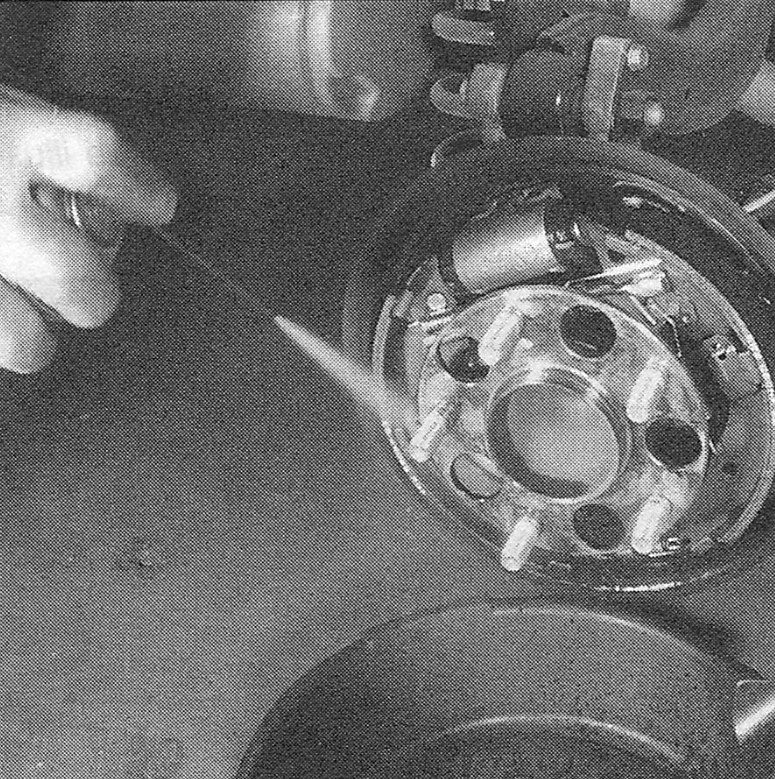
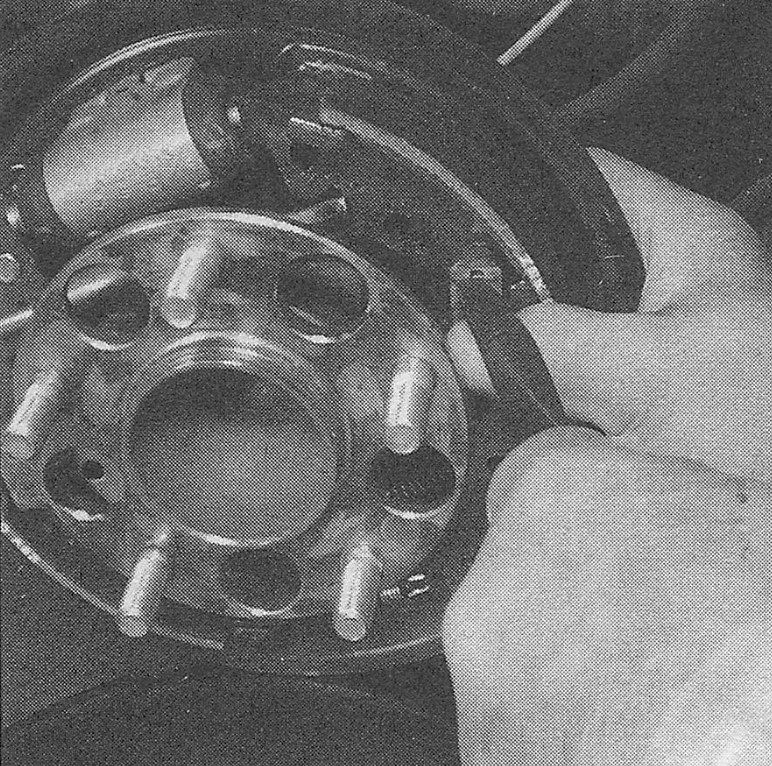
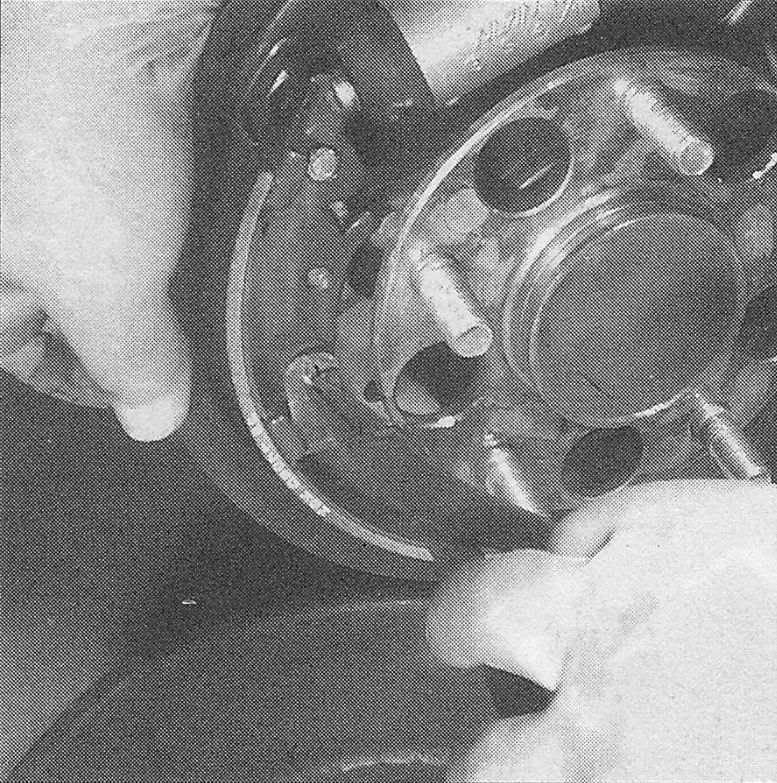
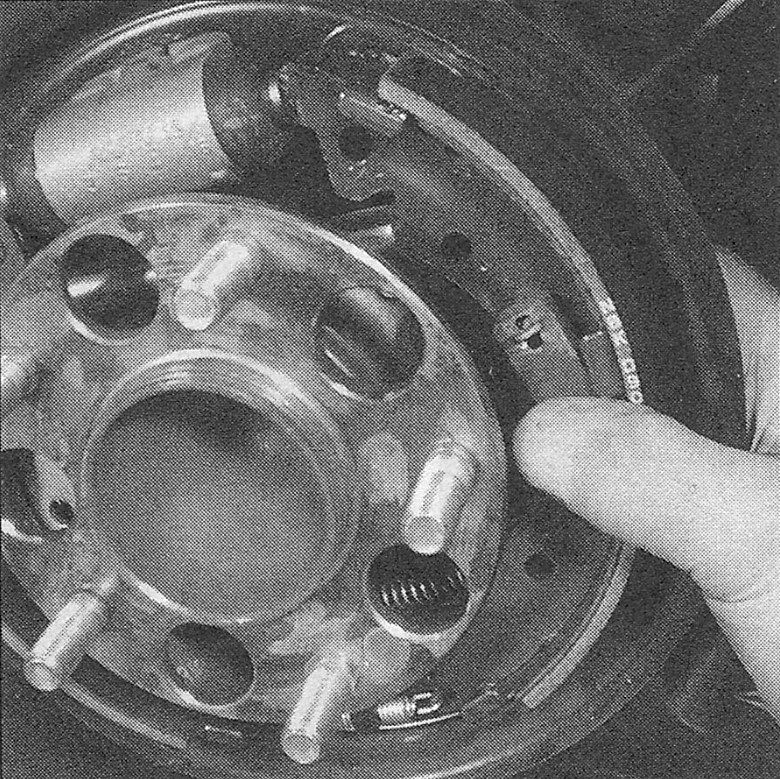
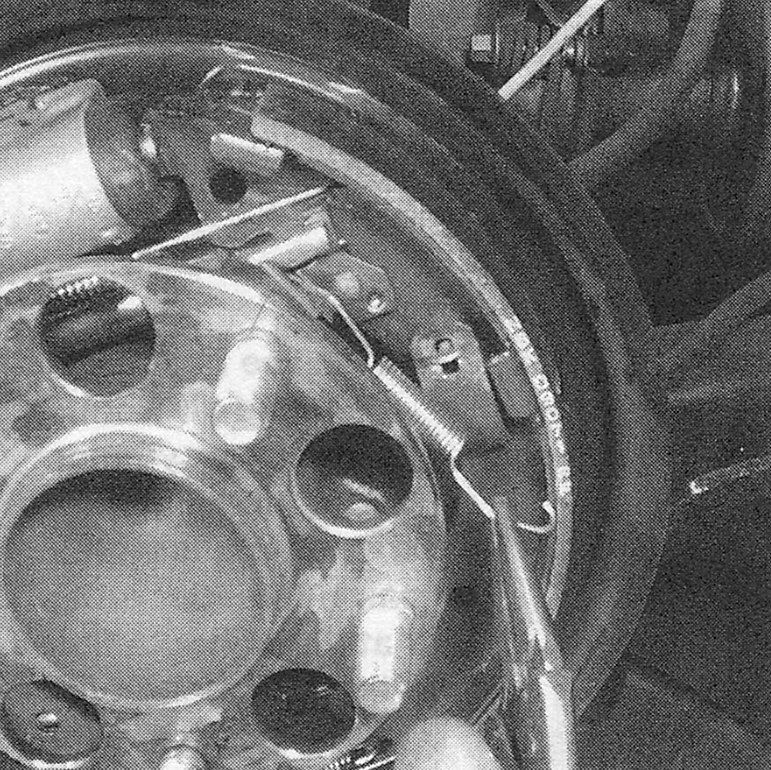
6. Clean the brake shoe assembly with brake system cleaner before beginning work (see illustration).
i.6 Before removing anything, clean the brake assembly with brake cleaner and allow it to dry — position a drain pan under the brake to catch the residue — DO NOT USE COMPRESSED AIR TO BLOW BRAKE DUST OFF THE PARTS!
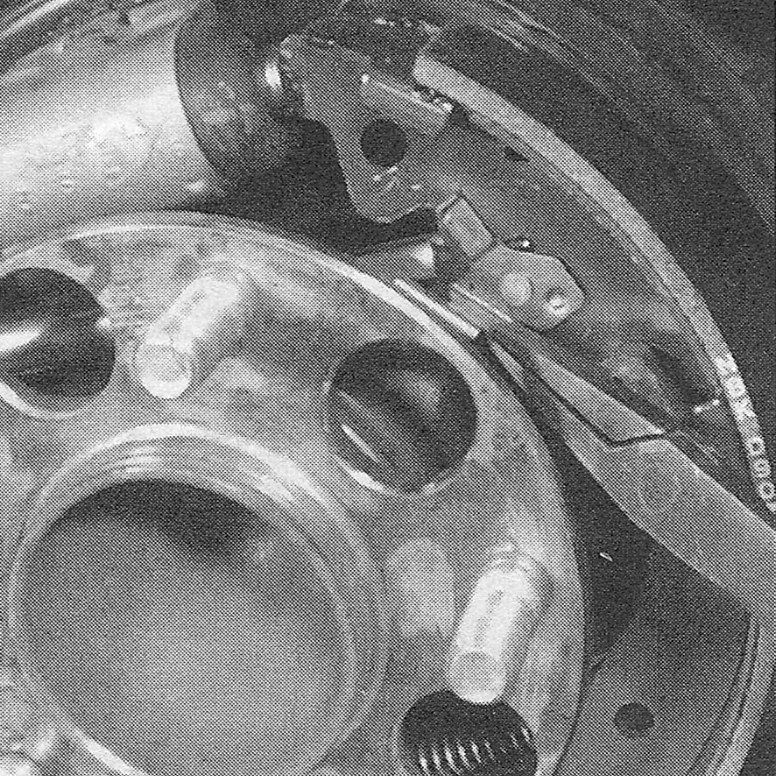
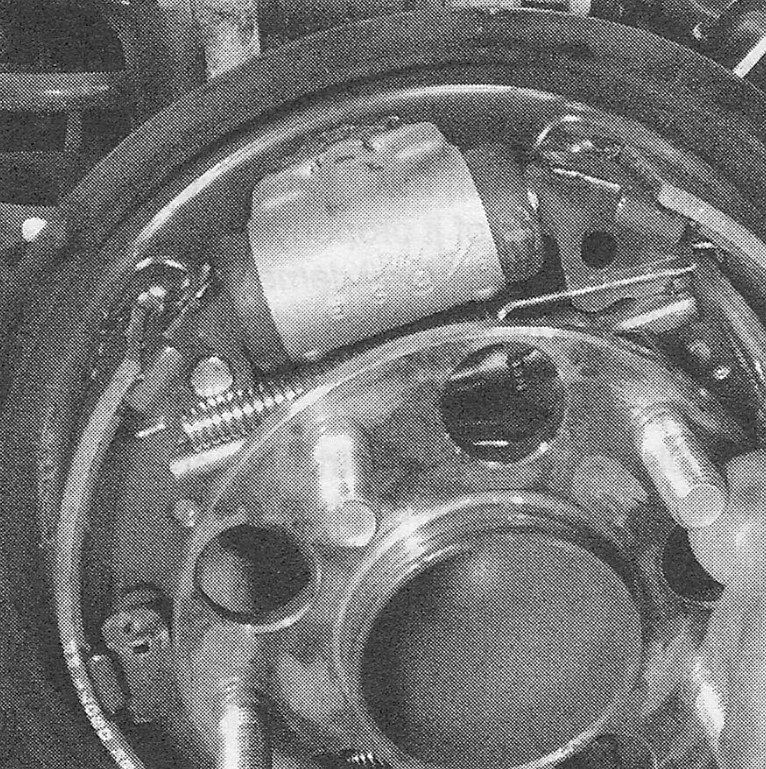
7. Follow the accompanying illustrations for the brake shoe replacement procedure (see illustrations 6.7a through 6.7u). Be sure to stay in order and read the caption under each illustration.
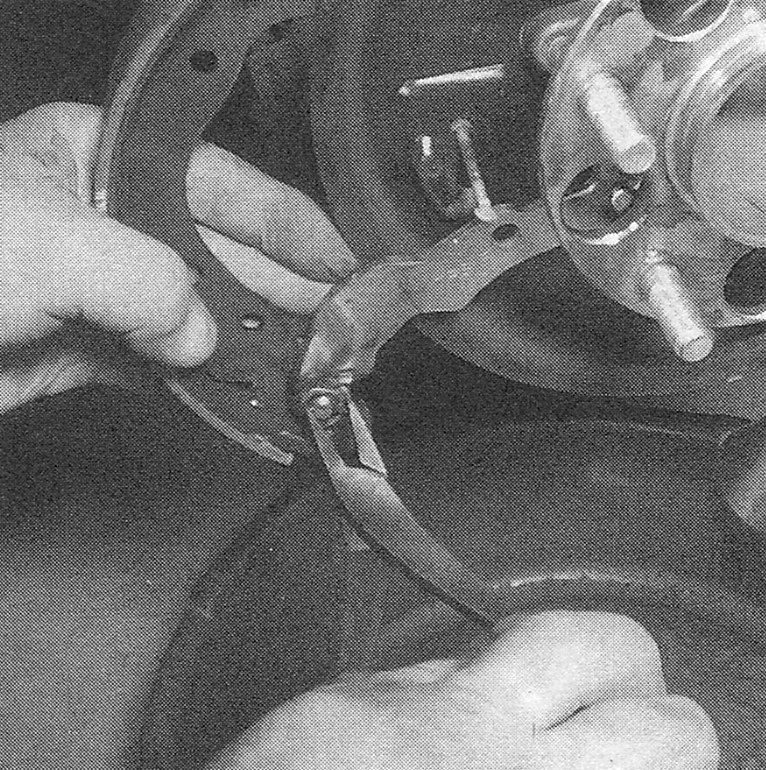
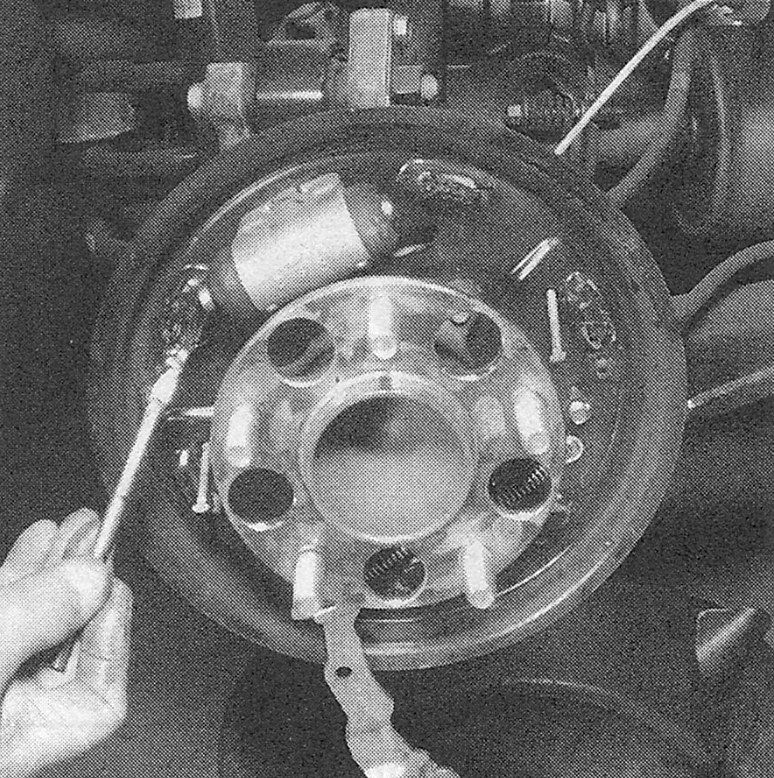
i.7 а Remove the upper return spring
i.7b Remove the adjuster lever spring
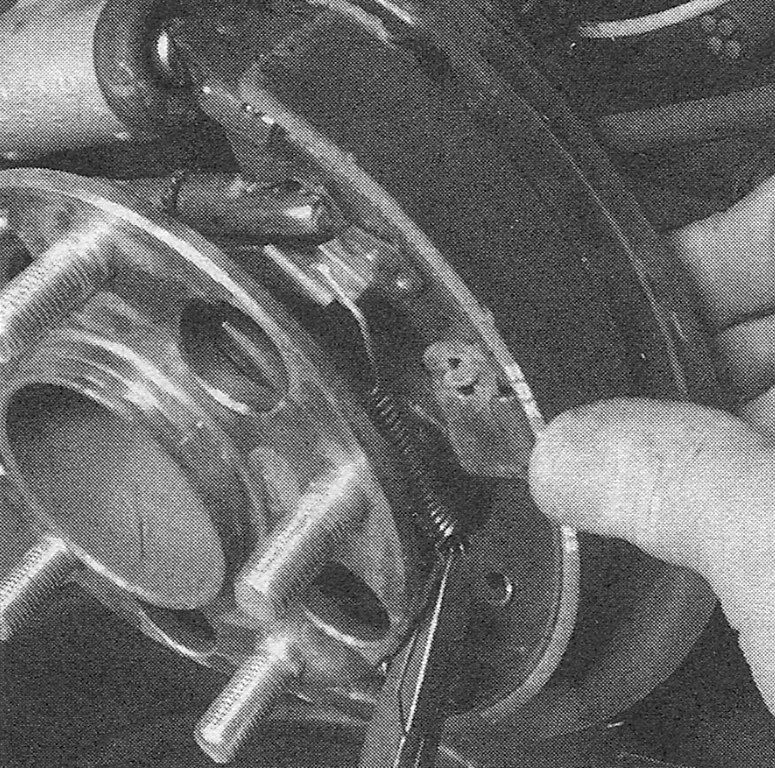
i.7c Remove the adjuster lever
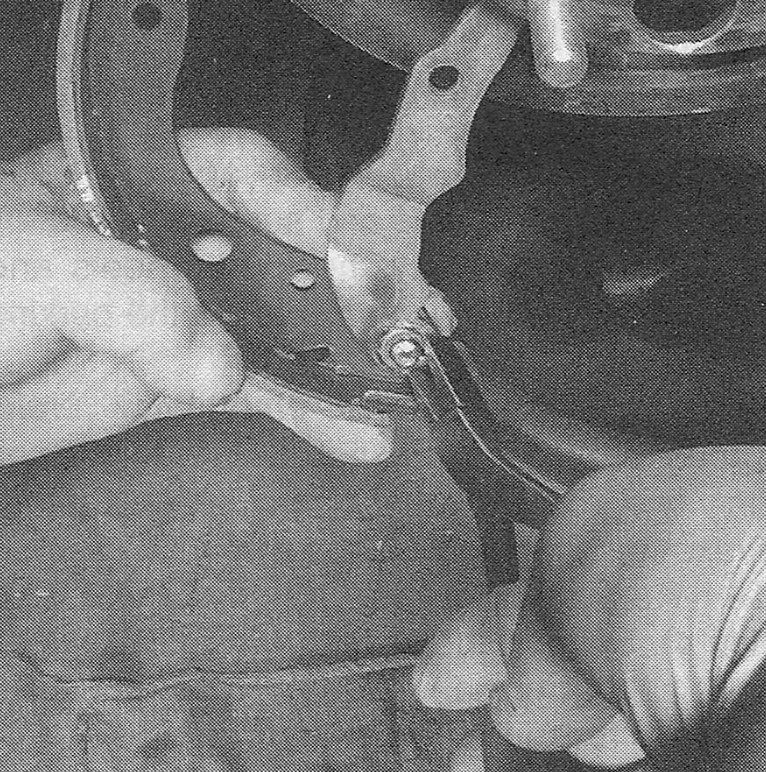
i.7d Push down on the hold-down spring and twist the pin 1/4-turn to free the spring
i.7e Remove the leading shoe from the backing plate
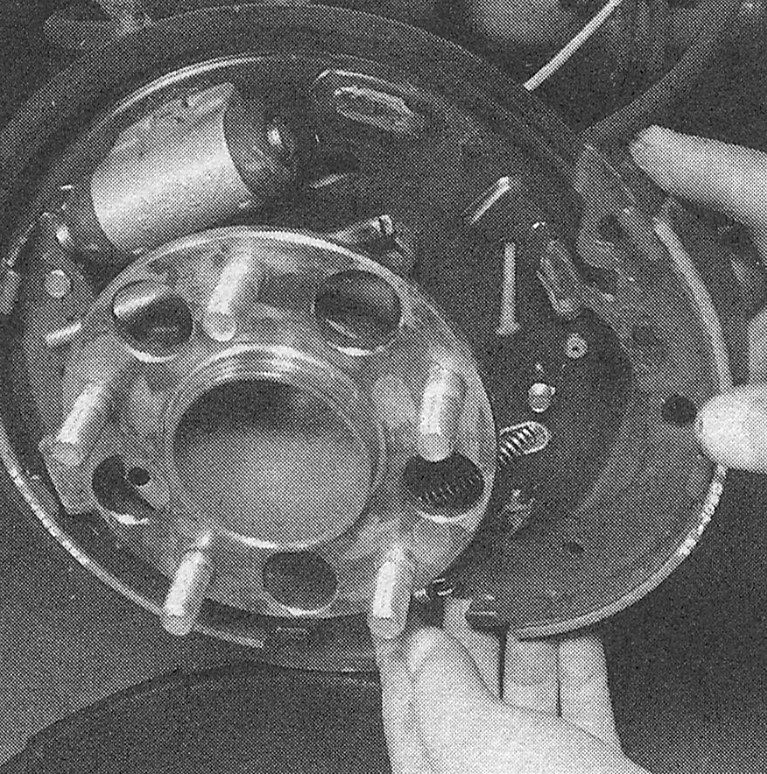
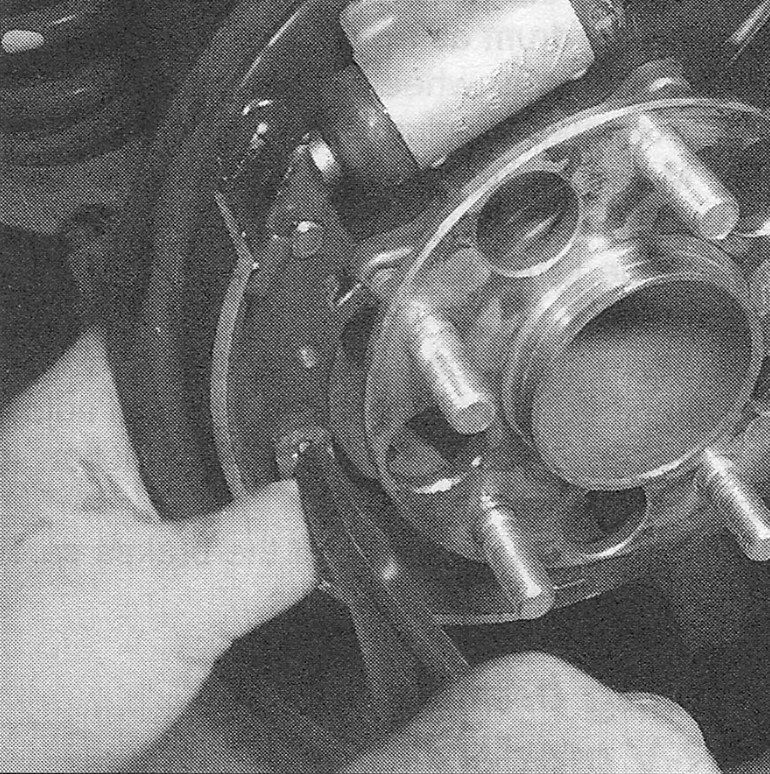
i.7f Remove the adjuster lever
i.7g Remove the hold-down spring from the trailing shoe
i.7h Spread open, then push off the C-clip retaining the parking brake lever pin …
i.7i … then remove the washer …
i.7j … and pin
i.7k Disassemble and clean the components of the adjuster, then lubricate the moving parts with a film of high temperature brake grease
i.7l Clean the backing plate, then lubricate the shoe contact areas with a light film of high-temperature brake grease
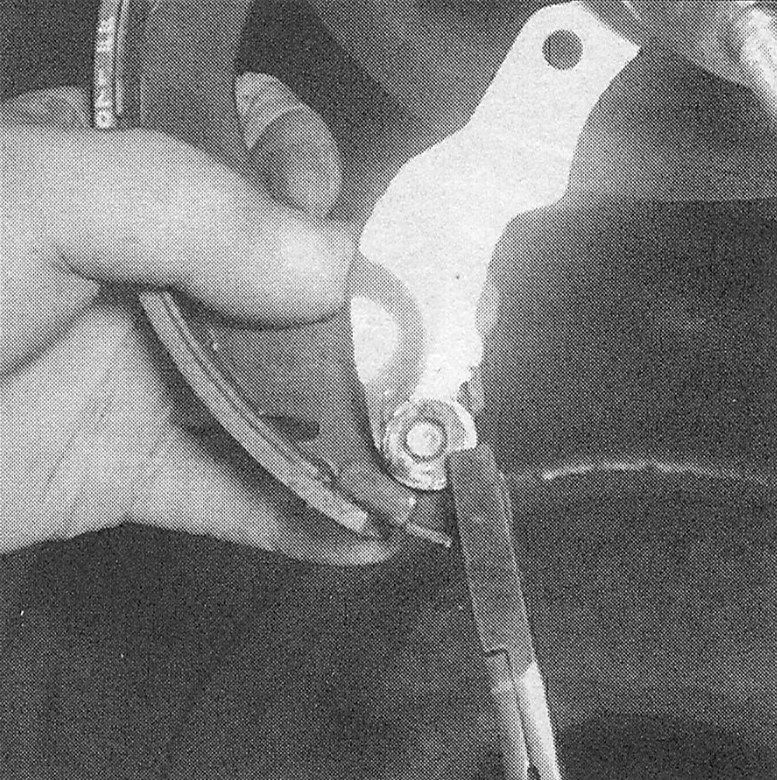
i.7m Connect the parking brake lever to the trailing shoe and install the pin, washer and C-clip. Squeeze the clip tight with a pair of pliers
i.7n Install the trailing shoe and hold- down spring
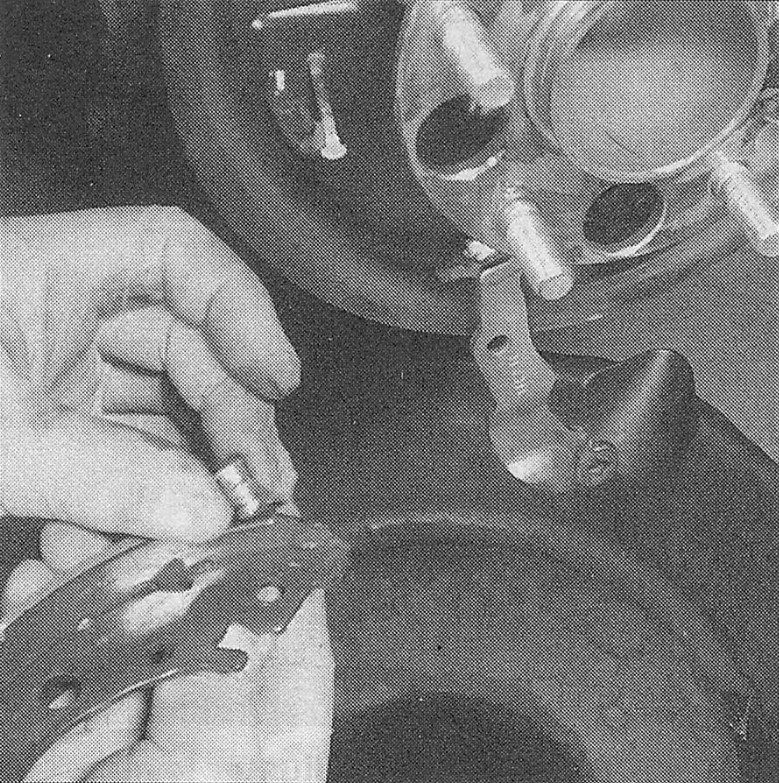
i.7o Install the adjuster, making sure the adjuster wheel is nearest the front of the vehicle
i.7p Connect the lower return spring to the bottom of each shoe …

i.7q … then place the leading shoe against the backing plate and install the hold-down spring
i.7r Install the adjuster lever
i.7s Install the upper return spring
i.7t Install the adjuster lever spring
i.7u Turn the adjuster wheel so the brake drum just slides over the shoes
8. Before reinstalling the drum, it should be checked for cracks, score marks, deep scratches and hard spots, which will appear as small discolored areas. If the hard spots cannot be removed with fine emery cloth or if any of the other conditions listed above exist, the drum must be taken to an automotive machine shop to have it resurfaced.
Note: Professionals recommend resurfacing the drums each time a brake job is done. Resurfacing will eliminate the possibility of out-front drums. If the drums are worn so much that they can’t be resurfaced without exceeding the maximum allowable diameter, then new ones will be required. At the very least, if you elect not to have the drums resurfaced, remove the glaze from the surface with emery cloth using a swirling motion.
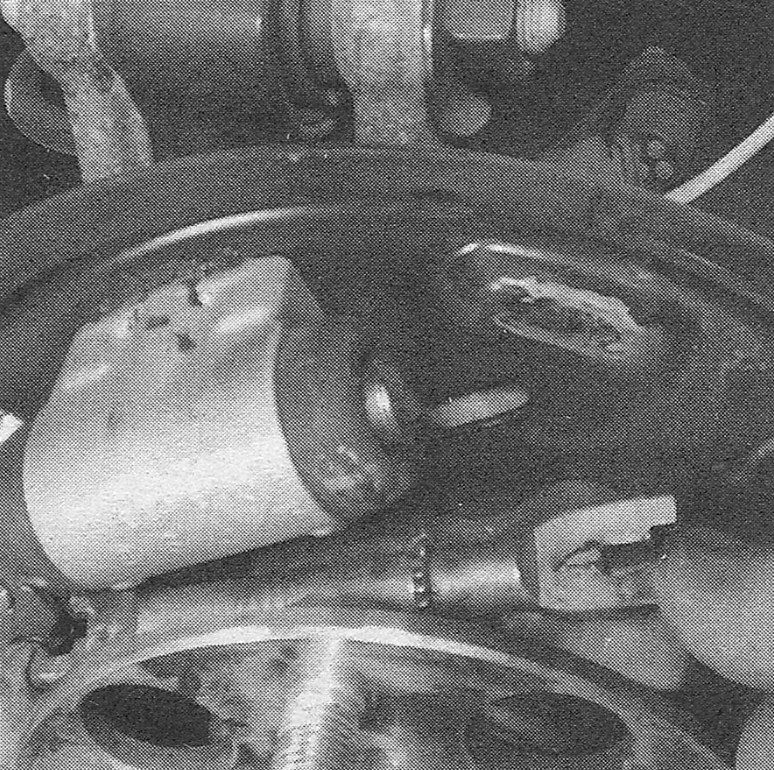
9. Install the brake drum on the hub flange. Using a screwdriver inserted through the adjusting hole in the brake backing plate, turn the adjuster star wheel until the brake shoes drag on the drum as the drum is rotated, then back off the star wheel until the shoes don’t drag. Reinstall the plug in the backing plate.
10. Mount the wheel and install the lug nuts. Lower the vehicle and tighten the lug nuts to the torque listed in the Tune-up and routine maintenance Specifications.
11. Make a number of forward and reverse stops and operate the parking brake to adjust the brakes until satisfactory pedal action is obtained.
12. Check the operation of the brakes carefully before driving the vehicle.
Parking brake shoes (CR-V models)
Warning: The dust created by the brake system is harmful to your health. Never blow it out with compressed air and don’t inhale any of it. An approved filtering mask should be worn when working on the brakes. Do not, under any circumstances, use petroleum-based solvents to clean brake parts. Use brake system cleaner only!
Removal
13. Loosen the rear wheel lug nuts, raise the rear of the vehicle and support it securely on jack stands. Block the front wheels and remove the rear wheels. Release the parking brake.
Warning: Replace the emergency brake shoes as a complete set. DO NOT change only one side. Do both sides or the emergency brake will only work on one wheel.
14. Remove the rear calipers (see Disc brake caliper — removal and installation). Support the caliper assemblies with a coat hanger or heavy wire and don’t disconnect the brake line from the caliper.
15. Remove the rear discs (see Brake disc — inspection, removal and installation).
16. Clean the parking brake assembly with brake system cleaner.
17. Remove the two upper return springs.
18. Push the hold-down clips on the shoes
and turn the pins 90-degrees, then remove the clips.
19. Remove the connecting rod and rod spring.
20. Remove the lower return spring, then pull the leading shoe back and remove the adjuster screw.
21. On the backing plate side of the trailing shoe, use diagonal cutters to pry the U-clip and washer from the top of the shoe.
22. Remove the parking brake lever from the trailing shoe and remove the shoe.
Installation
23. With the backing plate cleaned, apply light dabs of high-temperature grease to the shoe contact areas.
24. Lubricate the parking brake lever pin, then assemble the parking brake lever to the new trailing shoe.
25. Position the trailing shoe against the stationary stop at the top of the backing plate, then insert the hold-down pin through the backing plate and install the hold-down clip.
26. Clean the adjuster bolt and clevis, then lubricate the threads and ends with high-temperature grease.
27. Install the adjuster and lower return spring on each shoe, then position the leading shoe and insert the hold-down pin through the backing plate and install the hold-down clip.
28. Place the rod spring on the connecting rod, then separate the shoes and install the connecting rod.
29. Connect the two upper return springs to the top of each shoe.
30. Install the disc and caliper. Tighten the caliper mounting bolts to the torque listed in this Chapter’s Specifications.
31. Using a screwdriver inserted through the adjusting hole in the disc, turn the adjuster star wheel until the brake shoes drag on the drum as the drum is rotated, then back off the star wheel until the shoes don’t drag.
32. Mount the wheel and install the lug nuts. Lower the vehicle and tighten the lug nuts to the torque listed in the Tune-up and routine maintenance Specifications.
33. Make a number of forward and reverse stops and operate the parking brake to adjust the brakes until satisfactory pedal action is obtained.
34. Check the operation of the brakes carefully before driving the vehicle.