Master cylinder — removal and installation
Removal
1. The master cylinder is located in the engine compartment, mounted to the power brake booster.
2. Remove the air filter housing (see Fuel and exhaust systems).
3. Disconnect the electrical connector from
4. Using a syringe or equivalent, remove the brake fluid from the master cylinder reservoir and dispose of it properly.
Caution: Brake fluid will damage paint. Cover all painted surfaces and avoid spilling fluid during this procedure. If you do spill fluid, wash it off with water immediately.
5. Disconnect the electrical connector from the fluid level sensor on the remote reservoir, then remove the remote fluid reservoir mounting bolt (the reservoir will be removed along with the master cylinder).
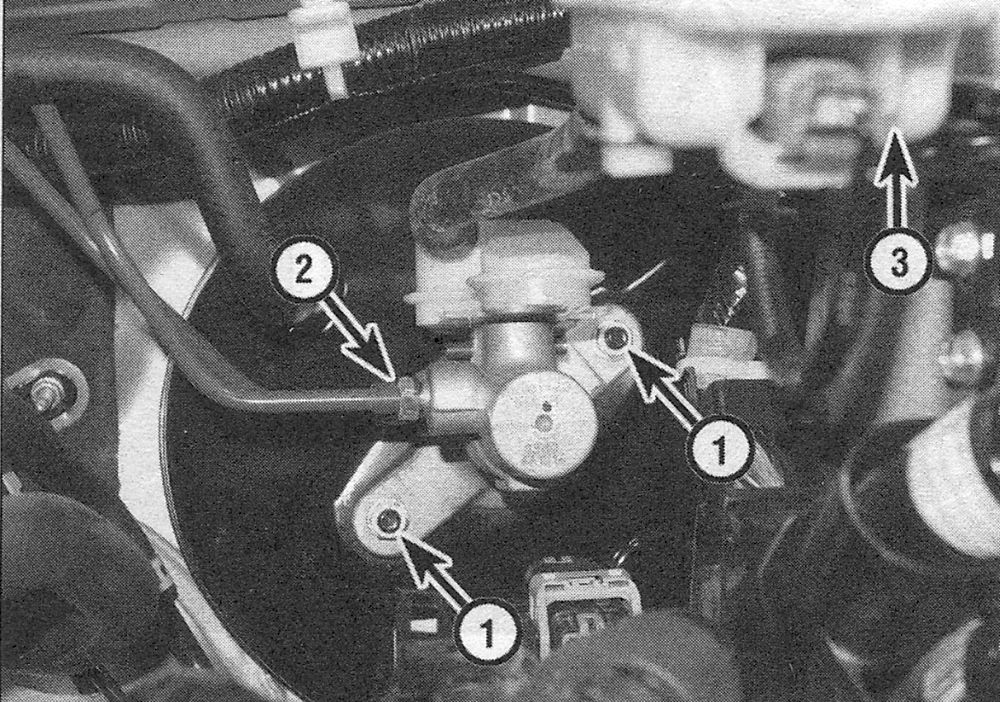
6. Place rags under the fluid fittings and prepare caps or plastic bags to cover the ends of the lines once they are disconnected. Loosen the fittings at the ends of the brake lines where they enter the master cylinder (see illustration). To prevent rounding off the corners on these nuts, the use of a flare-nut wrench, which wraps around the nut, is preferred. Pull the brake lines slightly away from the master cylinder and plug the ends to prevent contamination.
i.6 Master cylinder mounting details
1 Mounting nuts
2 Brake line fitting
7. Remove the mounting nuts from the master cylinder to separate it from the power booster. Pull the master cylinder off the studs and out of the engine compartment. Again, be careful not to spill the fluid as this is done.
8. If a new master cylinder is being installed, remove the reservoir from the master cylinder and transfer it to the new master cylinder.
Installation
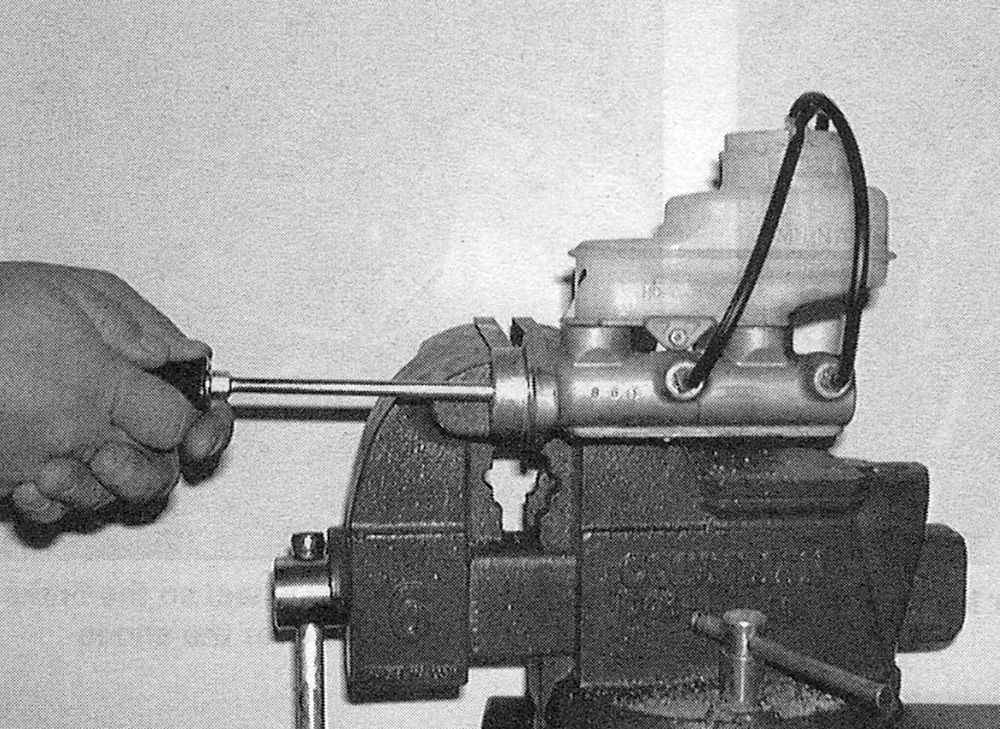
9. Bench bleed the new master cylinder before installing it. Mount the master cylinder in a vise, with the jaws of the vise clamping on the mounting flange.
10. Attach a pair of master cylinder bleeder tubes to the outlet ports of the master cylinder (see illustration).
i.10 The best way to bleed air from the master cylinder before installing it on the vehicle is with a pair of bleeder tubes that direct brake fluid into the reservoir during bleeding
11. Fill the reservoir with brake fluid of the recommended type (see Tune-up and routine maintenance).
12. Slowly push the pistons into the master cylinder (a large Phillips screwdriver can be used for this) — air will be expelled from the pressure chambers and into the reservoir. Because the tubes are submerged in fluid, air can’t be drawn back into the master cylinder when you release the pistons.
13. Repeat the procedure until no more air bubbles are present.
14. Remove the bleed tubes, one at a time, and install plugs in the open ports to prevent fluid leakage and air from entering. Install the reservoir cap.
15. Install a new 0-ring on the master cylinder, then install the master cylinder over the studs on the power brake booster and tighten the attaching nuts only finger-tight at this time.
16. Thread the brake line fittings into the master cylinder. Since the master cylinder is still a bit loose, it can be moved slightly in order for the fittings to thread in easily. Do not strip the threads as the fittings are tightened.
17. Fully tighten the mounting nuts, then the brake line fittings. Tighten the nuts to the torque listed in this Chapter’s Specifications.
18. Fill the master cylinder reservoir with fluid, then bleed the master cylinder. Have an assistant depress the brake pedal and hold the pedal to the floor. Loosen the front fluid line fitting at the master cylinder to allow air and fluid to escape (see illustration). Repeat this procedure on both fittings until the fluid is clear of air bubbles.
i.18 Have an assistant depress the brake pedal and hold it down, then loosen the fitting nut, allowing the air and fluid to escape; repeat this procedure on both fittings until the fluid is clear of air bubbles
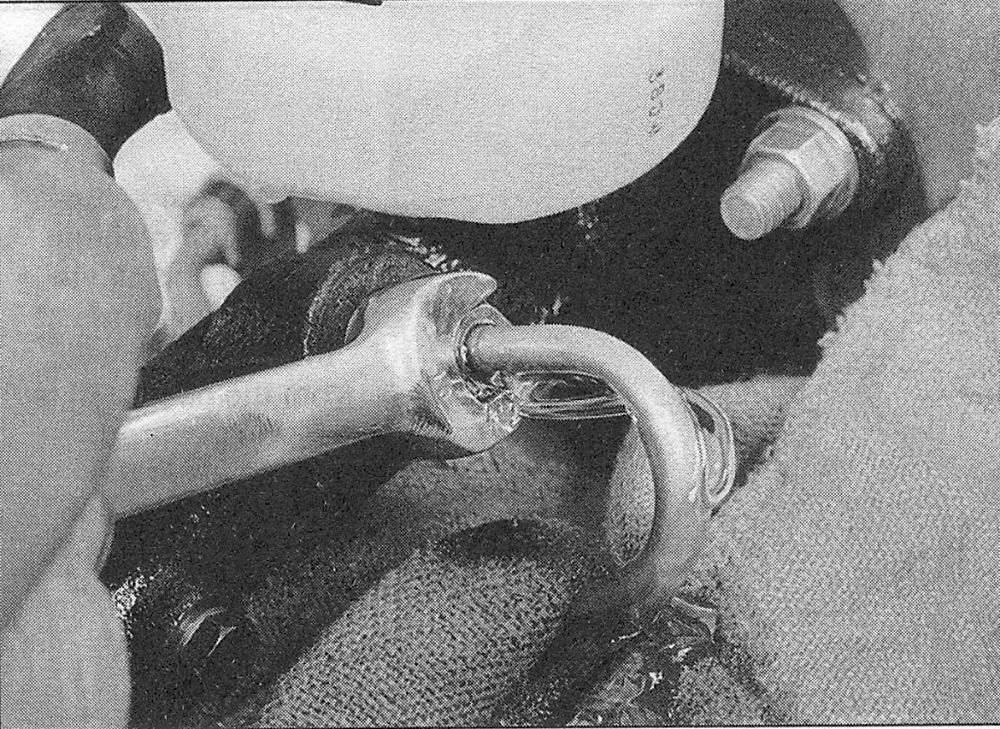
Note: Have plenty of rags on hand to catch the fluid — brake fluid will ruin painted surfaces. After the bleeding procedure is completed, rinse the area under the master cylinder with clean water.
19. Attach the remote fluid reservoir to its bracket and install the bolt, tightening it securely. Reconnect the electrical connector to the fluid level sensor.
20. The remainder of installation is the reverse of removal.
21. Bleed the rest of the brake hydraulic system (see Brake hydraulic system — bleeding).
22. Test the operation of the brake system carefully before placing the vehicle into normal service.
Warning: Do not operate the vehicle if you are in doubt about the effectiveness of the brake system. On models equipped with ABS, it is possible for air to become trapped in the anti-lock brake system hydraulic control unit. If the pedal continues to feel spongy after repeated bleedings or the BRAKE or ANTI-LOCK light stays on, have the vehicle towed to a dealer service department or other qualified shop to be bled with the aid of a scan tool.