Suspension arms (rear) and rear knucle — removal and installation
1. Loosen the rear wheel lug nuts. Raise the rear of the vehicle and support it securely on jack stands. Block the front wheels to prevent the vehicle from rolling. Remove the wheel.
Upper arm
2. If you’re working on a CR-V, detach the ABS wheel speed sensor harness bracket from the upper arm.
3. Support the trailing arm with a floor jack.
Warning: The jack must remain in this position until the arm is reinstalled.
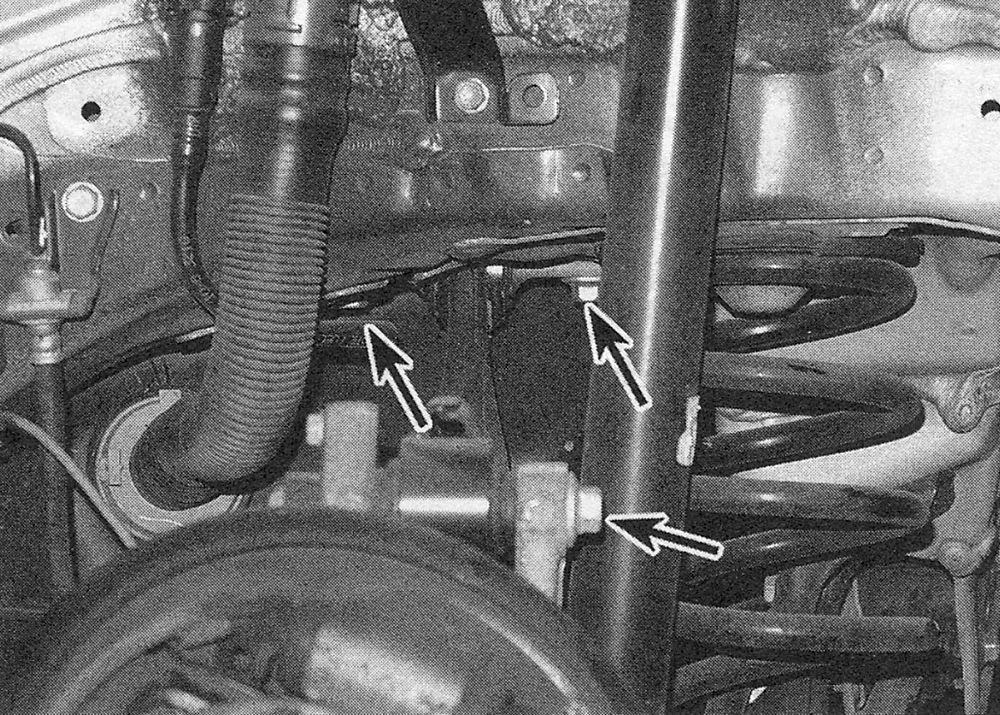
4. Remove the upper arm-to-knuckle bolt,
then remove the bolt (s) from the inner end of the arm (see illustration).
i.4 Upper arm-to-knuckle bolt and inner pivot shaft bolts (Civic model shown)
5. Installation is the reverse of removal, noting the following points:
- ) Before fully tightening the fasteners, raise the trailing arm with the floor jack to simulate normal ride height.
- ) Tighten all fasteners to the torque listed in this Chapter’s Specifications.
- ) Tighten the wheel lug nuts to the torque listed in the Tune-up and routine maintenance Specifications.
Trailing arm
6. Support the trailing arm with a floor jack.
7. Unbolt the brake hose and ABS sensor mounting brackets.
8. Remove the rear undercarriage splash shield (if applicable).
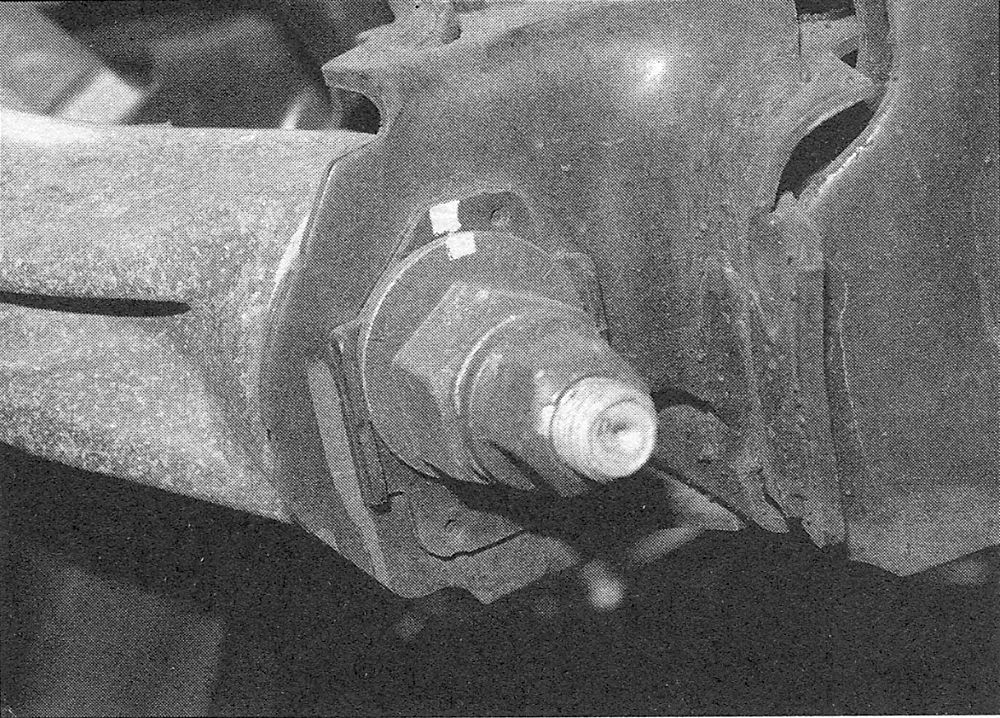
9. Mark the relationship of the toe adjusting cam on the trailing arm-to-knuckle bolt (see illustration).
i.9 Mark the toe adjusting came to the trailing arm
10. Remove the lower shock absorber bolt.
11. Remove the trailing arm-to-knuckle bolts, then disconnect the arm from the knuckle. Note: Suspend the knuckle with a bungee cord or piece of wire.
12. Disconnect the stabilizer bar link from the trailing arm (see Stabilizer bar and bushings (rear) — removal, inspection and installation).
13. If you’re working on a Civic model, remove the shock absorber lower mounting bolt, then remove the trailing arm-to-chassis front mounting bolts. Slowly lower the floor jack and remove the coil spring.
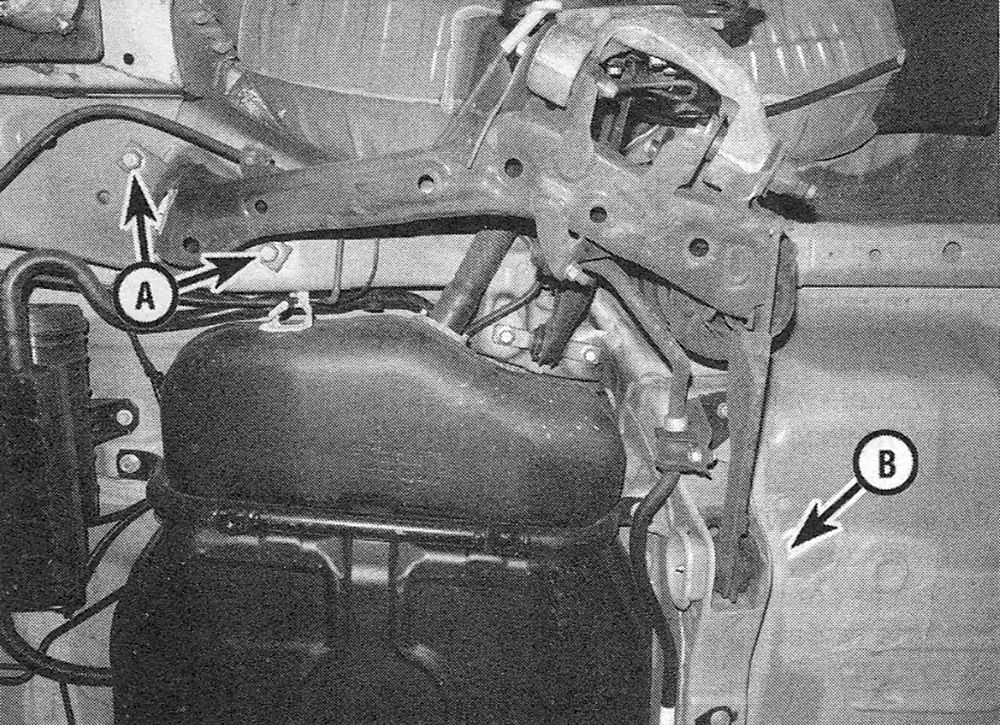
14. Remove the trailing arm-to-chassis front mounting bolts (CR-V models), then remove the trailing arm-to-chassis pivot bolt (see illustration).
i.14 Trailing arm- to-chassis front mounting bolts (A) and rear pivot bolt (B)
15. Remove the trailing arm.
16. Installation is the reverse of removal, noting the following points:
- ) Align the mark you made on the adjuster cam with the mark on the trailing arm.
- ) Before fully tightening the fasteners, raise the trailing arm with the floor jack to simulate normal ride height.
- ) Tighten all fasteners to the proper torque
- ) Tighten the wheel lug nuts to the torque listed in the Tune-up and routine maintenance Specifications.
- ) Have the rear wheel alignment checked and, if necessary, adjusted.
Rear knuckle
17. If you’re working on an AWD CR-V model, remove the drive axle/hub nut.
18. Remove the brake drum or brake caliper and disc (see Brakes).
19. Remove the parking brake shoes (if equipped), wheel speed sensor and parking brake cable (see Brakes).
20. Support the trailing arm with a floor jack, then disconnect the suspension arms from the knuckle.
21. Remove the rear wheel bearing hub assembly (see Hub and bearing assembly (rear) — removal and installation).
22. On drum brake models, remove the brake backing plate with the brake shoes attached.
23. Remove the upper and lower fasteners for the knuckle to the upper arm and trailing arm. Be sure to mark the cam bolt position before removing it.
24. Installation is the reverse of removal, noting the following points:
- ) Before fully tightening the suspension arm fasteners, raise the trailing arm with a floor jack to simulate normal ride
- ) Align the matchmarks on the toe adjusting cam (see Hub and bearing assembly (rear) — removal and installation).
- ) Tighten all fasteners to the proper torque
- ) Tighten the caliper mounting bolts to the proper torque settings.
- ) It won’t be necessary to bleed the brakes unless a hydraulic fitting was loosened.
- ) Have the rear wheel alignment checked and, if necessary.