Steering gear — removal and installation
Warning: Make sure the steering shaft is not turned while the steering gear is removed or you could damage the clock spring for the airbag system. To prevent the shaft from turning, place the ignition key in the lock position or thread the seat belt through the steering wheel and clip it into place.
Removal
1. Park the vehicle with the front wheels pointing straight ahead. Loosen the front wheel lug nuts, raise the front of the vehicle and support it securely on jack stands. Apply the parking brake and remove the wheels.
2. Disconnect the cable from the negative terminal of the battery (see Engine electrical systems).
3. Mark the relationship of the universal joint to the steering gear input shaft and the intermediate shaft. Remove the universal joint pinch bolts and separate the shafts from the joint.
4. Remove the undercarriage trim panels.
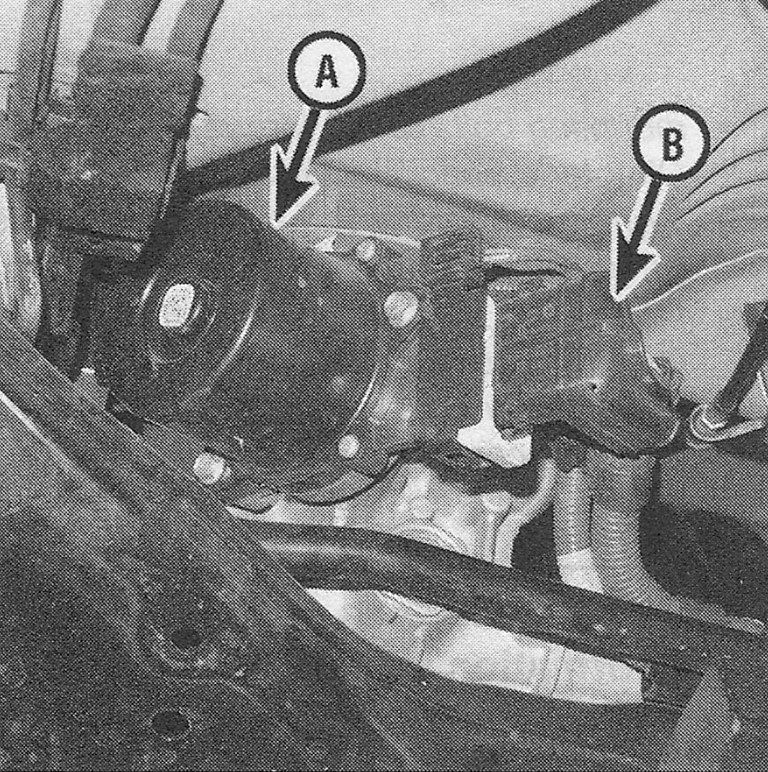
5. Working at the steering gear, remove the bracket securing the power steering motor electrical connector, then disconnect the connector (see illustration).
i.5 EPS steering motor and electrical connector
A EPS motors
B EPS electrical connector
6. Remove the fasteners securing the power steering motor, then remove the motor.
7. Separate the tie-rod ends from the steering knuckles (see Tie-rod ends — removal and installation).
8. Disconnect the electrical connector for the steering gear, then separate the connector mounting bracket. Remove the ground connection at the steering gear.
9. Working in the engine compartment, separate the engine wire harness from the mounting brackets securing it to the firewall.
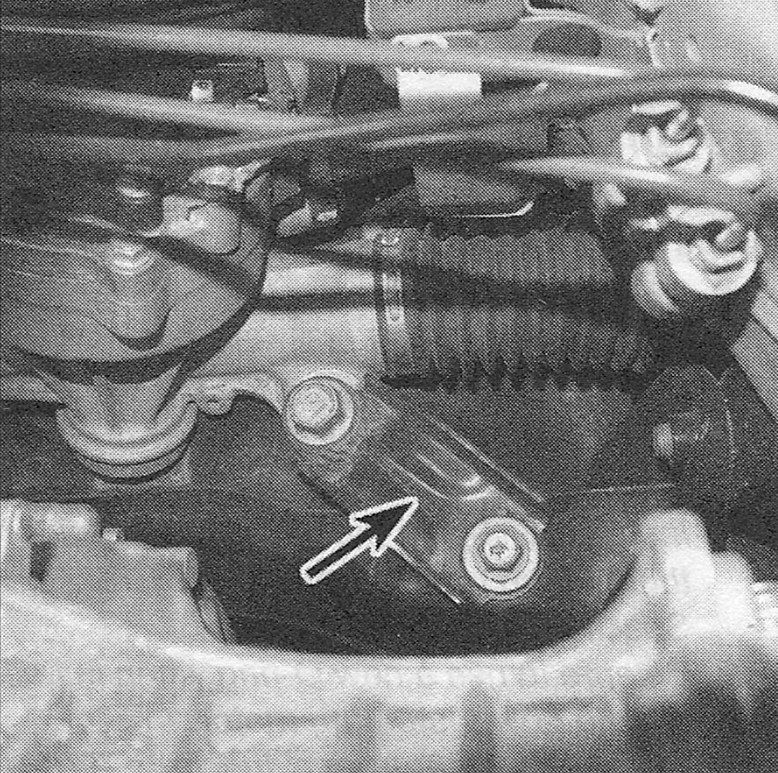
10. Remove the steering gear brackets (see illustration) (same on both sides).
i.10 Steering gear bracket location ( passenger’s side not shown)
11. Remove the steering gear mounting nuts and bolts, then pull on the steering gear to release it from the right-side mounting stud.
12. Lower the steering gearbox, then rotate the steering gear so that the input shaft is pointing upward. Carefully guide the steering gear assembly through the right wheel opening, then raise the left side of the steering gear up through the engine compartment and remove it from the vehicle
13. Installation is the reverse of removal, noting the following points:
- ) Raise the steering gear into position and connect the U-joint, aligning the marks.
- ) Install the mounting bolts and nuts and tighten them to the torque listed in this Chapter’s Specifications.
- ) Install the U-joint pinch bolts and tighten them to the torque listed in this Chapter’s
- ) Be sure to use a new 0-ring when installing the power steering motor.
- ) Install the wheels and lug nuts. Lower the vehicle, then tighten the lug nuts to the torque listed in the Tune-up and routine maintenance Specifications
- ) Have the front wheel alignment checked and, if necessary, adjusted.