Subframe — removal and installation
Warning: The manufacturer recommends replacing the subframe bolts with new ones whenever they are removed.
Removal
1. Disconnect the cable from the negative battery terminal (see Engine electrical systems).
2. Loosen the front wheel lug nuts, raise the front of the vehicle and support it securely on jack stands. Remove both front wheels.
Note: The jack stands must be behind the front suspension subframe, not supporting the vehicle by the subframe.
3. Remove the under-vehicle splash shields (see 1.8L single overhead camshaft (SOHC) engine, illustrations 14.3a and 14.3b)
4. Remove the front section of the exhaust system (see Emissions and engine control systems).
5. Disconnect the stabilizer bar links from the control arms (see Stabilizer bar and bushings (front) — removal, inspection and installation).
6. Disconnect the control arms from the steering knuckles (see Control arm (front) — removal and installation).
7. On automatic transaxle models, disconnect the shift control cable from the transaxle (see Automatic transaxle).
8. Using two floor jacks, support the sub- frame. Position one jack on each side of the subframe, midway between the front and rear mounting points.
9. Attach an engine support fixture or a hoist to the engine with a length of heavy-duty chain. If the engine is equipped with lifting brackets, use them. If not, you’ll have to fasten the chain to some substantial part of the engine — one that is strong enough to take the weight, but in a location that will provide good balance. If you’re attaching the chain to a stud on the engine, or are using a bolt passing through the chain and into a threaded hole, place a washer between the nut or bolt head and the chain, and tighten the nut or bolt securely. Take up the slack in the chain, but don’t lift the engine.
Warning: DO NOT place any part of your body under the engine when it’s supported only by a hoist or other lifting device.
10. Remove the torque rod-to-subframe bolt.
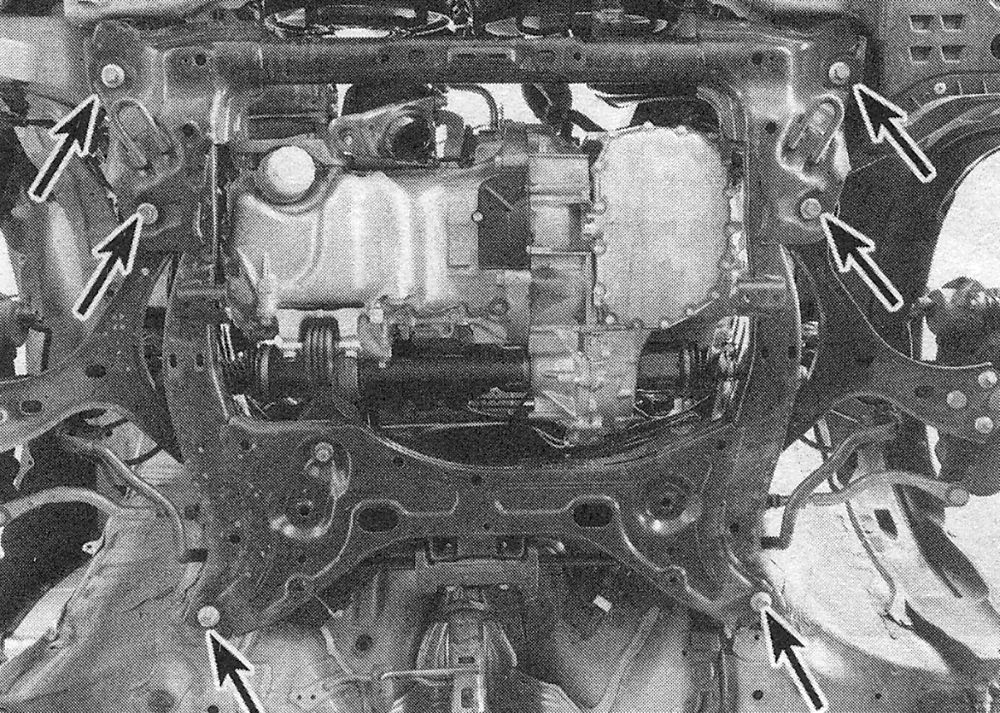
11. Make alignment marks from each corner of the subframe to the vehicle body. With the jacks sufficiently supporting the subframe, remove the subframe-to-chassis mounting bolts (see illustrations).
i.11a Subframe bolts (A, except middle bolts) and torque rod bolt (B) (Coupe and Sedan models shown, CR-V similar)
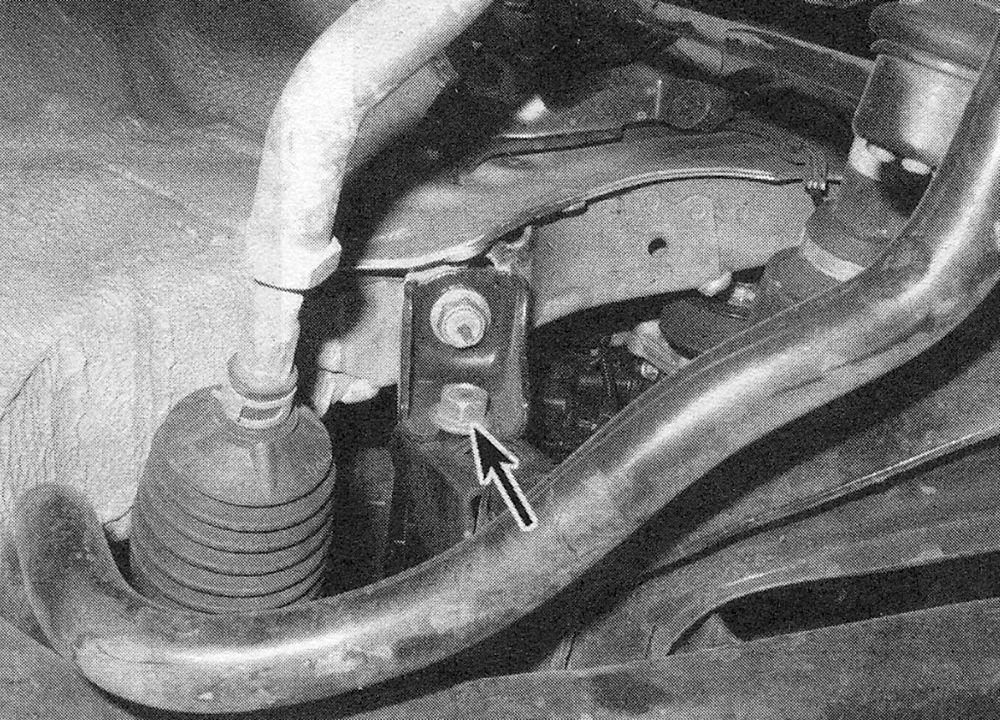
i.11b Subframe middle bolt (right side shown, left side identical)
12. Slowly lower the jacks, making sure nothing is still attached to the subframe.
Installation
13. Installation is the reverse of removal, noting the following points:
- ) Replace the subframe bolts with new Align the reference marks on the subframe, then tighten the subframe mounting bolts to the torque listed in this Chapter’s Specifications.
- ) Tighten the torque rod bolt to the torque listed in the 1.8L single overhead camshaft (SOHC) engine Specifications.
- ) Reconnect the negative battery cable (see Engine electrical systems).
- ) Have the front-end alignment checked and, if necessary, adjusted.