Door latch, lock cylinder and handles — removal and installation…
Caution: Wear gloves when working inside the door openings to protect against cuts from sharp metal edges.
Note: All door lock rods are attached by plastic clips. The plastic clips can be removed by unsnapping the portion that clips around the connecting rod, then pulling the rod out of its locating hole. On models with power door locks, disconnect the electrical connectors at the latch.
Door latch
1. Raise the window, then remove the door trim panel and water shield (see Door trim panels — removal and installation).
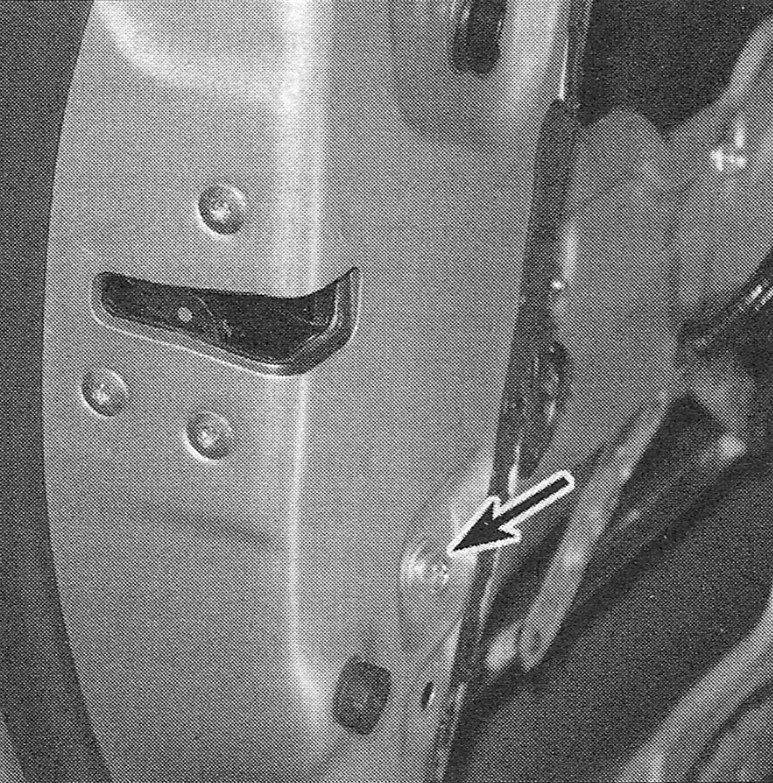
2. Pry the rear window guide track lining out of the rear guide track. Then, remove the single bolt securing the rear window guide track (see illustration). Remove the guide track from the door.
i.2 Rear window track retaining bolt
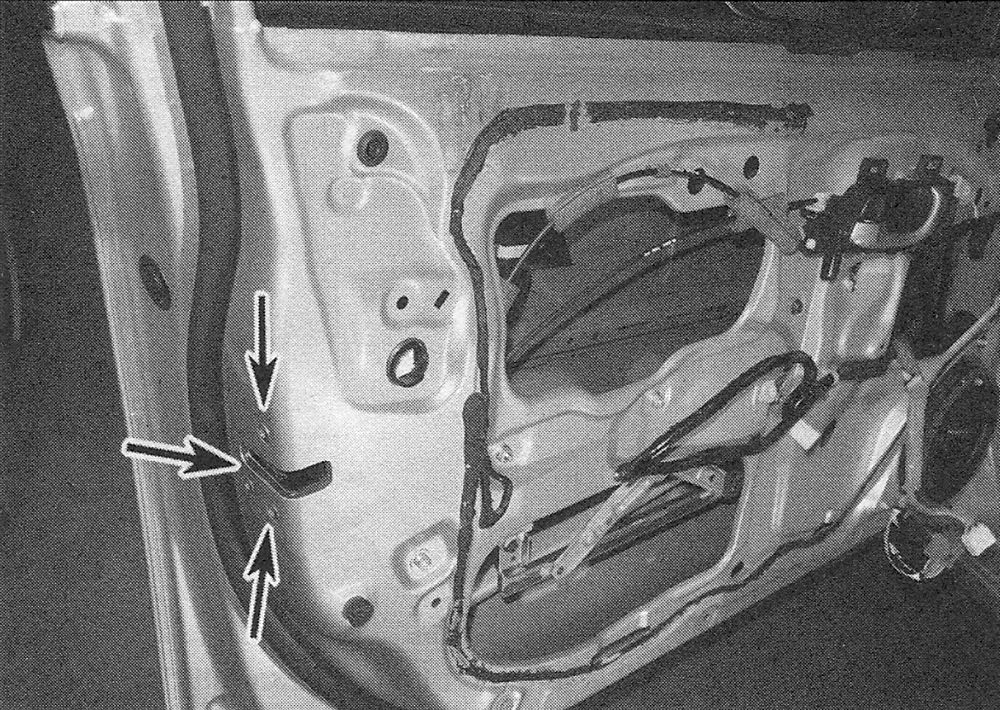
3. Remove the release cables from the door cable clips. Then remove the three screws securing the door latch to the door (see illustration).
i.3 Remove the latch screws from the end of the door
4. Slide the latch downward to release the outside latch handle actuator rod.
5. On the actual latch, open up the latch protector door. Disconnect the cables from the latch assembly.
6. Remove the latch.
7. Installation is the reverse of removal.
Outside handle and door lock cylinder
8. To remove the outside handle and lock cylinder assembly, raise the window and remove the door trim panel and watershield (see Door trim panels — removal and installation).
9. Working from the rear edge of the door remove the plastic protector cap that hides the lock cylinder bolt.
10. Remove the door lock cylinder by pulling straight away from the door handle.
11. Working from inside the door release the clip securing the door latch actuator rod to the outside door handle.
12. From the inside of the door, remove the outside handle retaining fastener.
13. Now pull the rear section of the door handle back to release the rear section, then pivot the rear section away from the door to free the front section. Remove the handle.
14. Installation is the reverse of removal.
Inside handle
15. Remove the door panel trim (see Door trim panels — removal and installation).
16. Pull the inside door handle to the rear to release the retaining hooks. (The retaining screw should already have been removed when you removed the door trim panel.)
17. Remove the cable from the inside door handle and remove the handle.
18. Installation is the reverse of removal.