Interior trim components — removal and installation
Sun visor
1. Use a small flat bladed screwdriver to push in the tab on the swivel base of the visor. Then, rotate the visor base 45 degrees to align the tab with the slot in the roof. Pull down while turning to release the sun visor from the roof.
2. If the tab is not completely lined up the sun visor will not come down. Rotate the sun visor back and forth to find the exact location of the tab. The actual tab location is hidden by the sun visor mounting trim and you won’t be able to see it until the sun visor is actually removed.
3. Disconnect the electrical connector and remove the sun visor.
4. To install, reattach the electrical connector and align the notch in the slot to the tab of the visor, then push up firmly and rotate 45 degrees.
Sun visor hook
5. Remove the visor from the hook.
6. Grasp the hook and rotate it counter- clockwise 45 degrees to remove it.
7. To install, align the tab to the slot, then push up firmly and rotate it clockwise 45 degrees.
Rear parcel shelf
8. Remove the rear seat cushion and seat back (see Seats — removal and installation).
9. Open the trunk and disconnect the high mounted brake light.
10. Detach the quarter panel trim pieces on both sides and detach the shelf trim panel.
11. Installation is the reverse of the removal procedure.
A pillar
12. Pull the rubber door seal down far enough to expose the entire A pillar trim.
13. Remove the headliner upper door trim panel.
14. Apply outward pressure to free the pressure clips while applying upward pressure to remove the A pillar trim.
15. Installation requires removing the upper clip from the body. Press in on the top and bottom clips. Reattach the upper clip to the A pillar trim. Then install the A pillar trim back into place.
B pillar
16. Start by removing the lower B pillar trim first.
Note: 2013 models have two different shaped lower B pillar trim panels, depending on the interior configuration for the four-door or two-door models.
Both come off in relatively the same way.
17. Remove the door sill trim panels.
18. Pull the rubber door seals down far enough to expose the entire upper and lower B pillar trim.
19. Remove the coat hanger hooks and the headliner upper door trim panel.
20. Slide the front seats as far forward as possible.
21. Grasp the edges of the lower B pillar trim and pull it off of the retaining clips.
22. Remove the trim cap from the shoulder seat belt mount.
23. Remove the bolt securing the shoulder seat belt to the B pillar.
24. Grasp the upper B pillar trim and pull the bottom section away from the body. Then pivot the upper B pillar trim upward to disengage the upper hook.
25. Remove the upper B pillar trim.
26. Installation is the reverse of removal.
C pillar
27. Grasp the C pillar trim by the lower (or upper) edges and pull straight off.
28. Before reinstalling, check for any of the pressure snap clips that have separated from the C pillar trim. Reattach them to the trim panel and press back into place.
Quarter panel trim
29. Remove the rear seat (see Seats — removal and installation).
30. Remove the rear seat shoulder seat belt mounting bolts.
31. Remove the coat hanger hooks.
32. Remove the headliner rear upper door trim panels.
33. Remove the square button and fastener mounted on the quarter trim panel.
34. Pull the quarter panel trim off by applying pressure along the edges to release the pressure snap connectors.
35. Installation is the reverse of removal.
Door sill plate trim
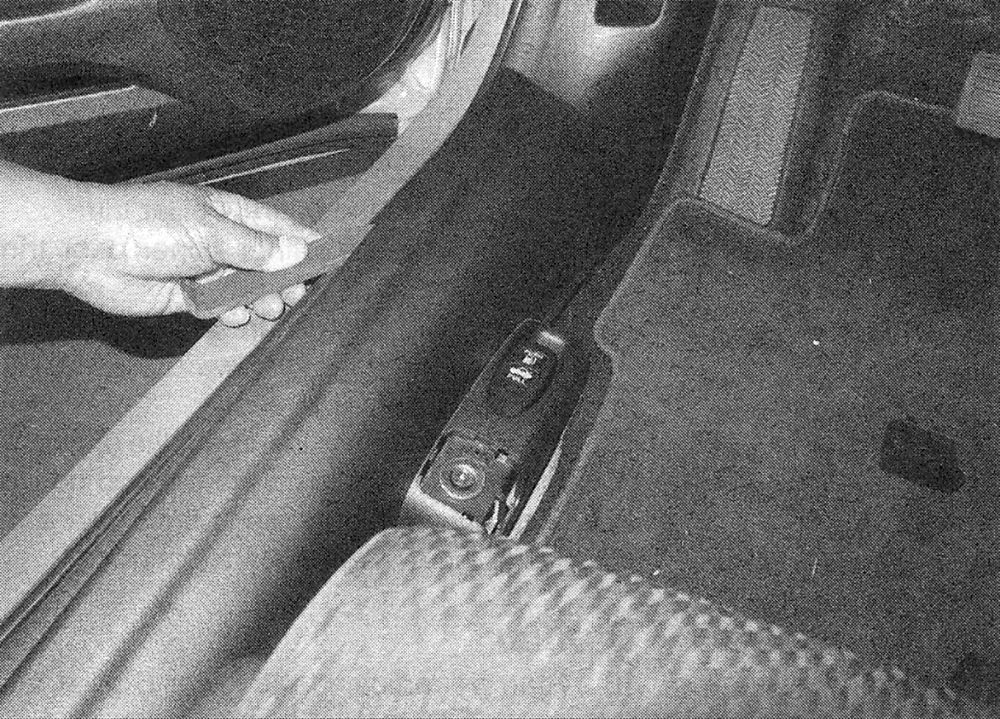
36. Remove the rubber door seal by pulling it off. Then, using a flat bladed trim tool, pry upward to disengage the plastic pressure snap clips (see illustration).
i.36 Pry up on the sill plate to remove it
37. On models with a locking gas cap door, remove the trim over the lock cylinder and remove the lock cylinder by lifting it up (a slight twist may be needed). Then remove the screw securing the sill plate trim to the body (see illustration).
i.37 Remove the lock trim cover, then remove the screw (A)
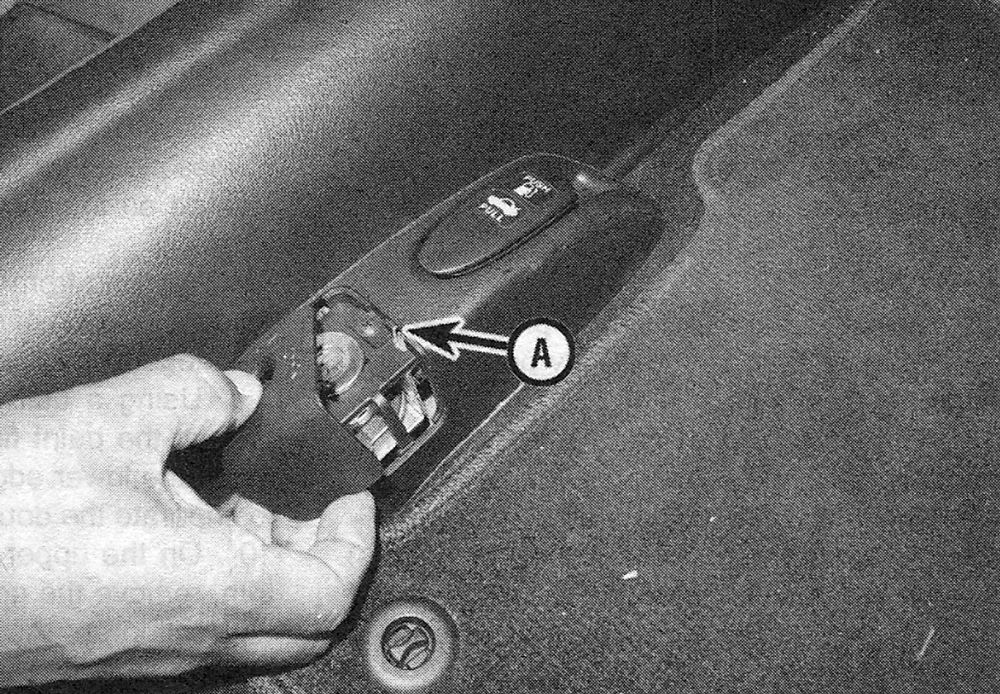
Note: On four-door models, flip the seat bottom out of the way to gain full access to the door sill trim plate.
38. Installation is the reverse of removal.
Kick panel
39. Remove the sill plate trim panel.
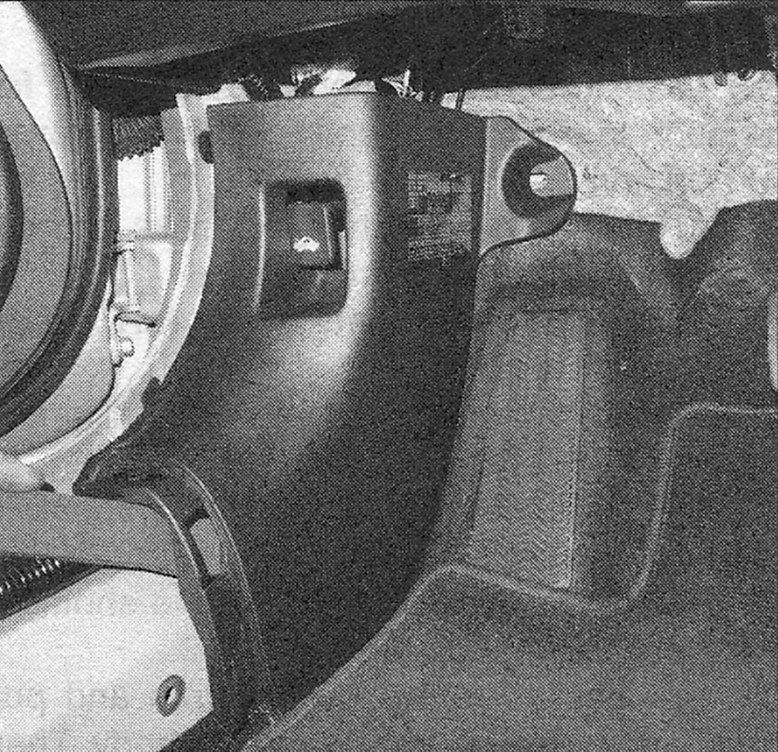
40. Pull or pry the edge of the panel until the clips are disengaged and remove the panel (see illustration).
i.40 Pry the kick panel plate out to remove
41. Installation is the reverse of removal.
Grab handles
42. With the grab handle in the down position, look for two small holes on either side of the grab handle trim cap. Insert the appropriate fitting tool in each side and pull from both sides at the same time to remove the grab handle.
Note: It may take some force to actually remove the grab handle. There are no screws securing the handle to the roof, only the pressure of the retaining clips.
43. To remove the retaining clips, press inward on the top and bottom edges of the clips and pull the clip straight out.
Dash end trim panels
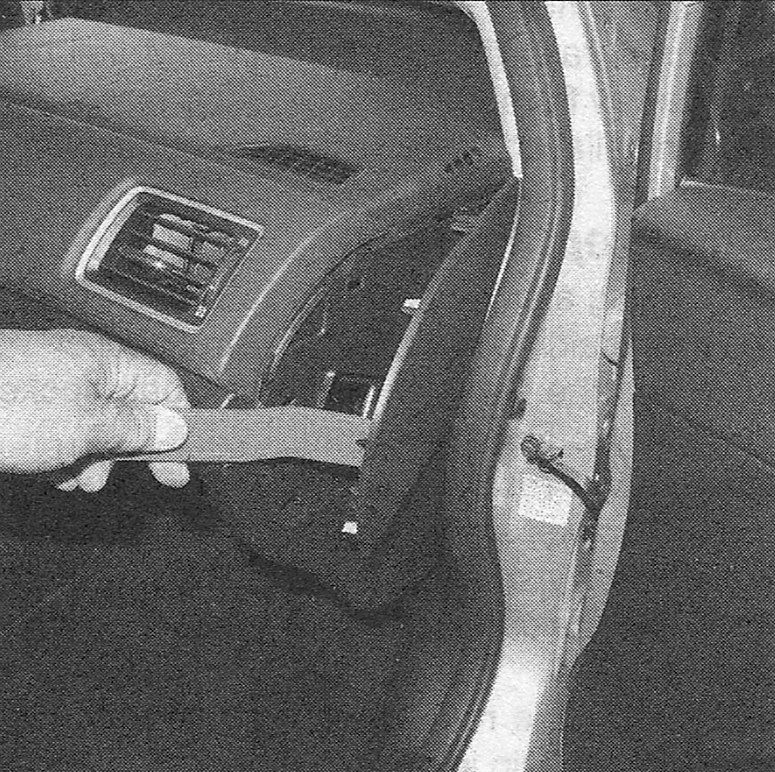
44. Using a flat bladed trim tool pry the dash end trim panels off (see illustrations).
i.44a Driver’s side end trim panel removal
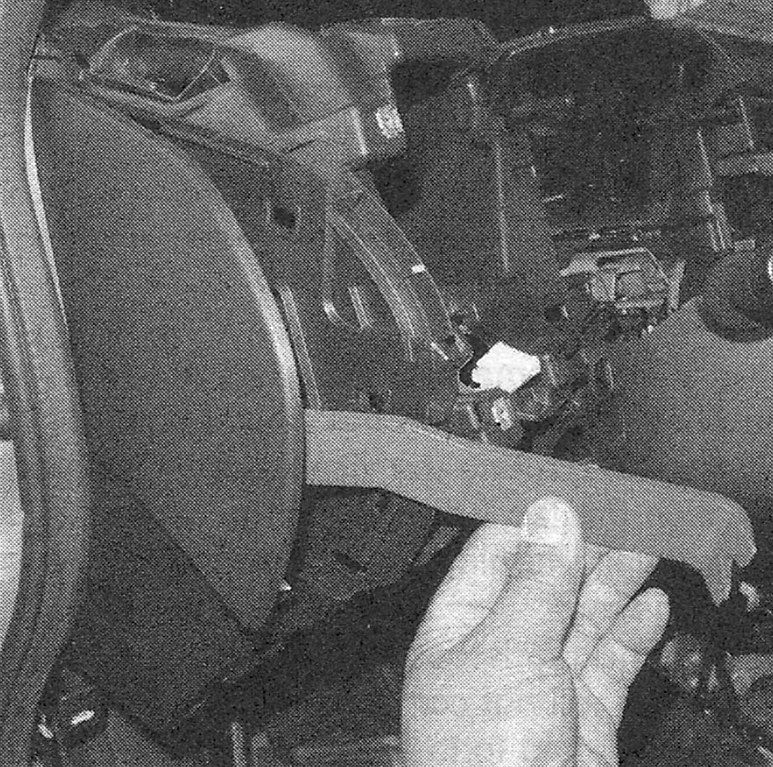
i.44b Passenger side end trim panel removal
Headliner
Warning: All models covered by this manual are equipped with a Supplemental Restraint System (SRS), more commonly known as airbags. Always disable the airbag system before working in the vicinity of any airbag system component to avoid the possibility of accidental deployment of the airbag, which could cause personal injury (see Chassis electrical system).
45. Disconnect the negative battery terminal (see Engine electrical systems).
46. Remove the dome light fixtures (see Chassis electrical system).
47. Remove the A pillar trim
48. Remove the B pillar trim.
49. Remove the headliner trim above each door as well as the grab handles.
50. Remove the C pillar or quarter panel trim (depending on which model you’re working on).
Note: On the four-door models remove the seat bolster trim. (This is the trim between the seat and the C pillar.) Pull the trim off by grasping the edges and pull straight off.
51. Remove sun visors.
52. Slide the front seats as far back as possible and tilt the back as far as possible.
53. Lower the headliner far enough to gain access to the electrical connectors. Disconnect the electrical connectors.
Note: According to the manufacturer’s removal descriptions, on some models the electrical connectors to the overhead wiring harnesses are in the kick panel area. Most are behind the headliner. If applicable, remove the kick panels to disconnect the electrical leads to the headliner harness.
54. Tilt the headliner down in the front and slide it out through the passenger front door.
55. Installation is the reverse of removal.