Disc brake pads — replacement
Warning: Disc brake pads must be replaced on both front or rear wheels at the same time -never replace the pads on one side. Also, the dust created by the brake system is harmful to your health. Never blow it out with compressed air and don’t inhale any of it. An approved filtering mask should be worn when working on the brakes. Do not, under any circumstances, use petroleum-based solvents to clean brake parts. Use brake system cleaner only!
Note: This procedure applies to front and rear disc brakes.
1. Remove the cap from the brake fluid reservoir.
2. Loosen the wheel lug nuts, raise the front, or rear, of the vehicle and support it securely on jack stands.
3. Remove the front, or rear, wheels. Work on one brake assembly at a time, using the assembled brake for reference if necessary.
4. Inspect the brake disc carefully as outlined in Brake disc — inspection, removal and installation. If machining is necessary, follow the information in that section to remove the disc, at which time the calipers and pads can be removed as well.
Front pads
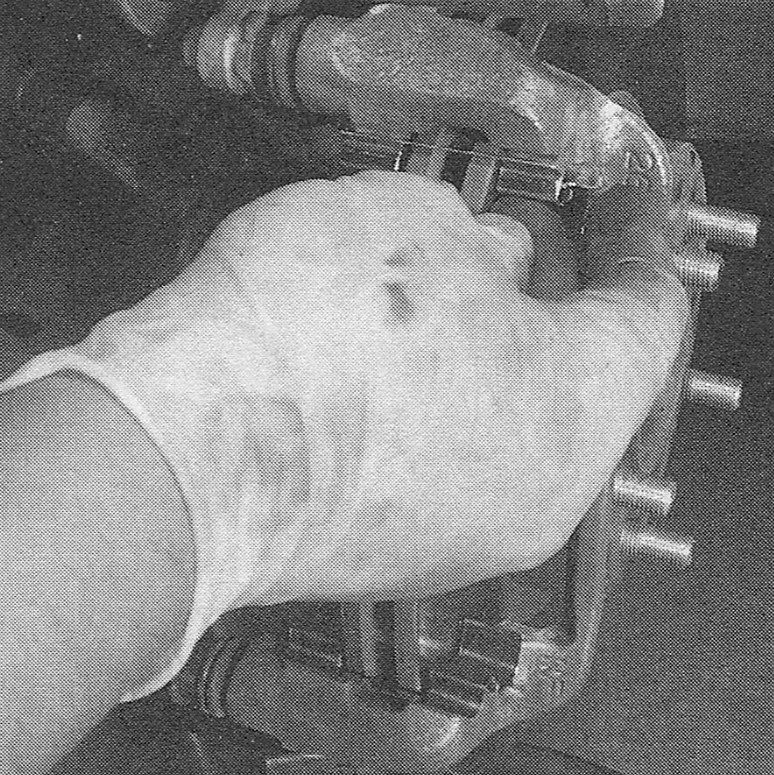
5. Push the piston back into the bore to pro-vide room for the new brake pads. A C-clamp can be used to accomplish this (see illustration). As the piston is depressed to the bottom of the caliper bore, the fluid in the master cylinder will rise. Make sure it doesn’t overflow. If necessary, siphon off some of the fluid.
i.5 Using a large C-clamp, push the piston back into the caliper — note that one end of the clamp is on the back side of the caliper and the other end (screw end) is pressing on the outer brake pad (front caliper shown, rear calipers similar). DO NOT press the rear calipers in with a C-clamp on the Civic models
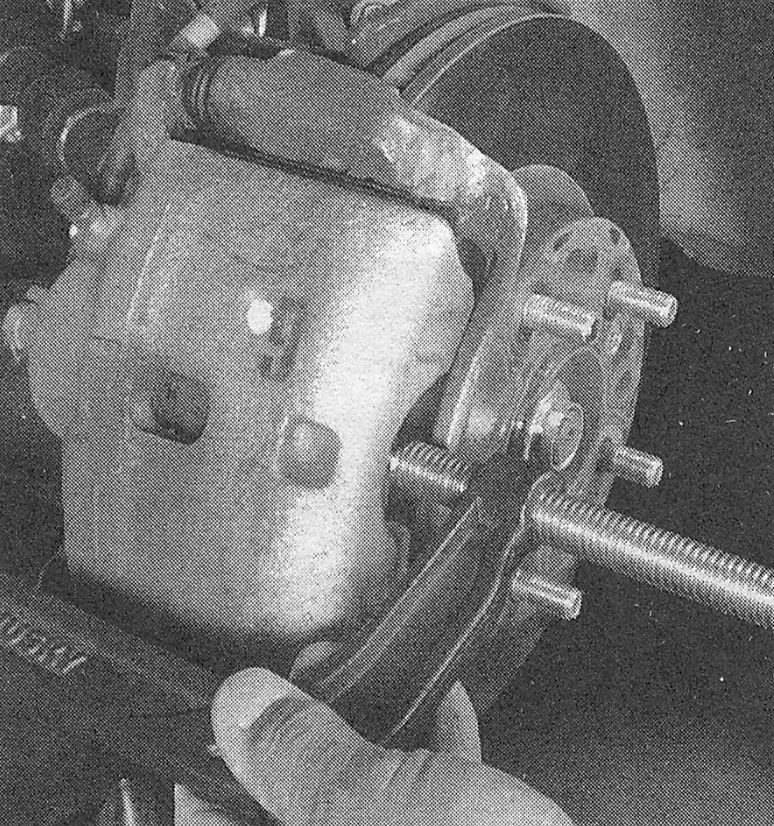
Note: There are a variety of caliper press clamps available. Some require removing the caliper and using the old brake pad as a backing plate in order to squeeze the caliper piston back in, while others have two plates that spread apart to squeeze the piston. The method shown was used because it is the most common type of tool that most home garages would have on hand that will sufficiently perform the task.
6. Follow the accompanying illustrations, beginning with 3.6a, for the actual pad replacement procedure. Be sure to stay in order and read the caption under each illustration.
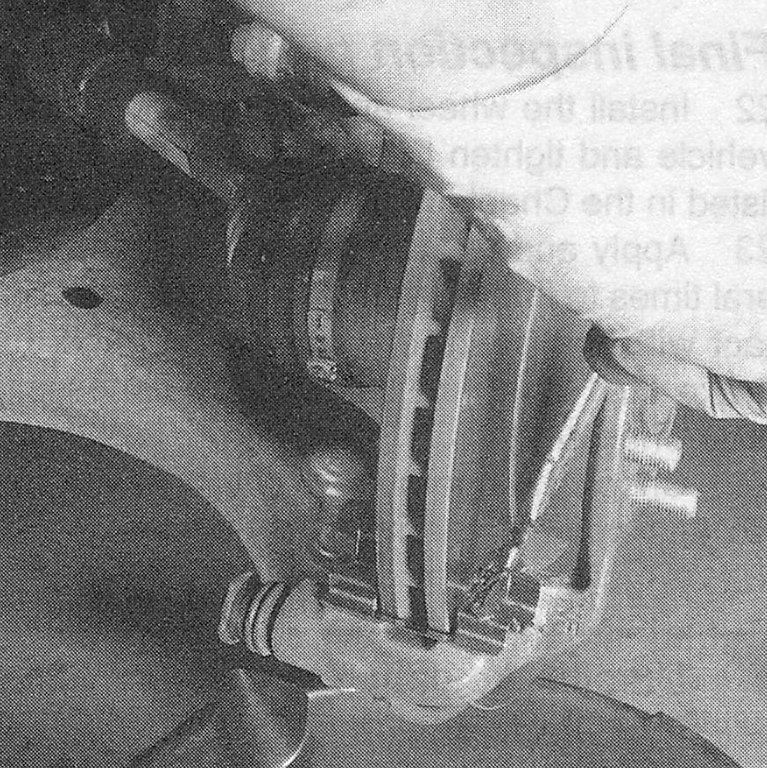
i.6a Before re removing anything, spray the assembly with brake system cleaner to remove the dust produced by brake pad wear — DO NOT blow the dust off with compressed air!

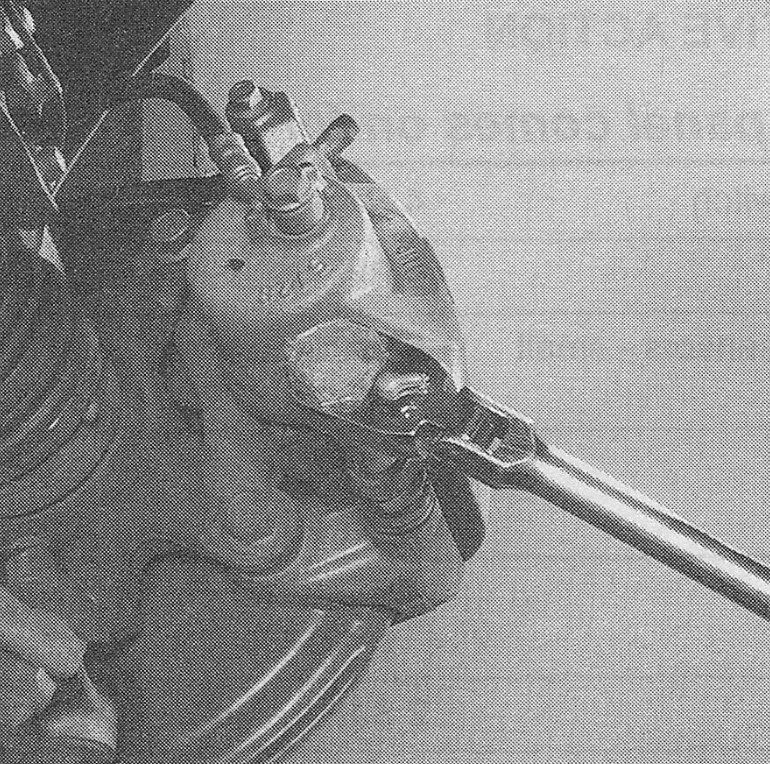
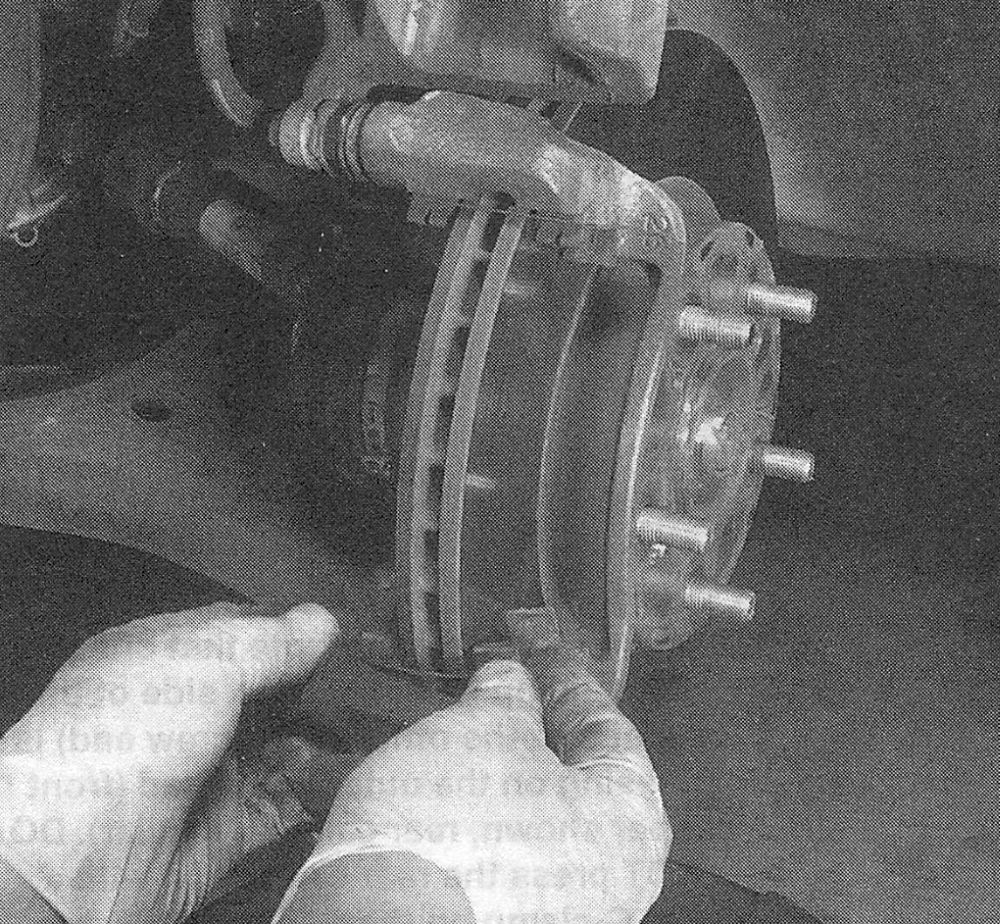
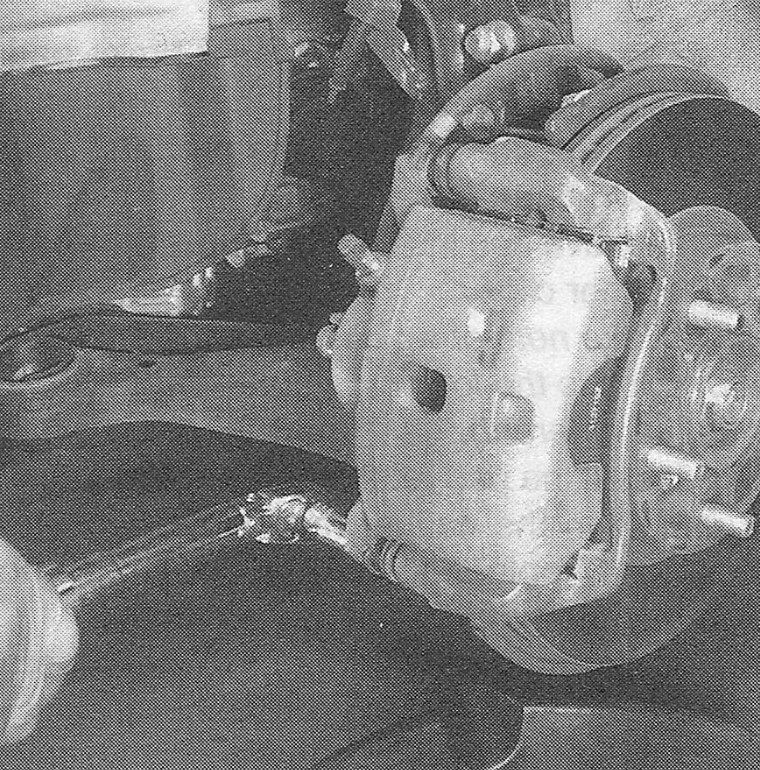
i.6b Remove the caliper lower mounting bolt …
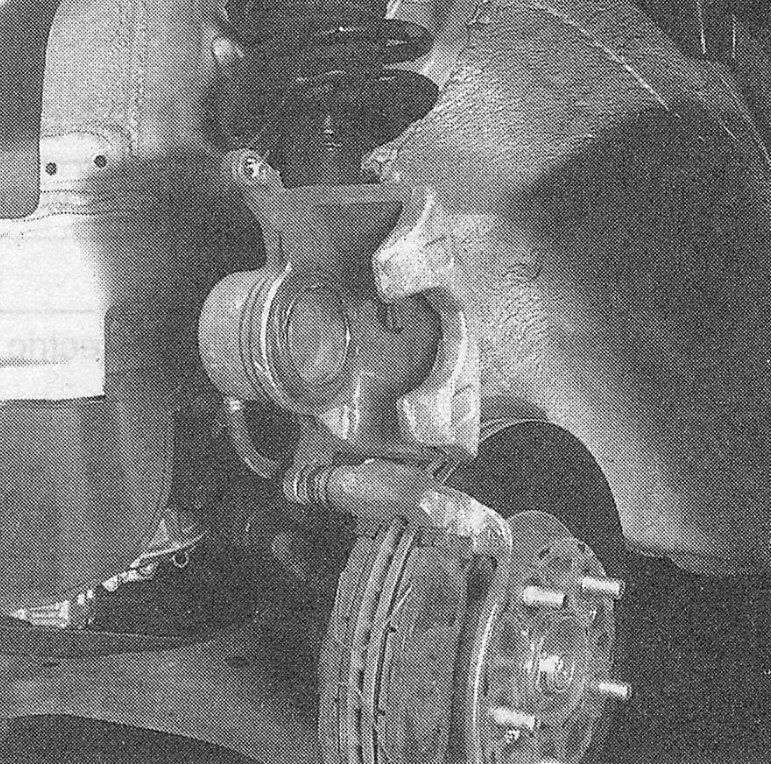
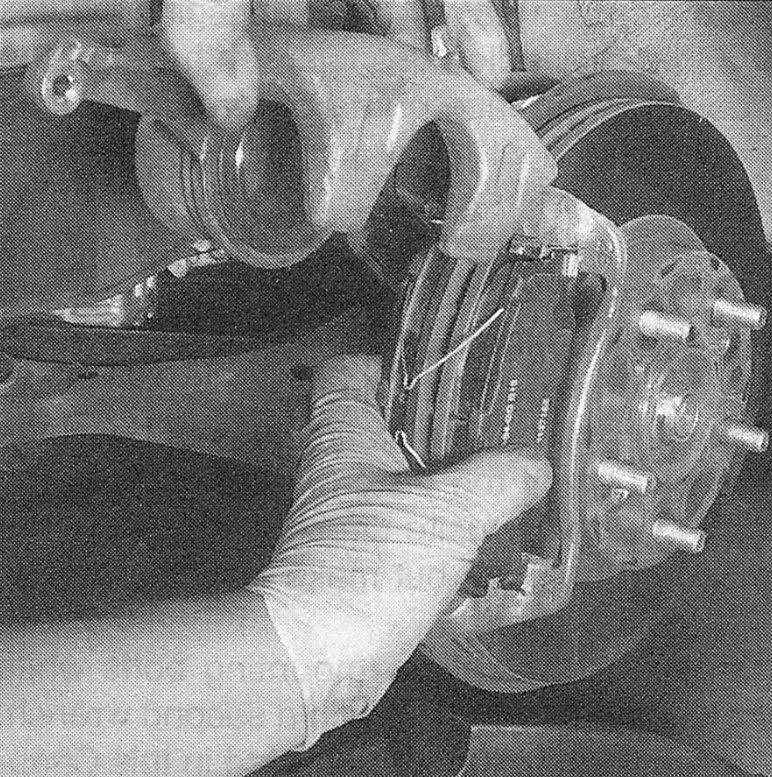
i.6c. then swing the caliper up and secure it to the strut with a piece of wire
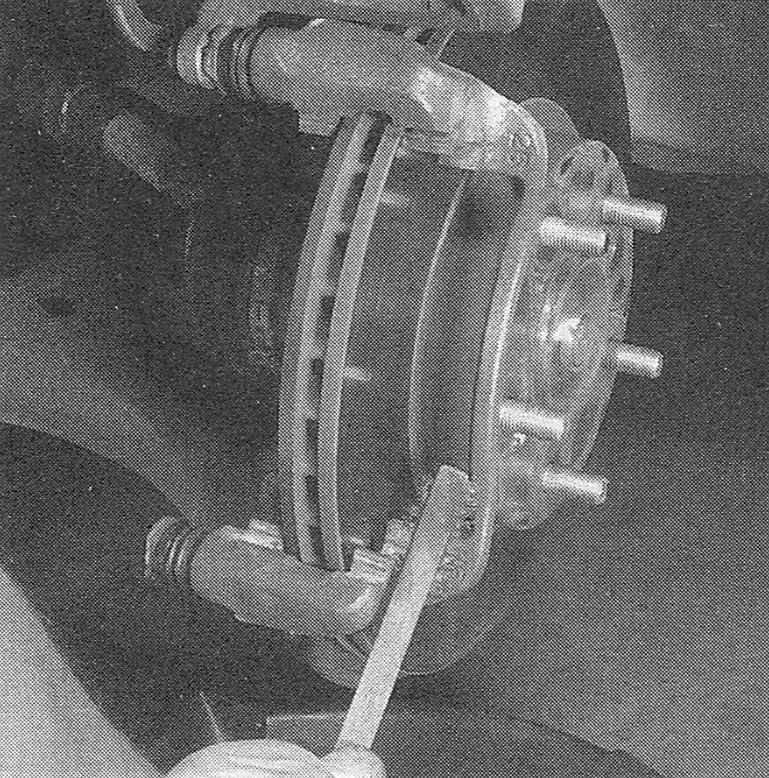
i.6d Remove the return springs
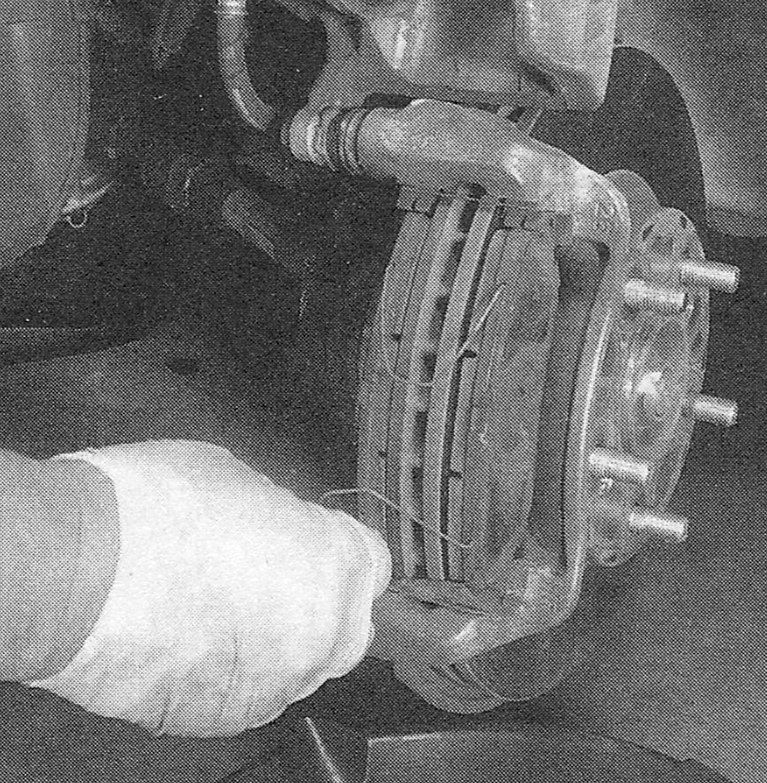
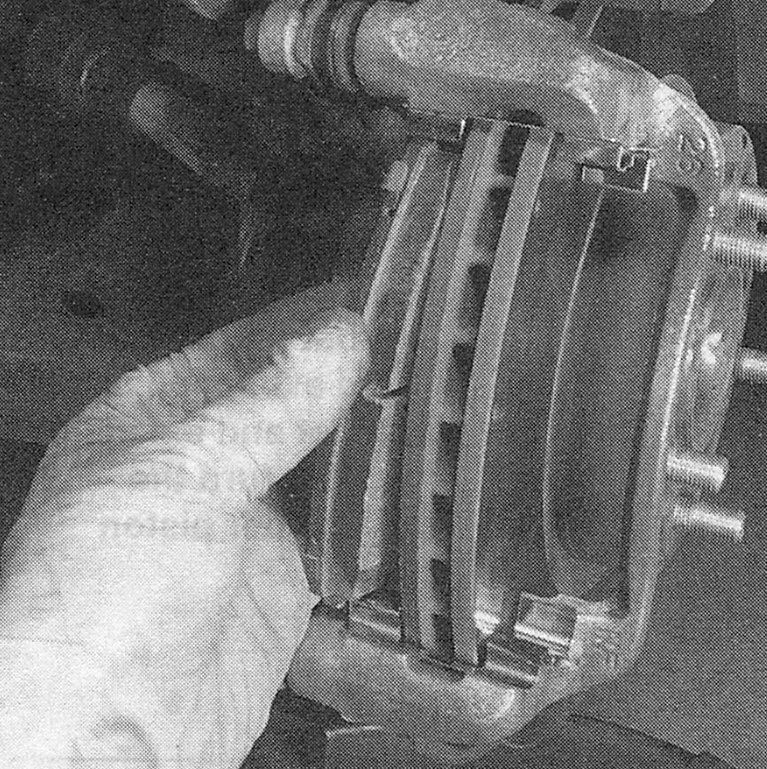
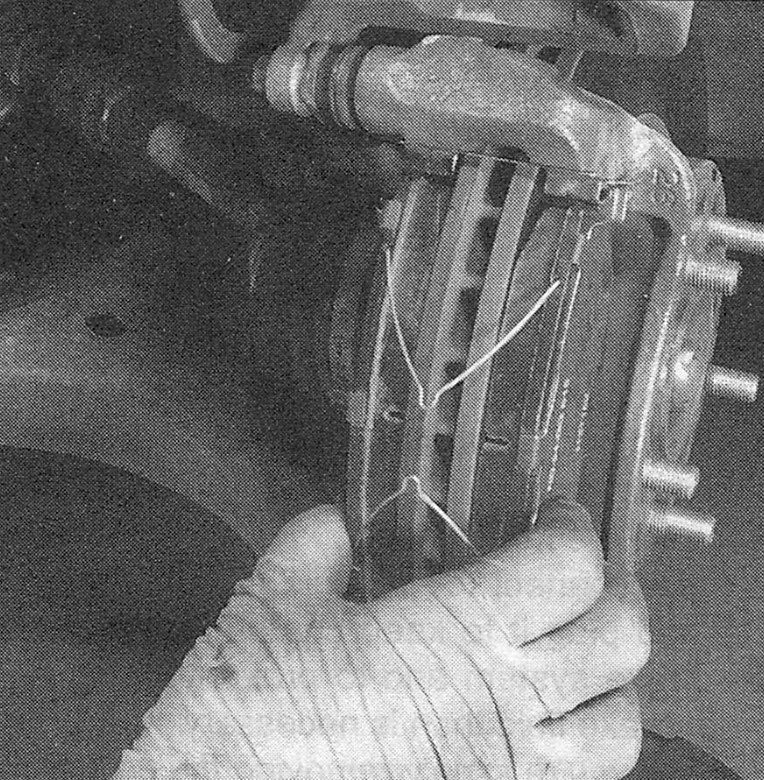
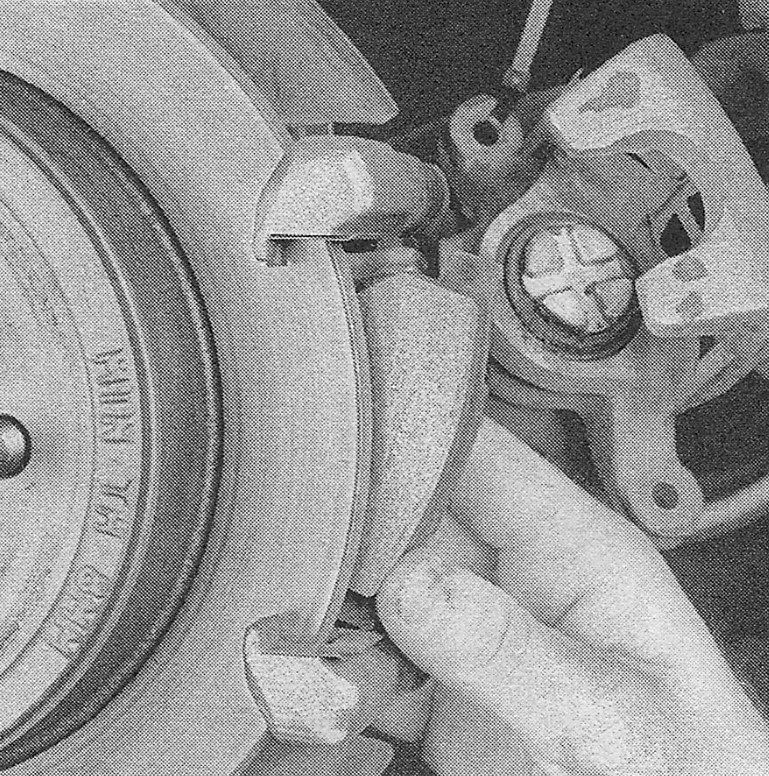
i.6e Remove the inner brake pad and shim (s)
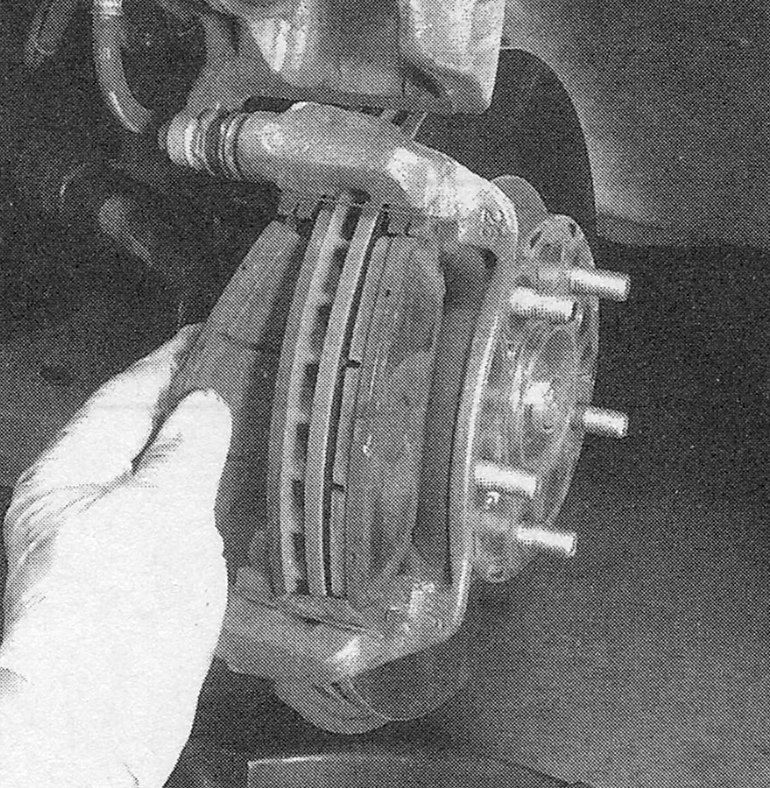
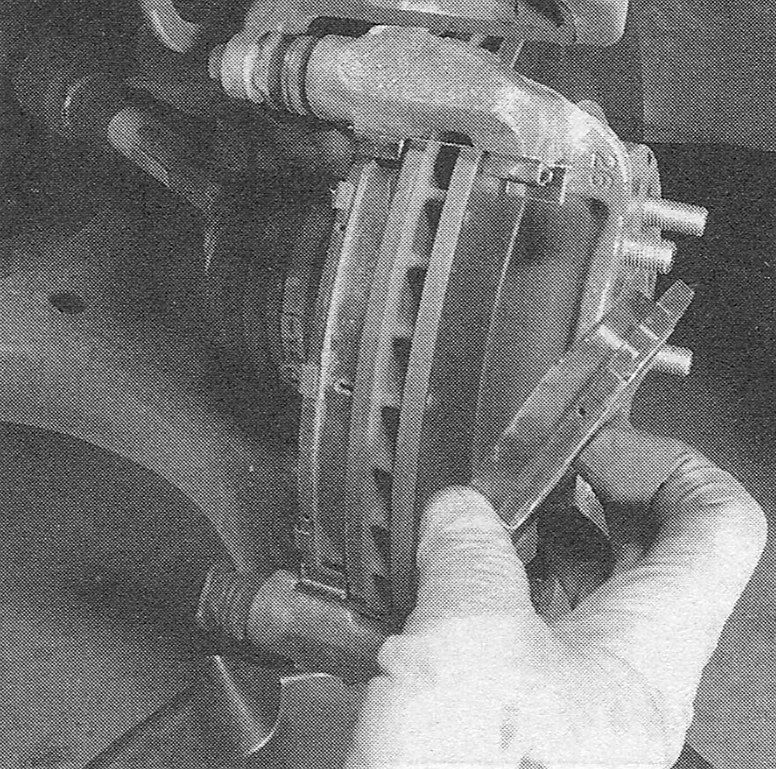
i.6f Remove the outer brake pad and shim (s)
i.6g the pad retainer clips should fit snugly into their respective grooves in the caliper mounting bracket; if they don’t, replace them
Note: Take note of which retainer is the upper and which is the lower (on some caliper types they are different)
i.6h Before replacing the retainer clips, clean the grooves with a wire brush
i.6i Check the caliper slide pins for wear. Slide them in and out making sure they don’t stick along the way, then clean them off and lubricate them with a film of high temperature brake grease

i.6j Install the retainer clips, making sure they are fully seated into the grooves
i.6k Using high-temperature brake grease, lightly lubricate the retainer clips where the pads will touch them
i.6l Install the new inner pad and shim (s)
i.6m Install the new outer pad and shim (s)
i.6n Install the return springs
i.6o While holding the pads in place, lower the caliper over the pads
i.6p Install the caliper lower mounting bolt and tighten it to the torque listed in this Chapter’s Specifications
7. Proceed to Step 22.
Rear pads
8. Disconnect the brake line from its mounting bracket.
9. If you’re working on a CR-V model, push the piston back into the bore to provide room for the new brake pads (see illustration 3.5). A C-clamp can be used to accomplish this.
Warning: DO NOT push the rear caliper in with a C-clamp on the Civic models. These models use a different type of rear caliper. The caliper piston must be turned clockwise to retract it. Read all directions carefully before proceeding.
21. Read the instructions in the Final inspection procedures in Disc brake pads — replacement.
Final inspection procedures
22. Install the wheel and lug nuts, lower the vehicle and tighten the lug nuts to the torque listed in the Tune-up and routine maintenance Specifications.
23. Apply and release the brake pedal several times to bring the pads or shoes into contact with the brake discs/drums. Check the brake fluid level and add fluid, if necessary (see Tune-up and routine maintenance).
24. Check the operation of the brakes in an isolated area before driving the vehicle in traffic.
4 Disc brake caliper — removal and installation10 Remove the caliper mounting bolts while holding the caliper pins with a second wrench, then remove the caliper from its mounting bracket and hang it out of the way with a piece of wire. Don’t let the caliper hang by the brake hose.
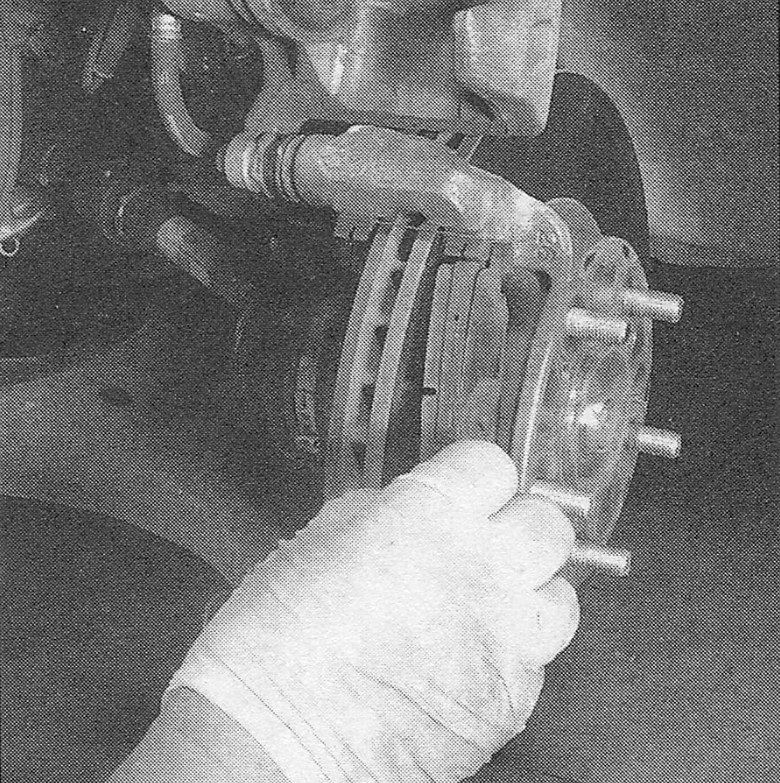
11. Remove the outer and inner brake pads and shims (see illustration).
i.11 Remove the outer pad and shim.
12. Remove the inner brake pad and shim (see illustration).
i.12… and the inner pad and shim
13. Remove and inspect the upper and lower pad retainer clips.
Note: Take note of which retainer is the upper and which is the lower (on some caliper types they are different).
14. Install the pad retainer clips. They should fit snugly in the caliper mounting bracket; if they don’t, replace them. Apply a thin film of high temperature grease to the retainer.
15. Apply a small amount of high-temperature grease to both sides of the shims.
16. Install the new inner pad and shim (s). Make sure the ears on the upper and lower ends of the pad are fully engaged with their respective grooves and the pad retainer clips.
17. Install the new outer pad and shim.
18. Before installing the caliper, remove the caliper pin dust boots and inspect them for tears and cracks; if they’re damaged, replace them.
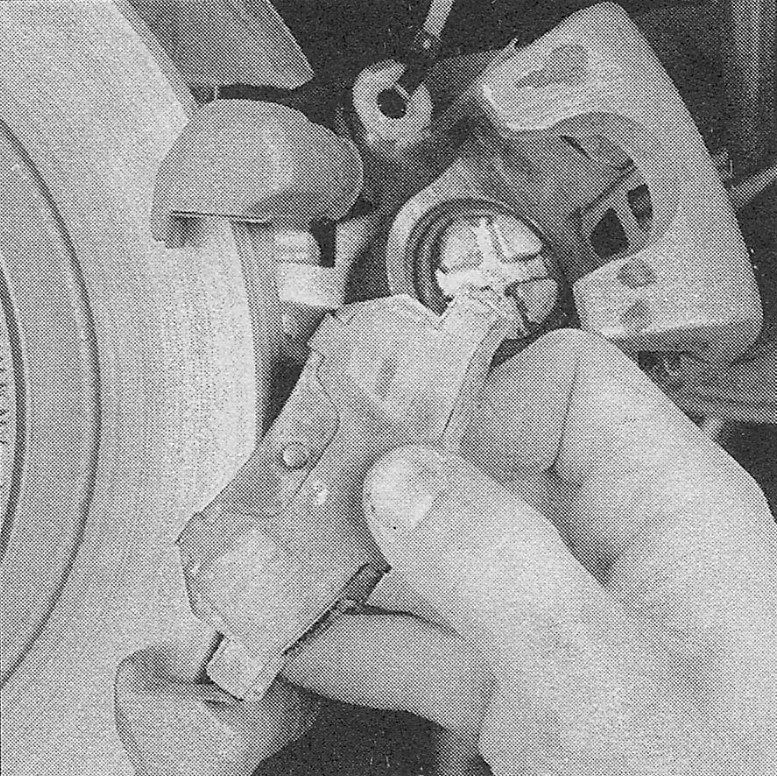
19. On Civic models, retract the piston by using a caliper piston tool or engaging the tips of a pair of needle-nose pliers with two of the grooves in the face of the piston and turning it clockwise until it bottoms in the bore (see illustrations). Now, rotate the piston out until one of its grooves is aligned with the tab on the inner brake pad when you install the caliper. You may have to adjust the piston position by turning it back and forth to fit the tab in the groove. If the piston dust boot becomes distorted when the piston is turned, turn the piston in the opposite direction to restore the shape of the boot, but make sure the groove is aligned properly.
i.19a to provide clearance for the new pads, back the piston into the bore by turning it clockwise
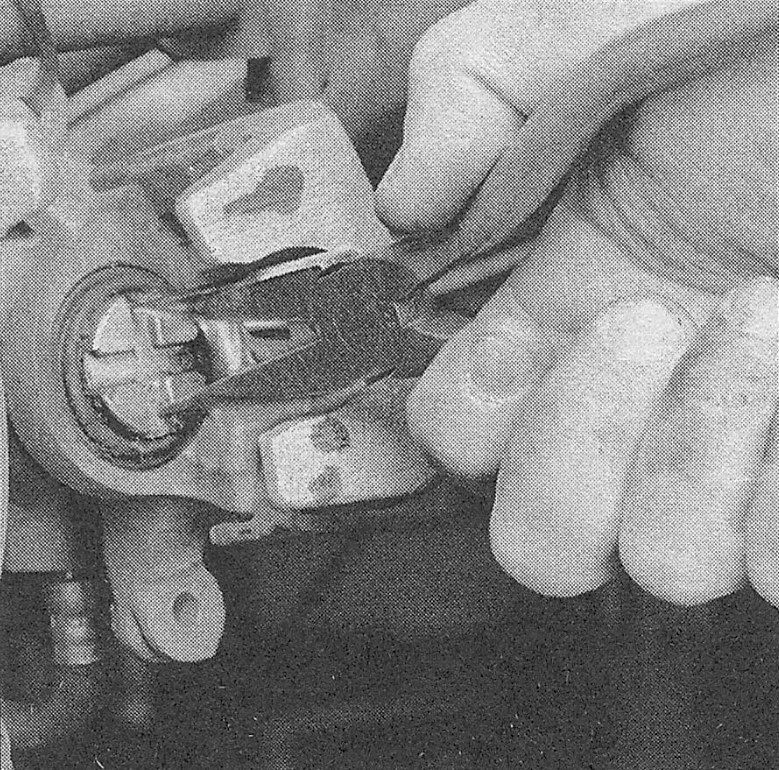
i.19b This is a typical caliper piston retracting tool which can be purchased at most parts stores. Use a 3/8-inch drive ratchet and extension to turn the caliper piston

20. Install the caliper mounting bolts while holding the caliper pins with a second wrench. Tighten them to the torque listed in this Chapter’s Specifications. If the brake line was disconnected from its mounting bracket, reconnect the line and tighten the bolt securely.
21. Read the instructions in the Final inspec¬tion procedures in Disc brake pads — replacement.
Final inspection procedures
22. Install the wheel and lug nuts, lower the vehicle and tighten the lug nuts to the torque listed in the Tune-up and routine maintenance Specifications.
23. Apply and release the brake pedal sev¬eral times to bring the pads or shoes into con¬tact with the brake discs/drums. Check the brake fluid level and add fluid, if necessary (see Tune-up and routine maintenance).
24. Check the operation of the brakes in an isolated area before driving the vehicle in traffic.