Door trim panels — removal and installation
1. On manual window regulator equipped models, remove the window crank.
Note: If a tool is not available for removing the clip, use a shop rag instead. Hold the shop rag by two corners and slide the edge of the rag under the handle (handle arm facing downward). By tugging on either corner of the shop rag work the shop rag up against the clip. The clip will come off as you work the rag back and forth.
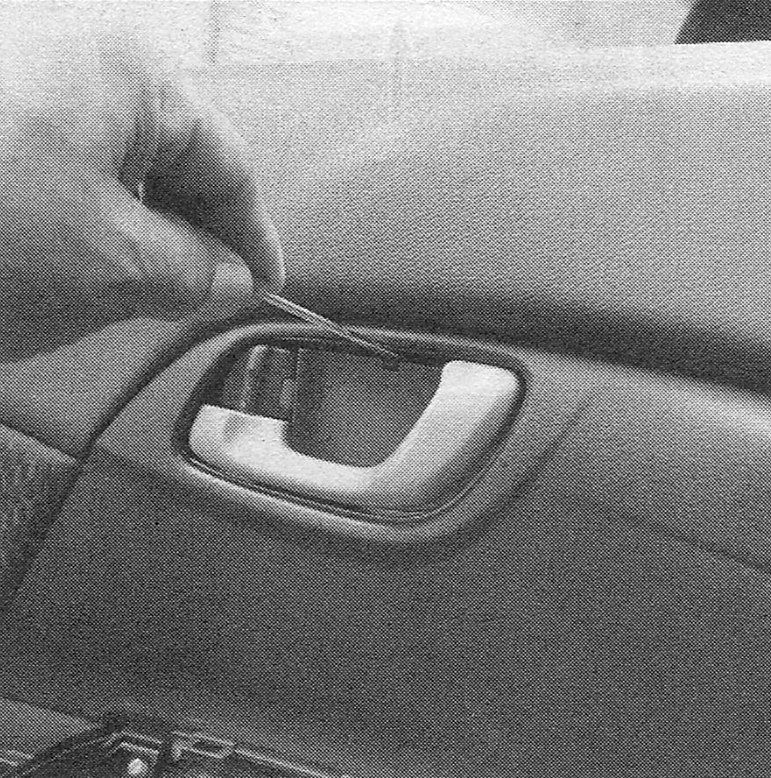
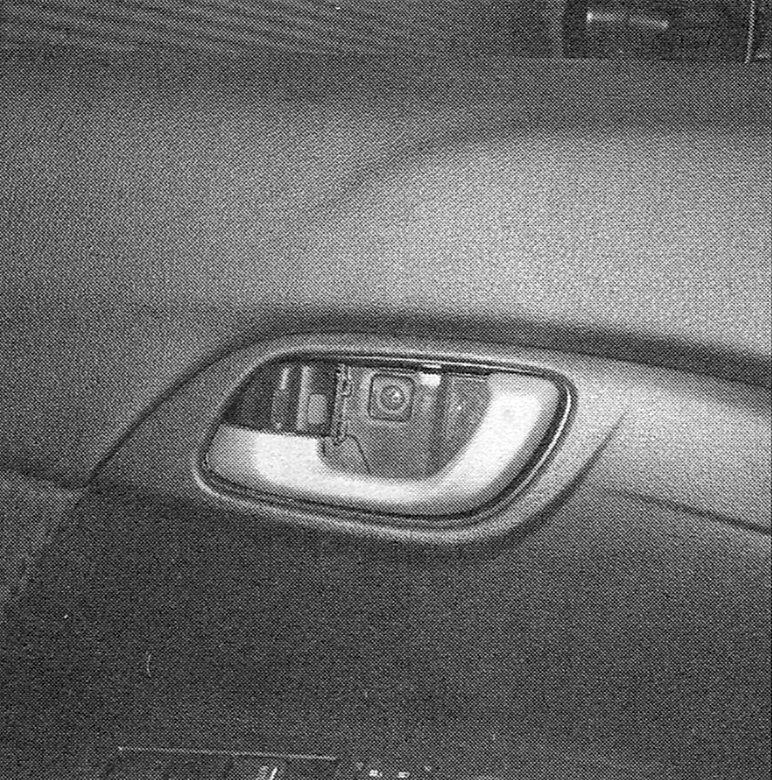
2. Remove the inside door handle trim cover. Remove the mounting screw (see illustrations).
i.2a Remove the inside door handle trim cover …
i.2b … then remove the screw from the inside pull handle
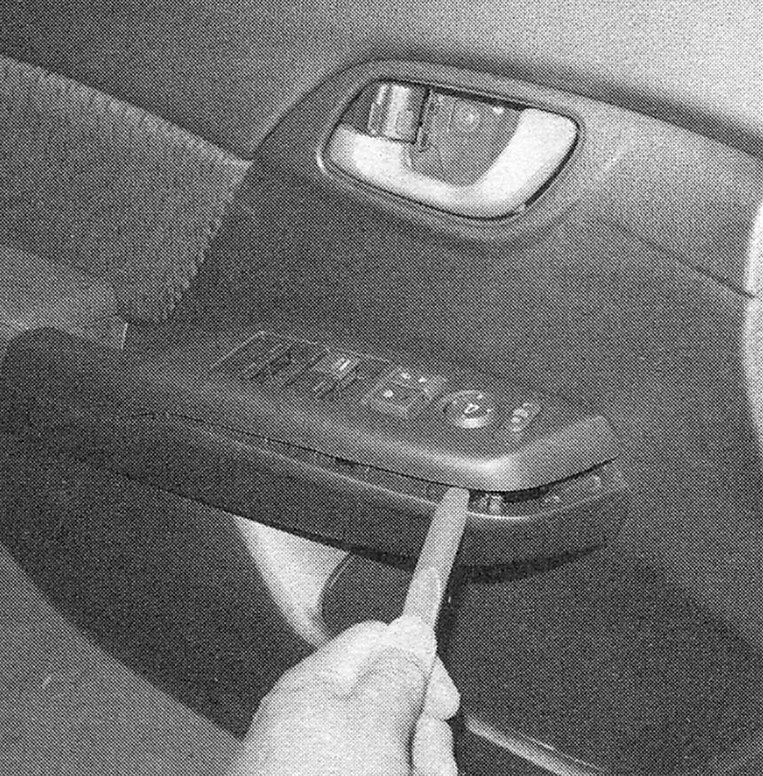
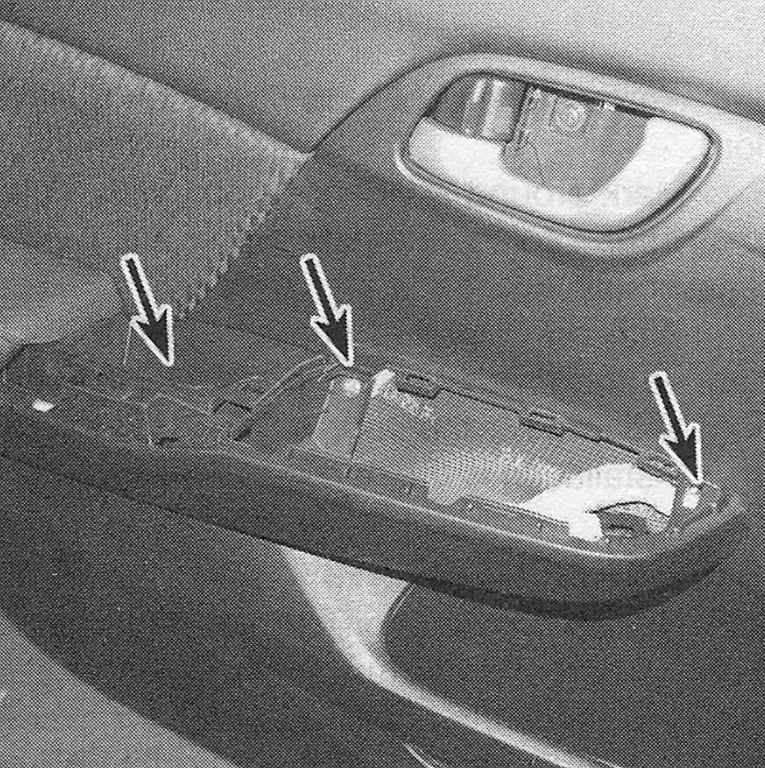
3. On models without inside grab handles but with electric windows, remove the window switch assembly (see illustrations). Remove the retaining bolts hidden by the window switch assembly.
i.3a Pry the window switch assembly off with a flat trim tool
i.3b Turn the switch assembly over to disconnect the electrical connectors
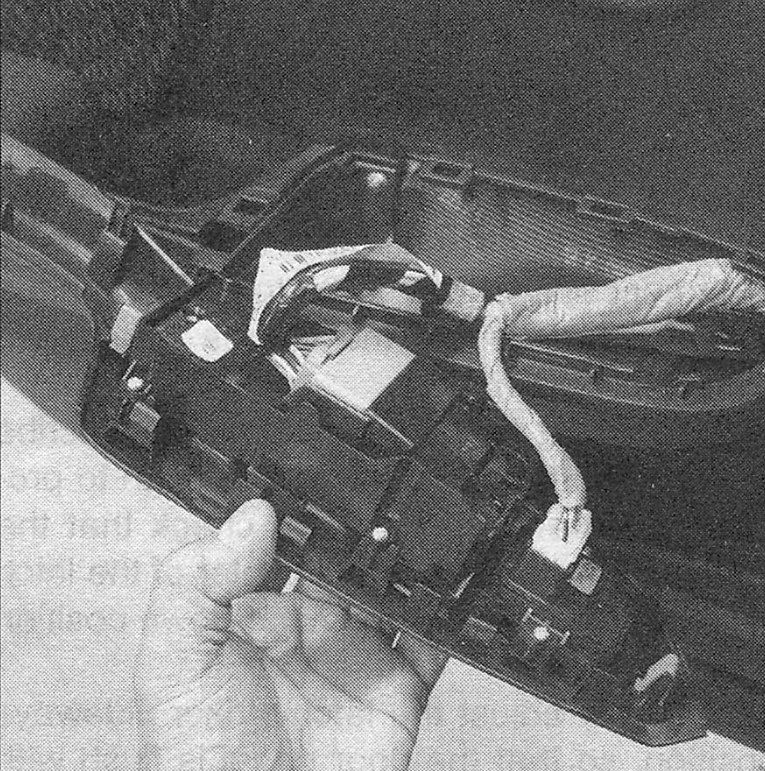
i.3c Remove the bolts hidden by the switch assembly and the single screw in the hand grab cup
4. On models with inside grab handles, remove the pull handle trim cover by pulling straight away from the door panel. (It’s some-times easier to get it started by using a small flat bladed screwdriver at a corner to release the plastic retaining clips.) Remove the retaining screws hidden by the grab handle trim.
5. If applicable, remove the mirror trim cover (sail trim cover) by pulling it straight away from the door. Disconnect the outside mirror cable (if applicable) by unscrewing the retaining nut.
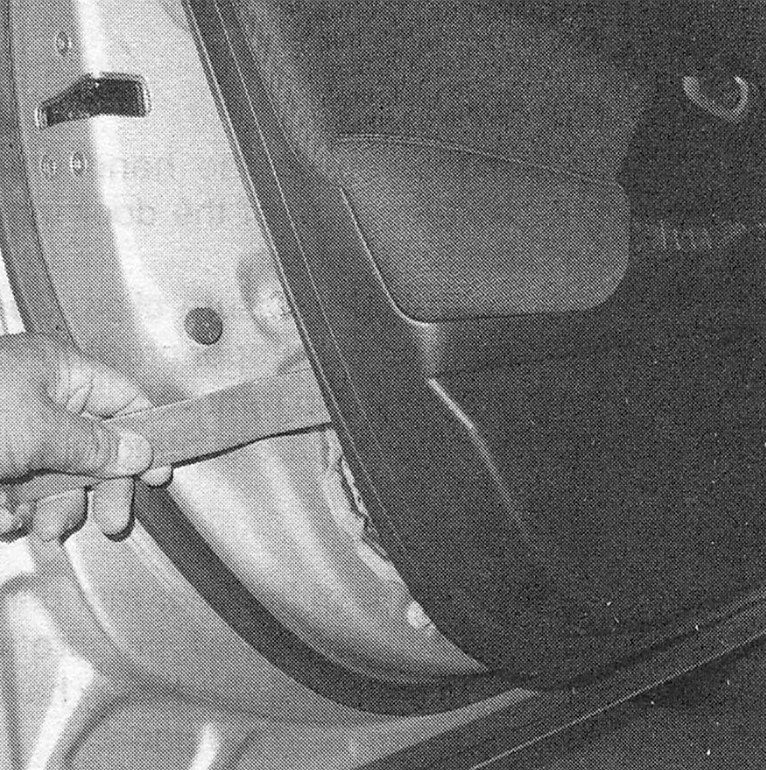
6. Remove the door trim panel using a door panel removal tool (see illustration). Start from the bottom corner of the trim panel and work around the perimeter until all the fasteners have been released from the door.
i.6 Carefully pry the clips free so the door trim panel can be removed
7. Lift the trim panel up to disengage the panel from the upper door ridge, unplug any electrical connectors, and remove the panel. Note: For those stubborn door panels that just don’t seem to want to lift off the door, try applying upward pressure by holding onto the bottom of the door panel and then use your other hand to firmly smack the top of the door panel where it meets the door. This usually will get it off.
8. Installation is the reverse of removal.
Trunk liner trim panels
9. The trunk liner trim panels are held on with pressure clips. Follow the steps in Fastener and trim removal for the proper procedures to remove the different types of clips.
10. Each trim panel will have several clips that need to be removed. Keep track of which clips go to which area of the panels. Some locations will have different size clips. Replace any clips that are damaged or not reusable. (Most parts stores carry a variety of replacement fasteners.)
Tailgate trim panel Upper trim
11. Carefully pry the notch on the outside edges of the upper trim where it meets with the side trim out away from the door. Then, pull the trim to release the pressure clips.
12. Installation is the reverse of removal.
Side trim
13. Remove the upper trim. Then pull the side trim panels off of the pressure clips.
14. Installation is the reverse of removal.
15. Remove the screw to the hand hold pocket on the bottom edge of the door trim. Remove the hand hold pocket.Lower trim panel
16. Remove the panel pressure clips. See Fastener and trim removal for details on the proper procedures for the various pressure clip removal.
17. Installation is the reverse of removal.
Installation
18. Prior to installation of the door trim panels and/or the tailgate trim panel, be sure to reinstall any clips in the panel which may have come out when you removed the panel.
19. Align several of the clips to their appropriate holes in the door. Then, press firmly to seat the clips back into place.
20. The remainder of the installation is the reverse of removal.