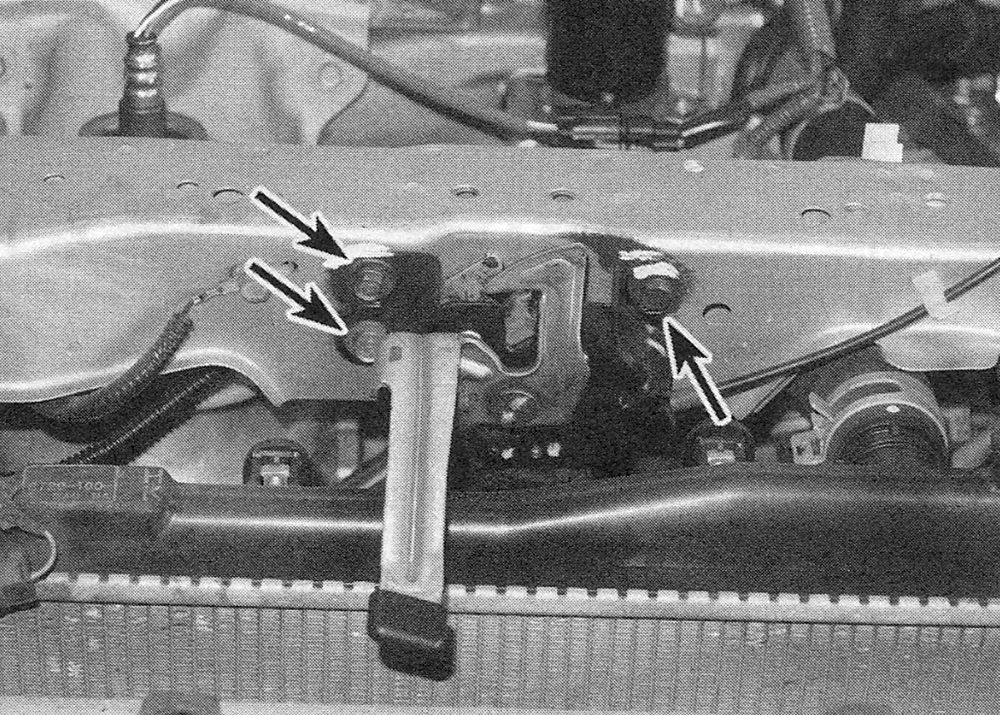
1. Remove the radiator grille opening cover (if equipped), then scribe a line around the latch (see illustration 7.10) to aid alignment when installing. Detach the latch retaining bolts (see illustration) from the radiator support and remove the latch.
i.1 Bolt locations for the hood latch
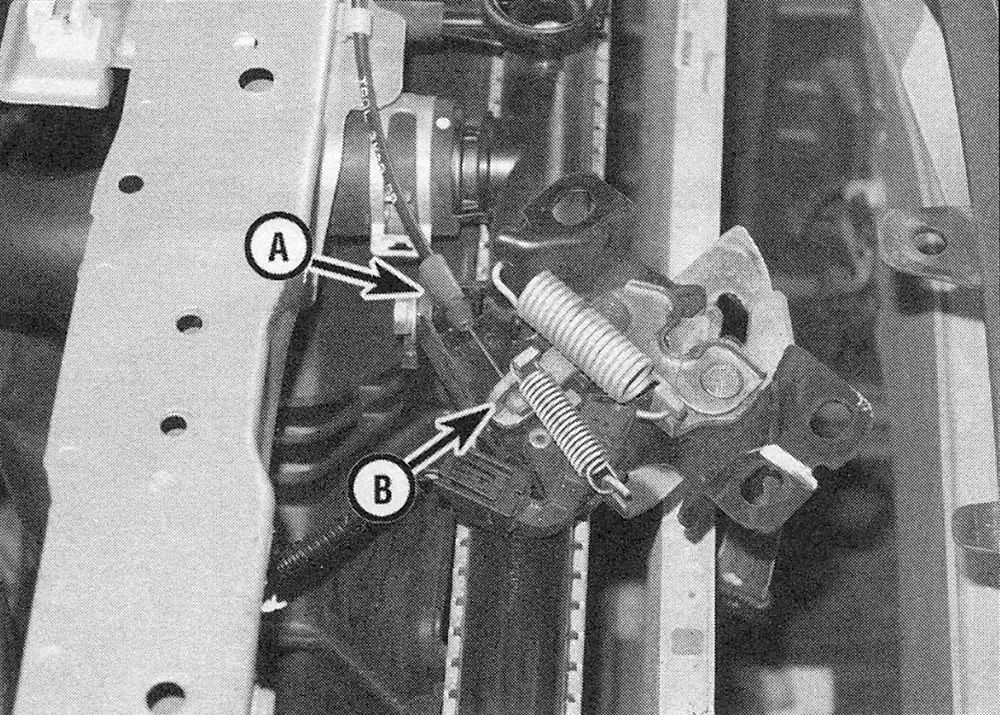
2. Disconnect the hood release cable by disengaging the cable from the latch assembly (see illustration).
i.2 Detach the cable (A) then unhook the end from the latch (B)
3. Installation is the reverse of removal.
Note: Adjust the latch so the hood engages securely when closed and the hood bumpers are slightly compressed.
Cable
4. Disconnect the hood release cable from the latch assembly (see illustrations i.1 and i.2), then detach the cable from any retaining clips securing it to the radiator support.
5. Attach a piece of wire or string to the latch end of the cable.
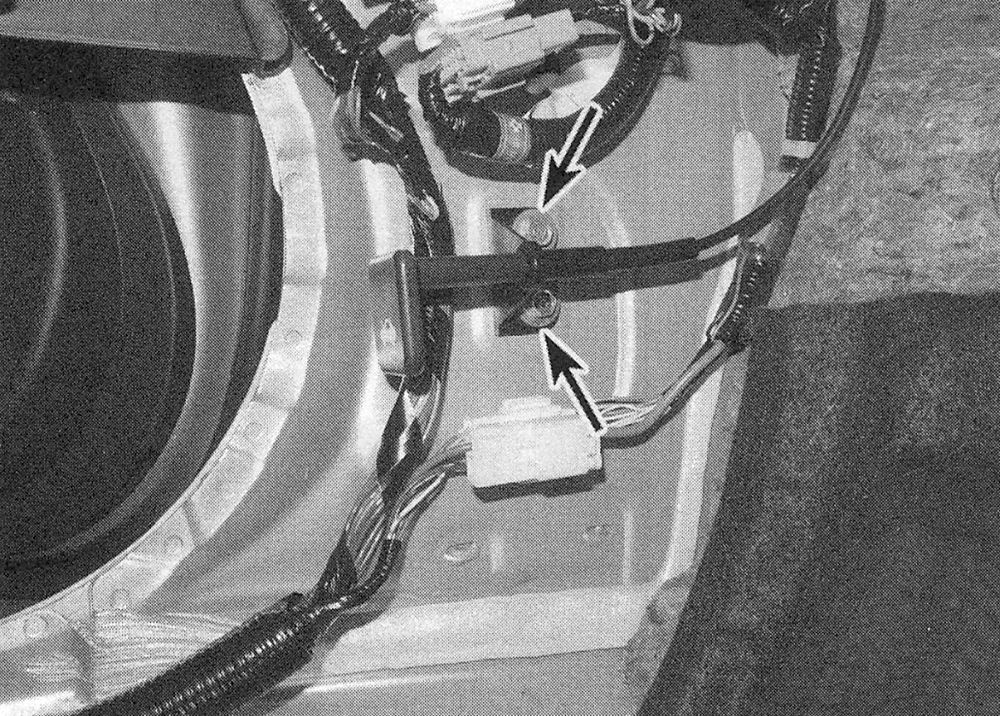
6. Working in the passenger’s compartment, remove the driver’s side kick panel (see License plate trim panel). Then remove the release lever mounting bolts and detach the hood release lever (see illustration).
i.6 Remove the release lever bolts and detach the cable and lever
8. Push the grommet through the body and pull the cable into the passenger compartment. Ensure that the new cable has a grommet attached, then remove the old cable from the wire or string and replace it with the new cable.
9. Carefully guide the wire or string (with the new cable attached) back through the firewall and along the same route back to the latch.
10. Reconnect the retaining clips inside the fender and complete the procedure by refit- ting the fender liner and hood latch to the new cable. The remainder of the installation is the reverse of removal.