Hood — removal, installation and adjustment
Removal and installation
Note: The hood is heavy and somewhat awkward to remove and install — at least two people should perform this procedure.
1. Use blankets or pads to cover the fenders and cowl areas. This will protect the body and paint as the hood is lifted off.
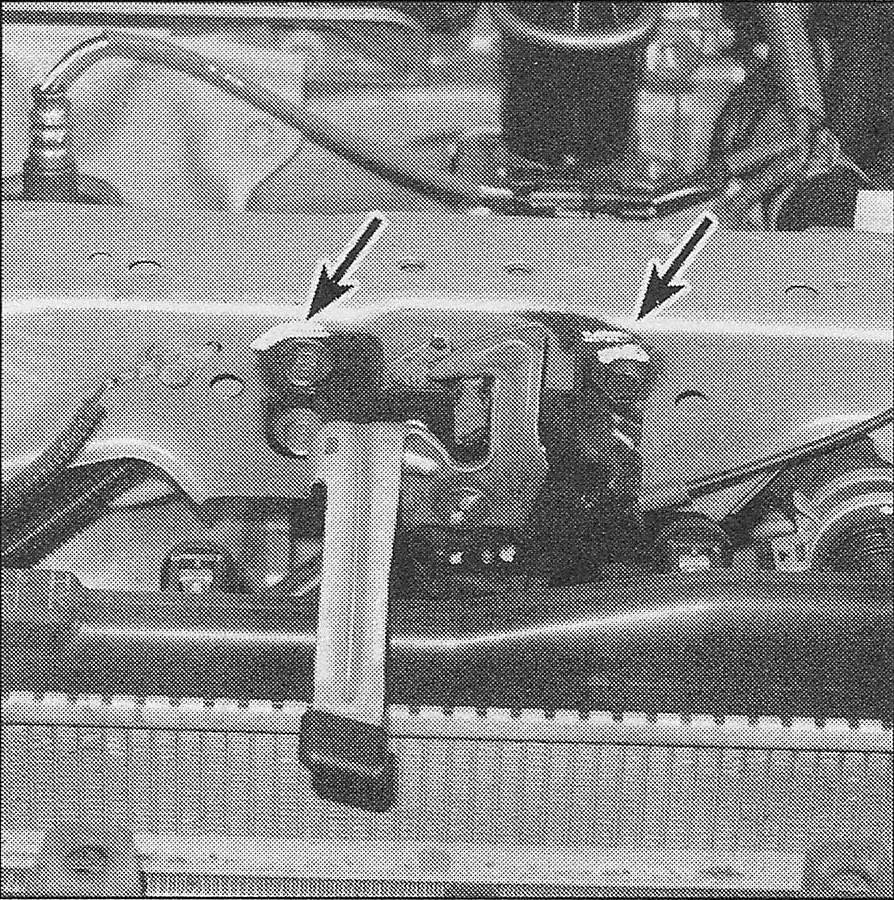
2. Scribe or draw alignment marks around the bolt heads to ensure proper alignment during installation (see illustration).
7.2 Scribe or draw alignment marks around the bolt heads and the hood hinges to ensure proper alignment of the hood when it’s reinstalled

3. Disconnect any cables or wire har nesses, which will interfere with removal.
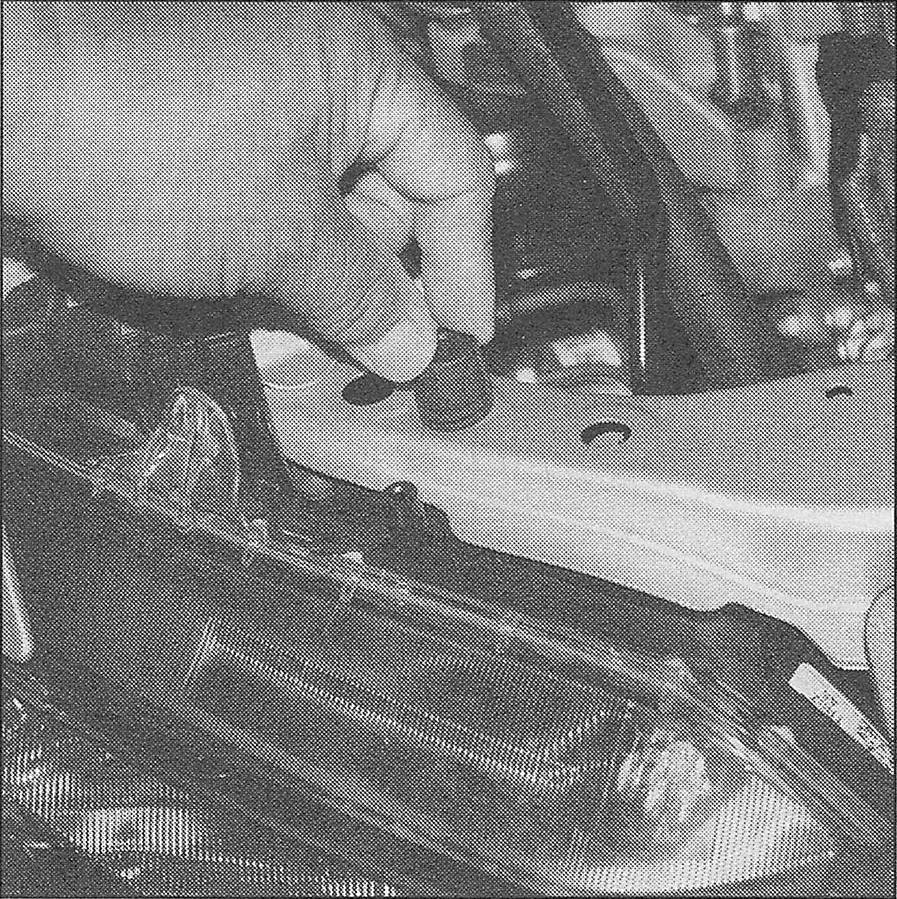
4. Have an assistant support one side of the hood. Take turns removing the hinge-to-hood bolts and lift off the hood (see illustration).
7.4 Support the hood with your shoulder while removing the hood bolts

5. Installation is the reverse of removal. If you position the hood so that the hinges fi within the scribe marks you made before loosening the bolts, in the same location they were in prior to removal, then the hood should still be aligned. Of course, if you’re installing a new hood, or forgot to scribe the hinge positions, then you’ll need to readjust the hood position.
Adjustment
6. You can adjust the hood fore-and-aft and right-and-left by means of the elongated holes in the hinges.
7. Mark a line between the hood itself and the hinge plate so you can judge the amount of movement.
8. Loosen the bolts just enough to allow the hood to move. Close the hood and check alignment.
Note: It’s a good idea to remove the hood latch before closing the hood to check the alignment, just in case there is a severe bind when it closes which will make the hood harder to open.
9. Carefully jiggle the hood around until the seams are all equal. Then, gently open the hood and snug the bolts.
Note: You may have to do this step several times before the alignment is perfect.
Note: The hood should rest on the stops without any great amount of downward pressure.
10. If necessary, after installation, the entire hood latch assembly can be adjusted up-and-down as well as from side-to-side on the upper radiator support so the hood closes securely and is flush with the fenders (see illustration). To do this, scribe a line around the hood latch \mounting bolts to provide a reference point. Then loosen the bolts and reposition the latch assembly as necessary. Following adjustment, retighten the mounting bolts.
7.10 Scribe a line around the hood latch or as we have done, use a white paint marker to mark the original location so you can judge the movement. Then loosen the bolts and adjust the latch position
11. Adjust the vertical height of the leading edge of the hood by screwing the edge cushions in or out so that the hood, when closed, is flush with the fenders (see illustration).
7.11 To adjust the vertical height of the leading edge of the hood so it’s flush with the fenders, turn each edge cushion clockwise (to lower the hood) or counterclockwise (to raise the hood)
Note: The hood latch assembly, as well as the hinges, should be periodically lubricated with white lithium-base grease to prevent sticking and wear.