Trunk and fuel door release lever, cable and latches — removal and installation
Release lever
1. Remove the driver’s side sill plate trim
(see Interior trim components — removal and installation).
2. Unbolt the trunk release lever handle
from the sill (see illustration).
i.2 Release lever bolt locations

3. Disconnect the cable from the handle by
rotating the cable 90 degrees or until the cable end aligns with the open tab. Now, remove the cable from the handle.
4. Installation is the reverse of removal.
Cables
5. Working in the trunk or rear compartment, remove the plastic clips securing the driver’s side and rear inside finishing panels
to allow access to the fuel door assembly.
i.5a Typical retaining clip
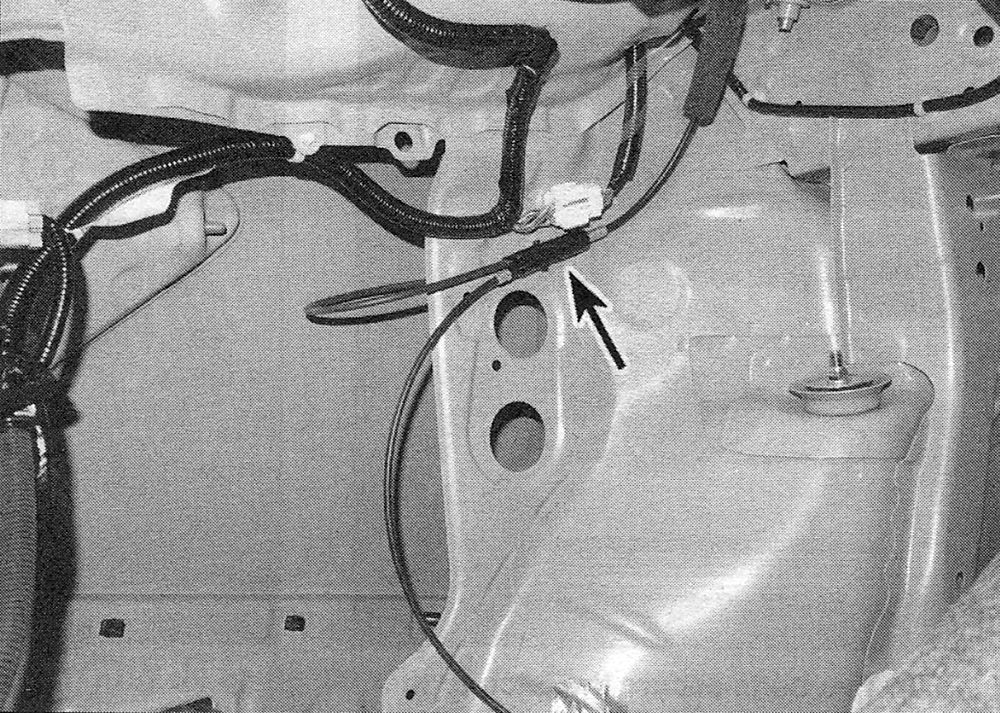
i.5b Trunk release cable location at the rear wall. Push out the grommet and remove the cable
Note: For the trunk release cable, mark the location of the trunk latch bolts and latch assembly before removing the latch. Now, unbolt the latch. Twist the cable ball end and cable 90 degrees so that the cable aligns with the open slot. Then remove the cable retaining clips and follow the cable to the left side of the trunk, removing any retaining clips along the way until you get to the rear wall of the trunk (see illustrations).
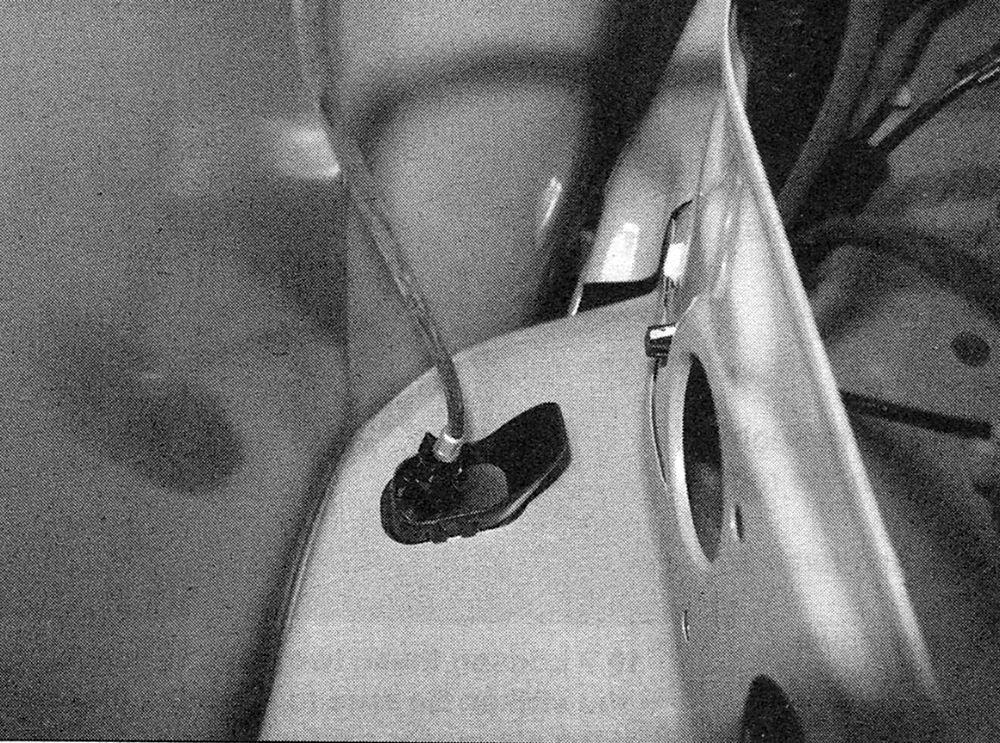
Note: To detach the fuel door release cable, unbolt the fuel door latch assembly from the vehicle. Twist the cable ball end and cable 90 degrees so that the cable aligns with the open slot, then remove the cable.
6. Remove the left door sill plate (see Interior trim components — removal and installation), the rear seat (see Seats — removal and installation),
The B pillar lower trim panel (see Interior trim components — removal and installation), and the left rear quarter trim panel (see Interior trim components — removal and installation). Pull the carpet back and detach all the cable retaining clips.
7. From the lever end of the cable, attach a string or thin wire to the end of the cable. Note: Make sure the string or wire is long enough that you still can grab a hold of it from inside the car after you have pulled the old cable through.
8. Working from inside the trunk or rear compartment, pull the old cable assembly toward the rear of the vehicle.
9. Remove the old cable and attach the string (or thin wire) to the replacement cable.
10. Guide the replacement cable through the
body by pulling on the string or wire. Reattach any retaining clips that were removed, then
reattach the cable to the latch and release
lever.
11. The remainder of the installation is the reverse of removal.
Electric trunk and fuel door release latch — removal and installation
Trunk release latch
12. Remove the inner trunk lid trim panels (if applicable).
13. Mark the location of the bolts and latch assembly before removing.
14. Disconnect the electrical connector and remove the bolts securing the latch to the trunk lid.
15. Remove the latch.
16. Installation is the reverse of removal.
Fuel door release latch
17. Remove the trunk liner trim on the fuel door side of the vehicle.
18. Disconnect the electrical connection or cable.
19. Unbolt the fuel door latch assembly and remove it.
20. Installation is the reverse of removal.