Brake disc — inspection, removal and installation
Warning: The dust created by the brake system is harmful to your health. Never blow it out with compressed air and don’t inhale any of it. An approved filtering mask should be worn when working on the brakes. Do not, under any circumstances, use petroleum-based solvents to clean brake parts. Use brake system cleaner only!
Inspection
1. Loosen the wheel lug nuts, raise the vehicle and support it securely on jack stands. Remove the wheel and install the lug nuts to hold the disc in place against the hub flange. Note: If the lug nuts don’t contact the disc when screwed on all the way, install washers under them. If you’re checking the rear disc, release the parking brake.
2. Remove the brake caliper as outlined in Disc brake caliper — removal and installation. It isn’t necessary to disconnect the brake hose. After removing the caliper bolts, suspend the caliper out of the way with a piece of wire. Remove the two-caliper mounting bracket-to-steering knuckle bolts (see illustration 4.4) or, on rear calipers, the bracket-to-knuckle bolts and remove the mounting bracket.
3. Visually inspect the disc surface for score marks and other damage. Light scratches and shallow grooves are normal after use and may not always be detrimental to brake operation, but deep scoring requires disc removal and refinishing by an automotive machine shop. Be sure to check both sides of the disc (see illustration). If pulsating has been noticed during application of the brakes, suspect disc runout.
i.3 The brake pads on this vehicle were obviously neglected, as they wore down completely and cut deep grooves into the disc — wear this severe means the disc must be replaced

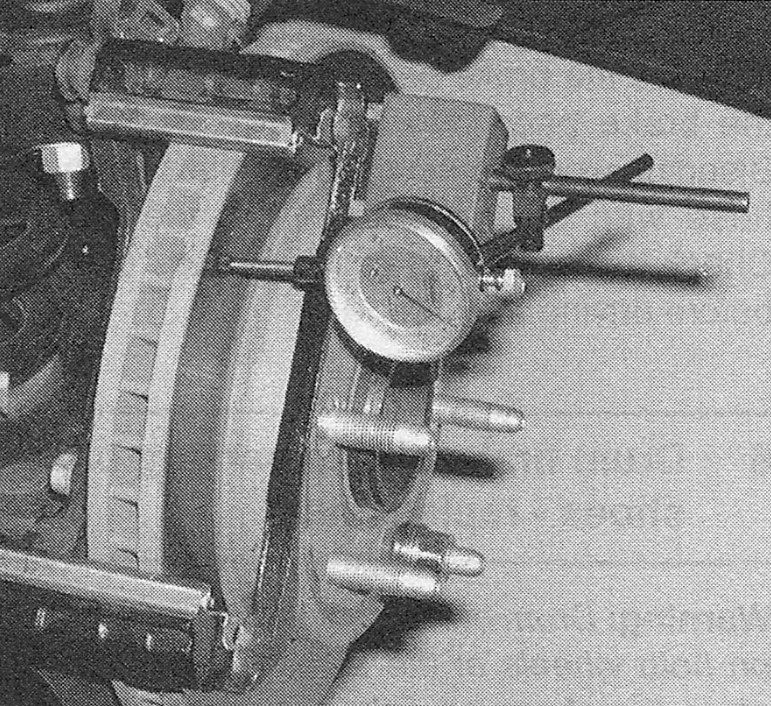
4. To check disc runout, place a dial indicator at a point about 1/2-inch from the outer edge of the disc (see illustration). Set the indicator to zero and turn the disc. The indicator reading should not exceed the specified allowable runout limit. If it does, the disc should be refinished by an automotive machine shop.
i.4a to check disc runout, mount a dial indicator as shown and rotate the disc
i.4b Using a swirling motion, remove the glaze from the disc surface with sandpaper or emery cloth
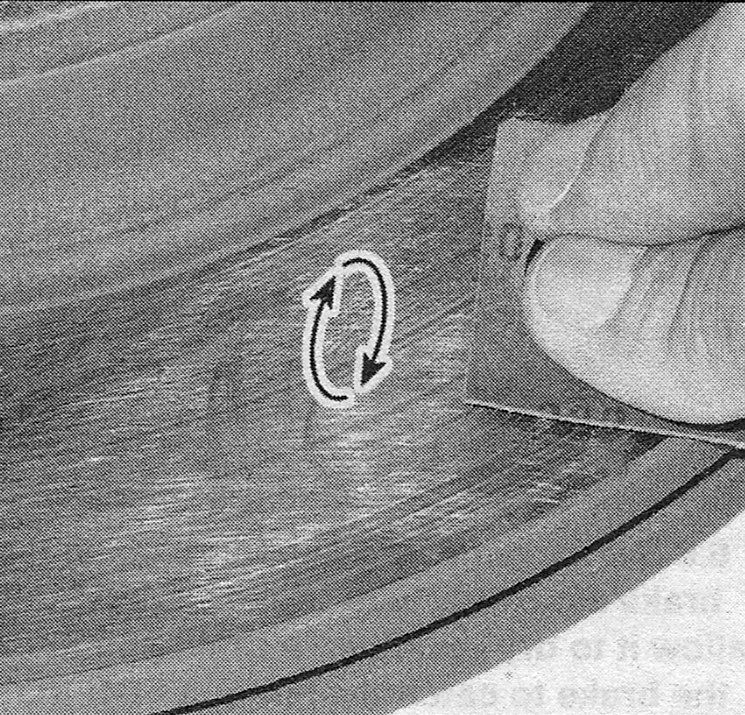
Note: The discs should be resurfaced regardless of the dial indicator reading, as this will impart a smooth finish and ensure a perfectly flat surface, eliminating any brake pedal pulsation or other undesirable symptoms related to questionable discs. At the very least, if you elect not to have the discs resurfaced, remove the glaze from the surface with emery cloth or sandpaper, using a swirling motion (see illustration).
5. It’s absolutely critical that the disc not be machined to a thickness under the specified minimum thickness. The minimum (or discard) thickness is cast or stamped into the disc. The disc thickness can be checked with a micrometer (see illustration).
i.5 Use a micrometer to measure disc thickness

Removal
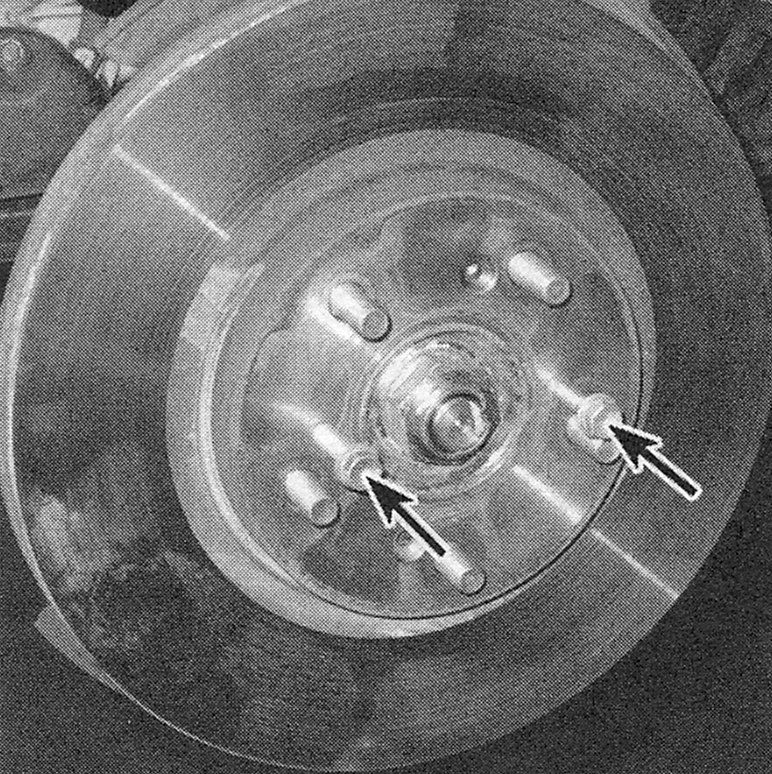
6. Remove the lug nuts which were installed to hold the disc in place, or remove the two disc retaining screws (see illustration) and remove the disc from the hub. If the disc is stuck to the hub and won’t come off, thread two bolts into the holes provided (see illustration) and tighten them. Alternate between the bolts, turning them a couple of turns at a time, until the disc is free. Remove the disc from the hub.
i.6a If the disc retaining screws are stuck, use an impact screwdriver to loosen them
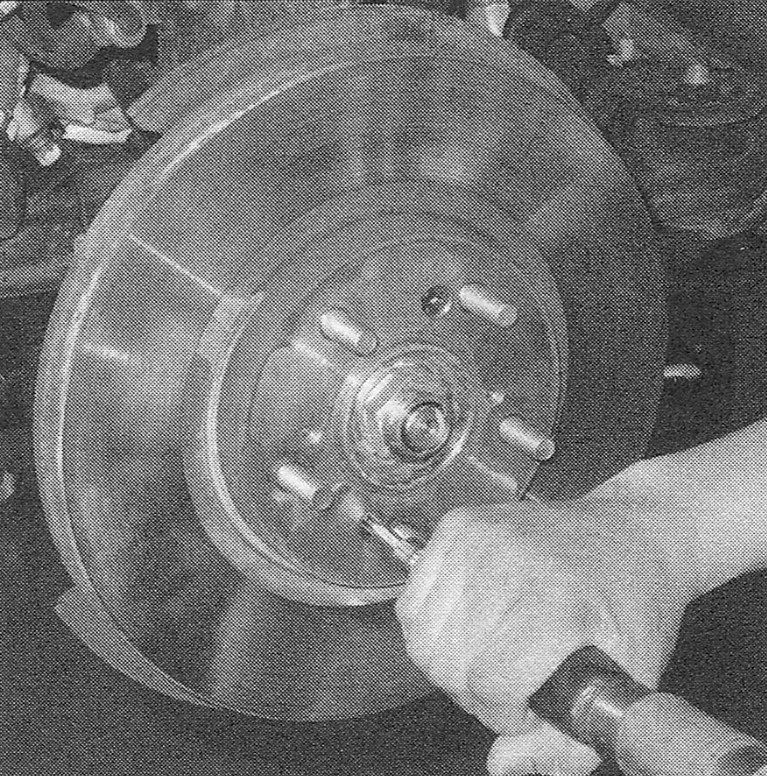
i.6b If the disc is stuck, thread two bolts into the disc and tighten them to force the disc off the hub
Installation
7. Place the disc in position over the threaded studs. Install the disc retaining screws and tighten them securely.
8. Install the caliper mounting bracket and caliper, tightening the bolts to the torque values listed in this Chapter’s Specifications.
9. Install the wheel, then lower the vehicle to the ground. Tighten the lug nuts to the torque listed in the Tune-up and routine maintenance Specifications. Depress the brake pedal a few times to bring the brake pads into contact with the disc. Bleeding won’t be necessary unless the brake hose was disconnected from the caliper. Check the operation of the brakes carefully before driving the vehicle.