Ignition switch and key lock cylinder — replacement
Warning: All models covered by this manual are equipped with a Supplemental Restraint System (SRS), more commonly known as airbags. Always disable the airbag system before working in the vicinity of any airbag system component to avoid the possibility of accidental deployment of the airbag, which could cause personal injury (see Airbag system — general information).
1. Disconnect the cable from the negative battery terminal (see Engine electrical systems), then wait at least three minutes before proceeding.
2. Remove the driver’s dashboard panel assembly and the steering column covers (see Body).
Ignition switch (key type)
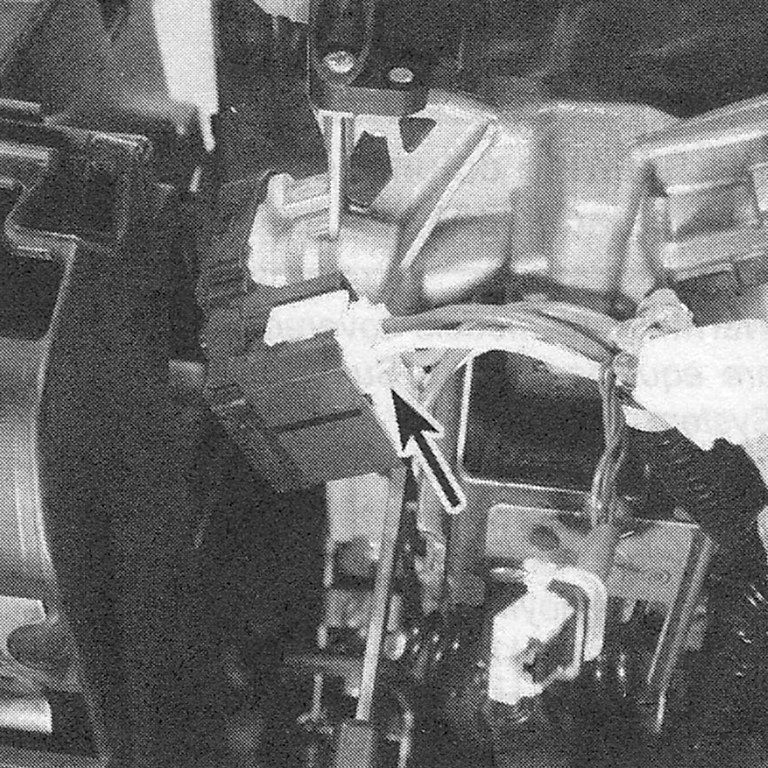
3. Disconnect the electrical connector from the ignition switch (see illustrations).
i.3a Ignition switch electrical connector
i.3b Pull the release tab to remove the connector
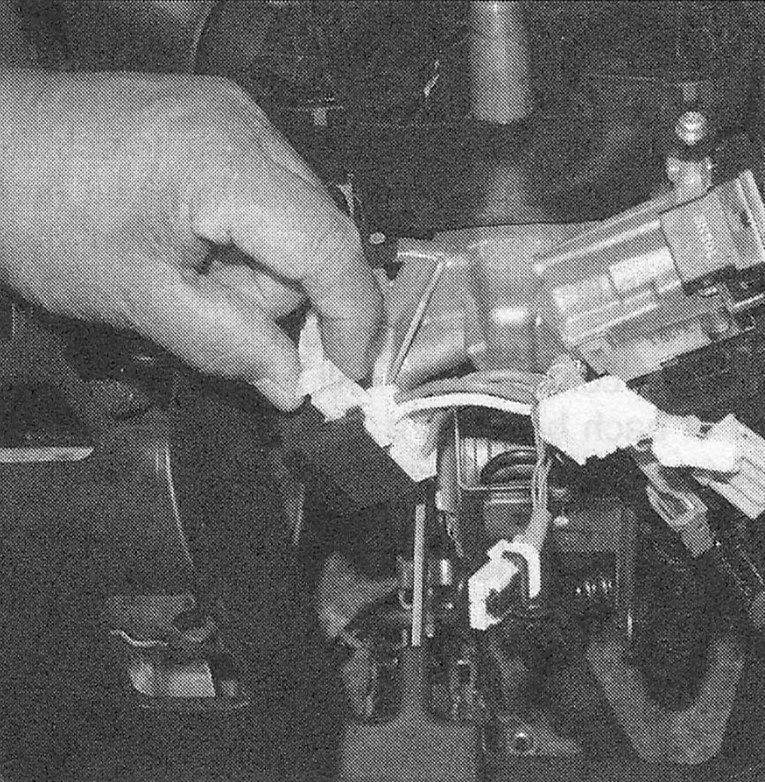
i.3c Leave the pull tab out until you reinstall the connector to the switch. Slide the connector into place and then push the tab in to secure the switch and connector together

4. Remove the ignition switch mounting screws and remove the switch.
5. Installation is the reverse of removal. Reconnect the cable to the negative battery terminal and verify that the ignition switch operates correctly in the Lock, Acc, On and Start positions.
Key lock cylinder (key type)
Note: If the key lock cylinder is being replaced, the immobilizer and transmitter must be reprogrammed using the factory scan tool. Take the vehicle to a dealer service department or other qualified repair facility and have it reprogrammed.
6. Disconnect the negative battery terminal and wait at least three minutes before continuing (see Engine electrical systems).
7. Remove the steering column covers and the dashboard panels (see Body).
8. Disconnect the ignition switch electrical connector and the connectors for the ignition key lock cylinder, the immobilizer control unit/ receiver and the ignition key lock cylinder/key light.
9. Remove the ignition switch (electrical part) and remove the immobilizer unit (see illustrations).
i.9a Disconnect the immobilizer connector
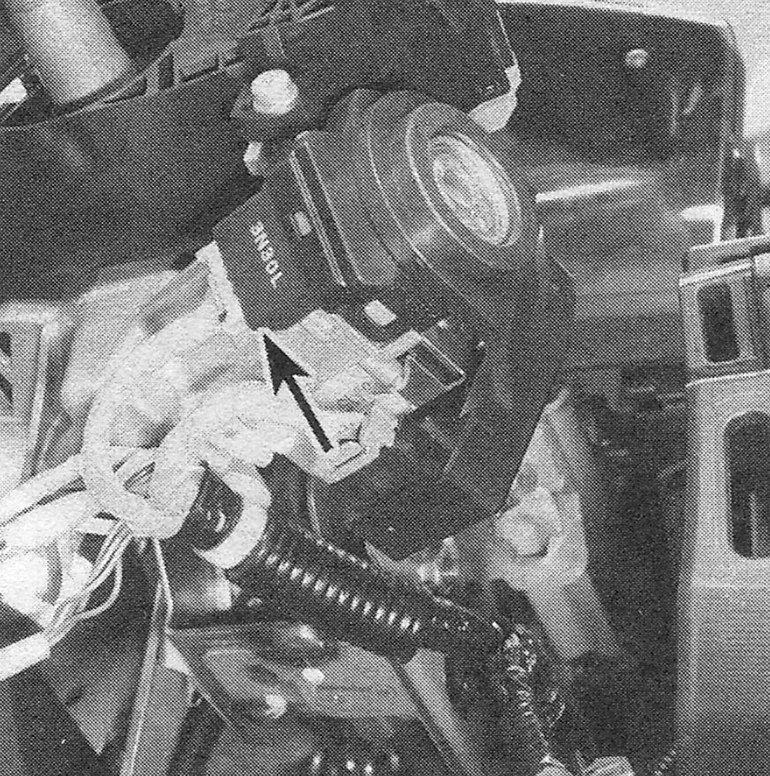
i.9b Carefully lift the top and bottom tab to remove the immobilizer from the ignition lock housing

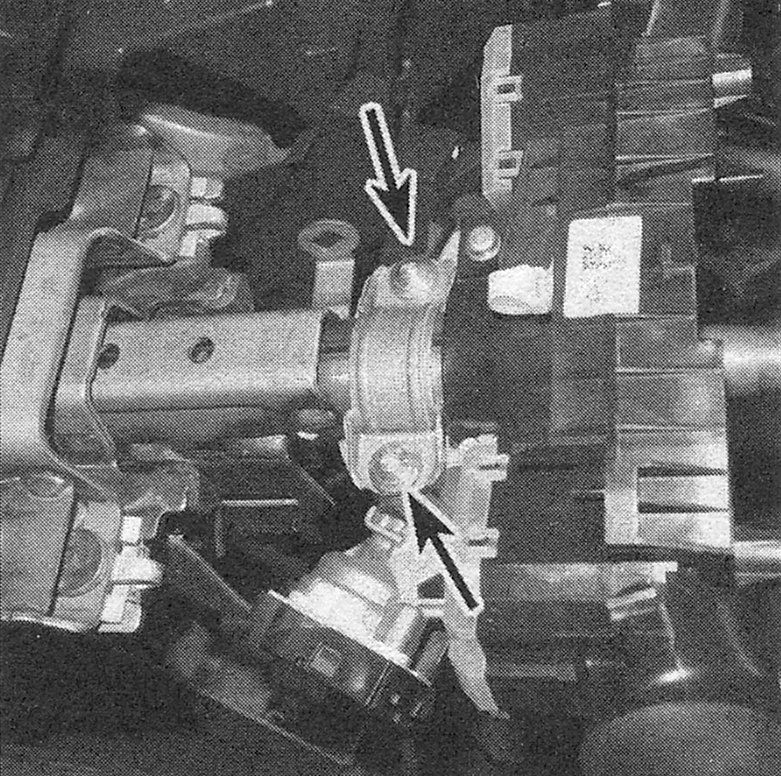
10. Center-punch the shear-head bolts that secure the key lock cylinder housing to the steering column, then drill a hole in the center of each bolt with a 3/16-inch (5 mm) drill bit (see illustration) and unscrew them with a screw extractor.
i.10 To detach the key lock cylinder housing from the steering column, drill out the bolts with a 3/16-inch (5 mm) drill bit and remove the bolts with a screw extractor
11. Remove the key lock cylinder assembly from the steering column.
12. Before tightening the new shear-head bolts, insert the ignition key and verify that the steering wheel lock mechanism functions correctly and that the ignition key turns freely in the key lock cylinder. Then tighten the shear-head bolts until the heads break off.
13. Installation is otherwise the reverse of removal. Reconnect the cable to the negative battery terminal (see Engine electrical systems).
Ignition switch (Push button start system)
14. Disconnect the negative battery terminal and wait at least three minutes before proceeding.
15. Remove the driver’s side dash vent trim (see Body).
16. Remove the dash center pocket (see Body).
17. Remove the audio/navigation unit (see Radio and speakers — removal and installation).
18. Remove the driver’s side lower dash trim panels (see Body).
19. Remove the instrument cluster display trim panel (see Body). Disconnect the electrical connector to the ignition push button switch.
20. Turn the instrument cluster display trim cover and remove the screws securing the ignition push button switch to the trim cover.
21. Installation is the reverse of removal.