Radio and speakers — removal and installation
Warning: All models covered by this manual are equipped with a Supplemental Restraint System (SRS), more commonly known as airbags. Always disable the airbag system before working in the vicinity of any airbag system component to avoid the possibility of accidental deployment of the airbag, which could cause personal injury (see Airbag system — general information).
Note: Before beginning these procedures, make sure that you have the anti-theft code for the radio.
To obtain the audio/navigation codes go to https://radio-navicode.honda.corn/.
1. Disconnect the cable from the negative battery terminal and wait at least three minutes before proceeding (see Engine electrical systems).
Civic with audio display system
2. Remove dash center pocket (see Body).
3. Remove the lower bolts securing the radio to the dash (see illustration).
i.3 Removing the lower radio retaining screws
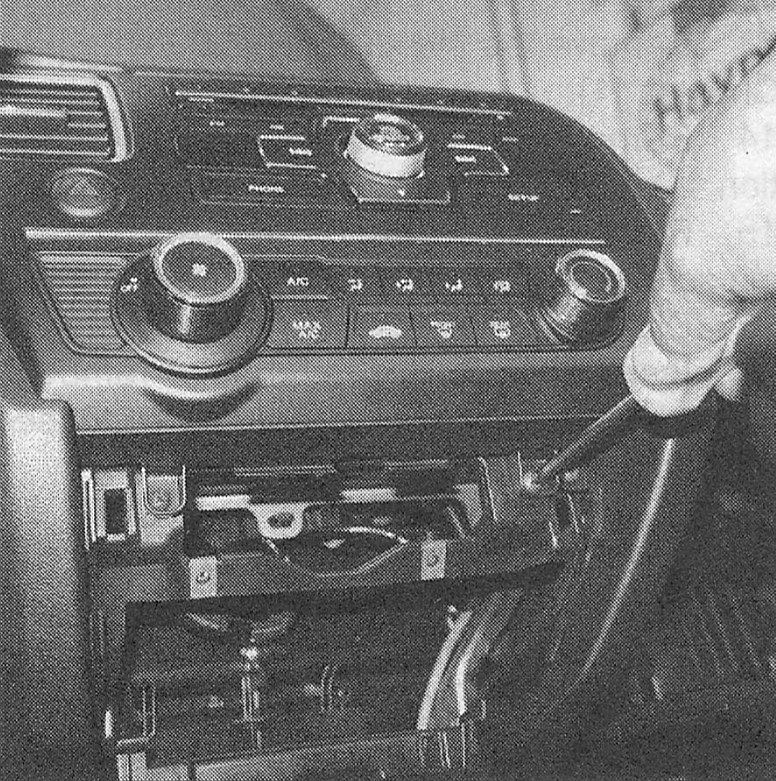
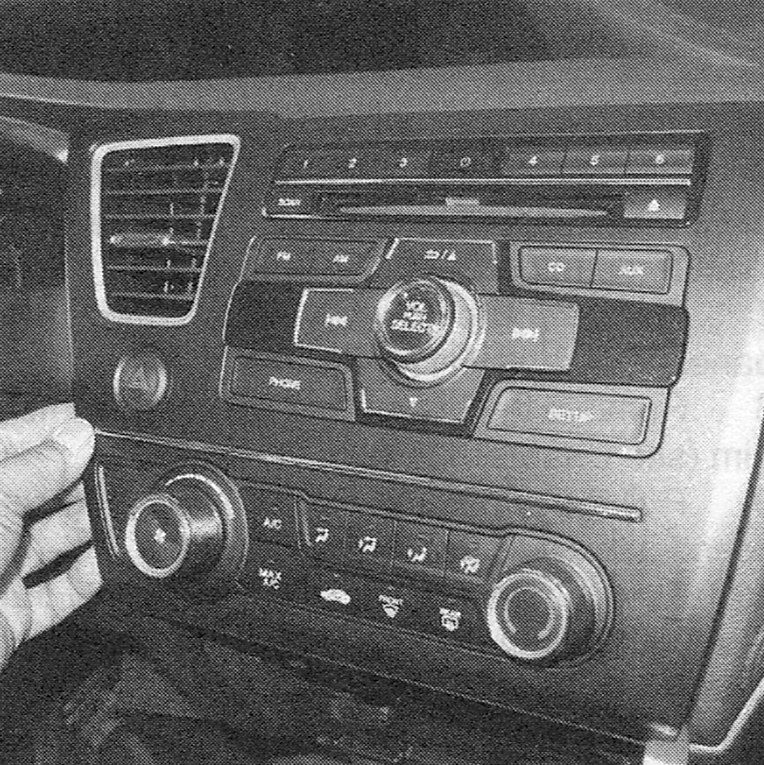
4. Carefully pull the radio assembly out of the dash far enough to reach the connections (see illustration).
i.4 Gently pry the trim and radio assembly out of the dash
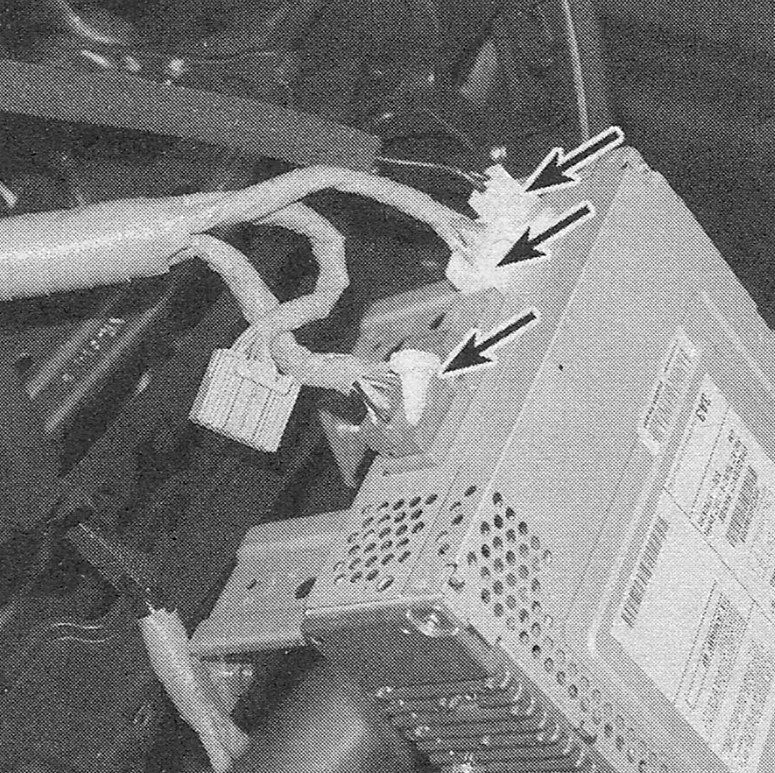
5. Disconnect the connectors and remove the assembly (see illustration).
i.5 Disconnect the electrical connectors
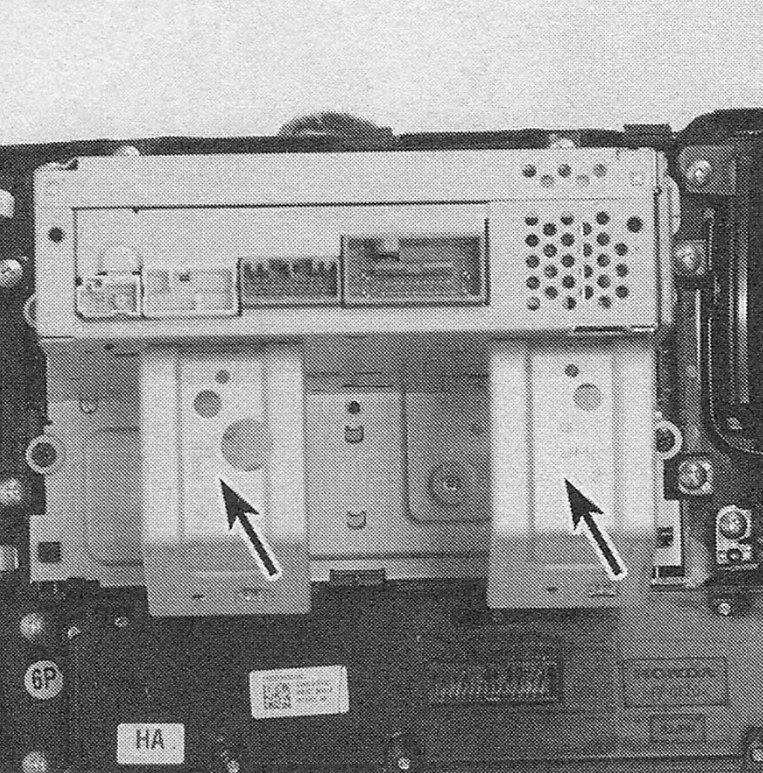
6. Remove the brackets on the side of the radio assembly and unscrew the radio from the trim panel (see illustration).
i.6 Remove these brackets to remove the radio assembly
7. Installation is the reverse of removal.
Civic with premium sound system or navigation system
8. Remove the driver’s side lower trim panels (knee bolster) (see Body).
9. Remove the instrument cluster assembly trim panel (see Body).
10. Remove the center lower trim panel (see Body).
11. Remove the lower bolts securing the radio to the dash. (Look up into the cavity of the center lower trim panel to see the bolts.)
12. Carefully pull the radio assembly out of the dash far enough to reach the connections. Disconnect the connectors and remove the assembly.
13. Remove the brackets on the side of the radio assembly and unscrew the radio from the trim panel.
14. Installation is the reverse of removal.
15. Reconnect the cable to the negative battery terminal (see Engine electrical systems).
CR-V with audio display system
16. Remove the center HVAC vents (see Body).
17. Remove the bolts securing the radio system to the dash supports.
18. Carefully pry the radio unit forward enough to disconnect the electrical connectors and remove the radio assembly from dash.
19. Remove the hazard switch from the trim panel.
20. Remove the radio bracket mounting bolts and separate the radio from the center panel.
21. Installation is the reverse of removal.
22. Reconnect the cable to the negative battery terminal (see Engine electrical systems).
CR-V with premium sound or navigation system
23. Remove the center HVAC vents (see Body).
24. Remove the bolts securing the assembly to the dash supports.
25. Slide the assembly out far enough to disconnect the electrical connectors, then remove the assembly.
26. Disconnect the FM distributor assembly (mounted on the bottom of the assembly) and remove the FM distributor assembly.
27. Remove the assembly from the trim, and then remove the locating brackets on either side of the assembly.
28. Installation is the reverse of removal.
Speakers
Tweeters — dashboard mounted
29. Tweeters on 2011 and earlier models are mounted to the underside of grilles located on top of the dashboard.
30. Carefully pry up the tweeter grille until it separates from the dashboard, taking care not to scratch or gouge the dashboard or grille.
31. Lift the grille away from the dashboard as far as you can with the wiring harness connected and turn it over.
32. Disconnect the tweeter two-pin wiring connector.
33. Check the capacitor, located next to the electrical connector on the tweeter, for damage. Replace the tweeter if any problems are visible.
34. With the tweeter electrical connector facing you, connect an ohmmeter between the right-hand terminal of the electrical connector and the left-hand terminal of the capacitor.
35. With the ohmmeter set to ohms X 1, check the resistance. It should be about 4 ohms. If not, replace the tweeter.
36. Installation is the reverse of removal.
Tweeters — door mounted
37. Carefully pry the sail trim from the top corner of the door.
38. Disconnect the electrical connector to the tweeter.
39. Pry the retaining clips away from the speaker then remove it.
40. Installation is the reverse of removal.
Door speakers
41. Remove the front door trim panel (see Body).
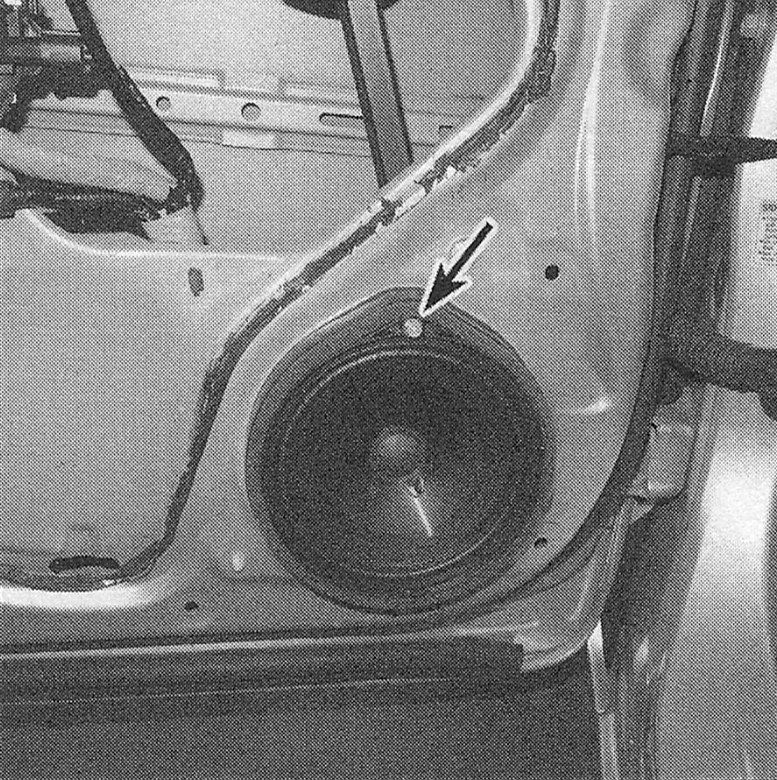
42. Remove the upper mounting screw, then lift up on the speaker to release the lower tab (see illustration).
i.42 Remove the single screw, then tilt out and lift it out of the door…
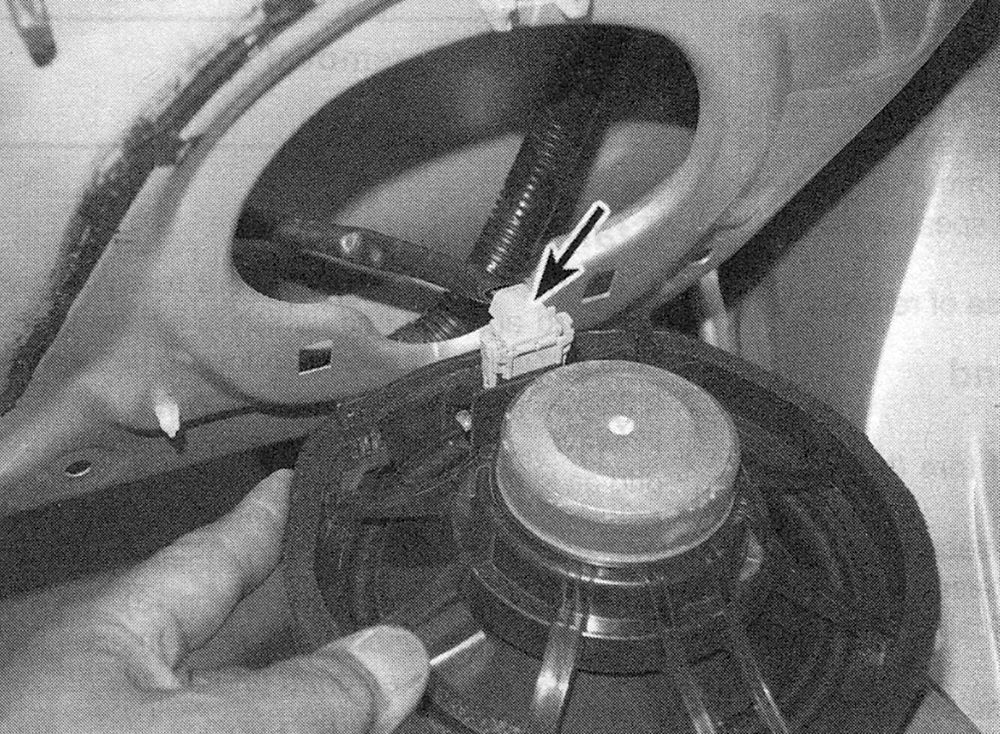
43. Disconnect the electrical connector (see illustration) and remove the speaker from the vehicle.
i.43… then disconnect the electrical connector
44. Installation is the reverse of removal.
Rear speakers — 2 door models
45. Remove the rear shelf trim panel (see Body).
46. Open the trunk and disconnect the electrical connector from the speaker.
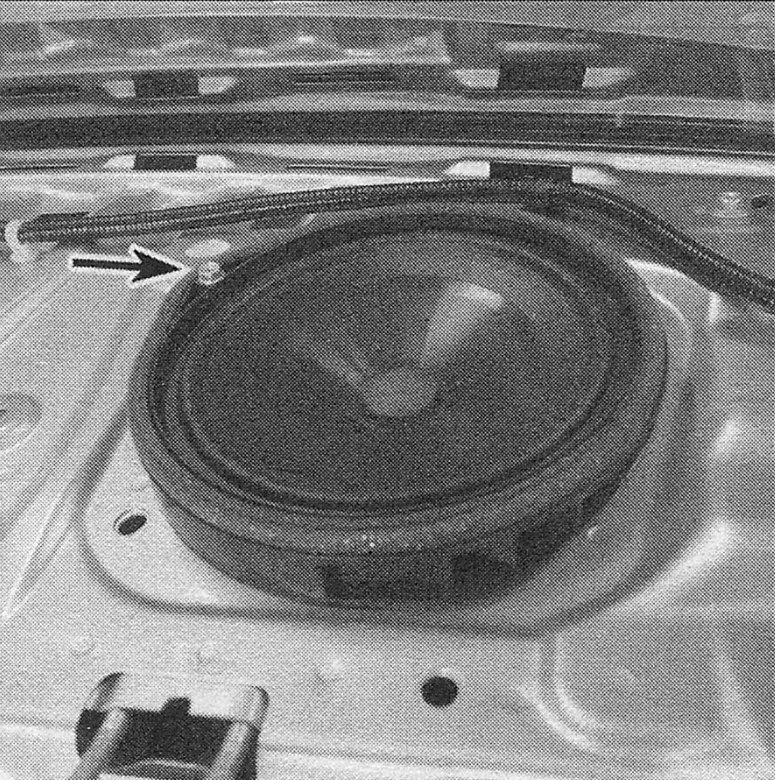
47. Remove the speaker mounting screw (see illustration) and pull the speaker out of its receptacle.
i.47 To detach a rear speaker from the rear shelf area, remove the screw, then tilt up and pull upward to remove
48. Installation is the reverse of removal.
Sub-woofer removal and installation
49. Remove the rear shelf trim (see Body).
50. Unscrew the fasteners securing the sub-woofer to the rear shelf. Raise the speaker and disconnect the electrical connections. Then remove the speaker.
51. Installation is the reverse of removal.