Engine cooling fans — replacement
Warning: To avoid possible injury or damage, DO NOT operate the engine with a damaged fan. Do not attempt to repair fan blades — replace a damaged fan with a new one.
Note: All air-conditioned models have two complete fan circuits — one for the condenser fan and one for the radiator fan. The following procedures apply to both.
Warning: Wait until the engine is completely cool before beginning this procedure.
1. Disconnect the cable from the negativebattery terminal (see Engine electrical systems).
2. On 2.4L Civic models, remove the PCMfrom the mounting bracket, without disconnecting the electrical connectors and secure the assembly out of the way.
3. On 2.4L models, remove the intake airduct and air filter housing (see Fuel and exhaust systems).
4. On CR-V models, remove the grille pushpins and carefully disengage the lower clips, then separate the grille from the bumper cover, ifnecessary (see Radiator grille — removal and installation). Once the grille is removed, remove the duct pushpins and duct assembly from the bumper cover.
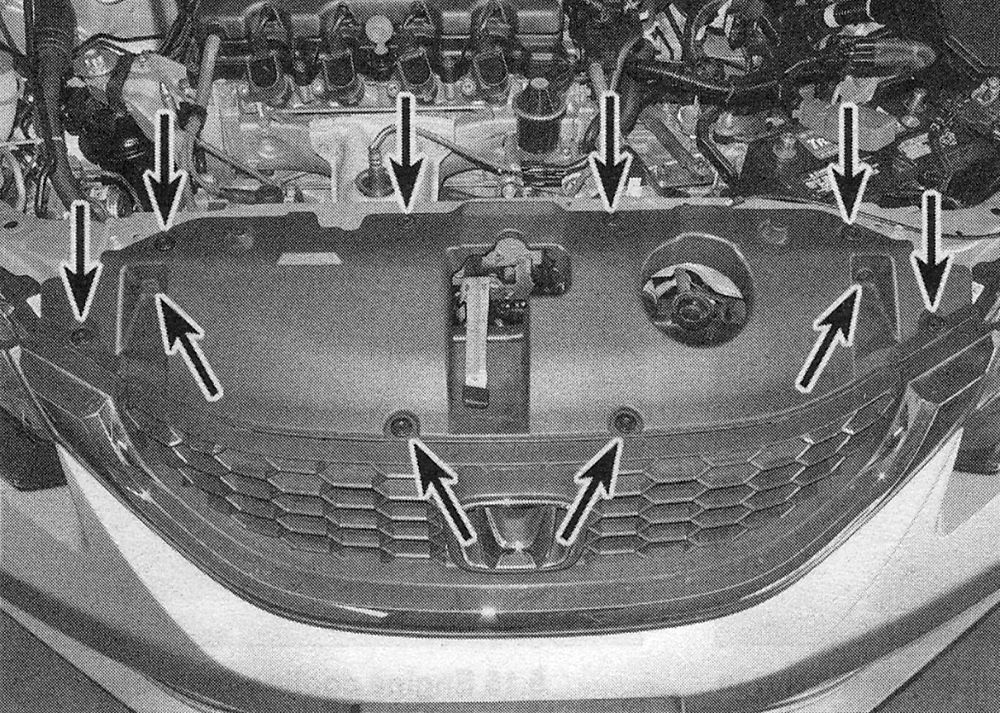
5. On Civic models, remove the radiator support cover push pins and remove the cover (see illustration).
i.5 Radiator cover mounting fasteners — Civic models
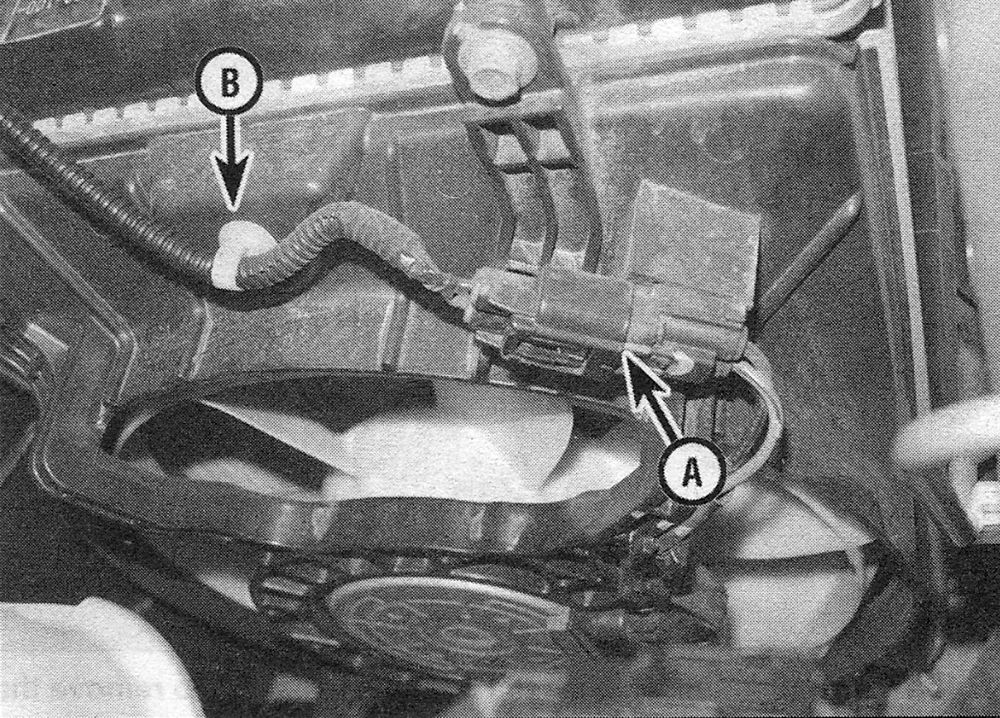
6. Remove the wiring harness clamp and position the harness off to the side (see illustration).
i.6 Disconnect the radiator fan electrical connector (A) then the harness retainer (B) and remove the fan shroud — condenser
fan similar
7. On Civic models, remove the battery andthe battery tray, and position the wiring harness off to the side (see Engine electrical systems).
8. On CR-V models, disconnect the electrical connector to the horn, then remove the horn and bracket as an assembly (see Chassis electrical system). Remove the hood latch (see Body).
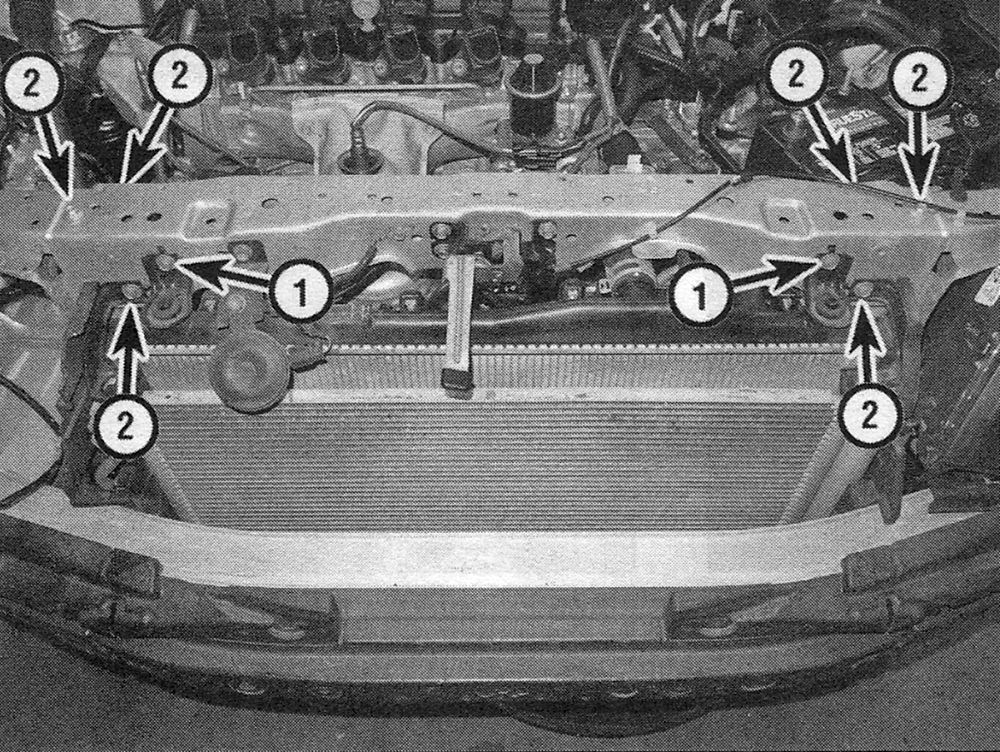
9. Remove the radiator mount upperbracket bolts and brackets (see illustration .10).
10. On Civic models, remove the coolant reservoir (see Coolant reservoir — removal and installation), then remove the radiator crossmember (see illustration).
i.10 Radiator mount bolt (1) and crossmember mountingbolt (2) locations
11. Disconnect the fan wiring connectors located near the top of the cooling fan shroud.
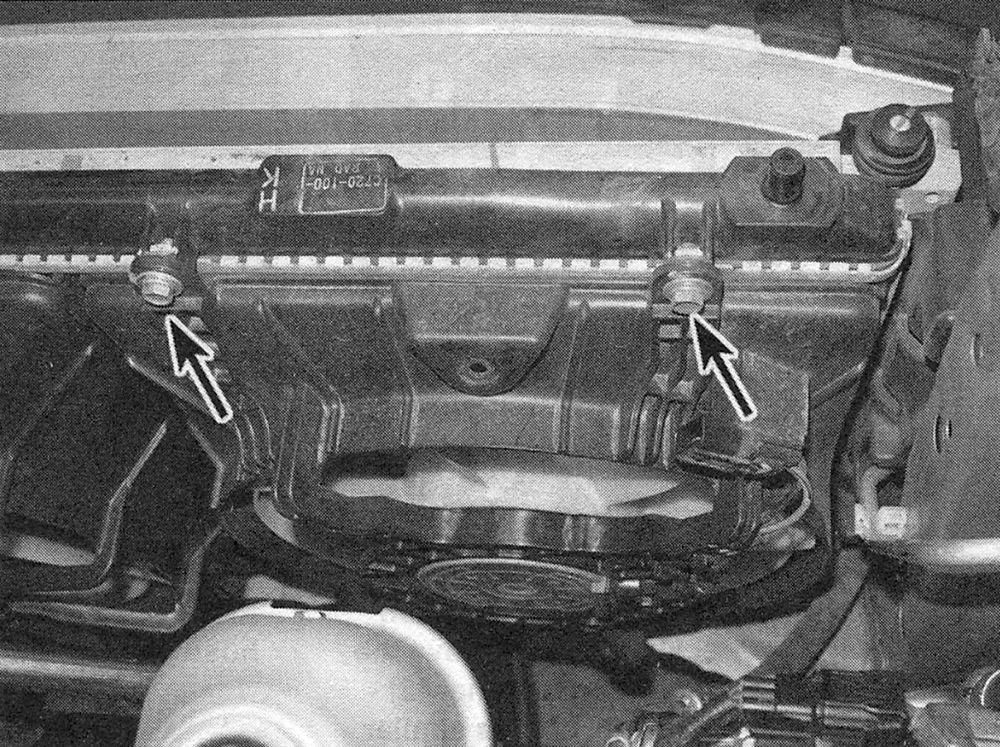
12. Unbolt the engine cooling fan (s) from the radiator at the top (see illustration).
i.12 Location of the radiator fan mounting bolts (condenser fan similar)
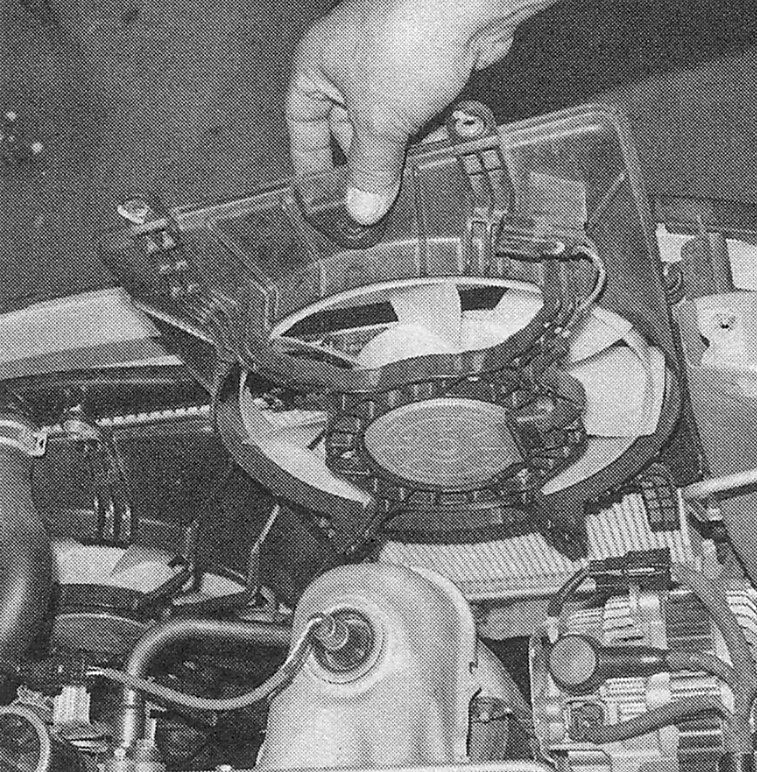
13. Carefully lift the condenser fan out first, then lift the radiator fan up slightly, sliding it to the right and pull it out of the engine compartment (see illustration).
i.13 Lift the radiator fan from the engine compartment — Civic model shown
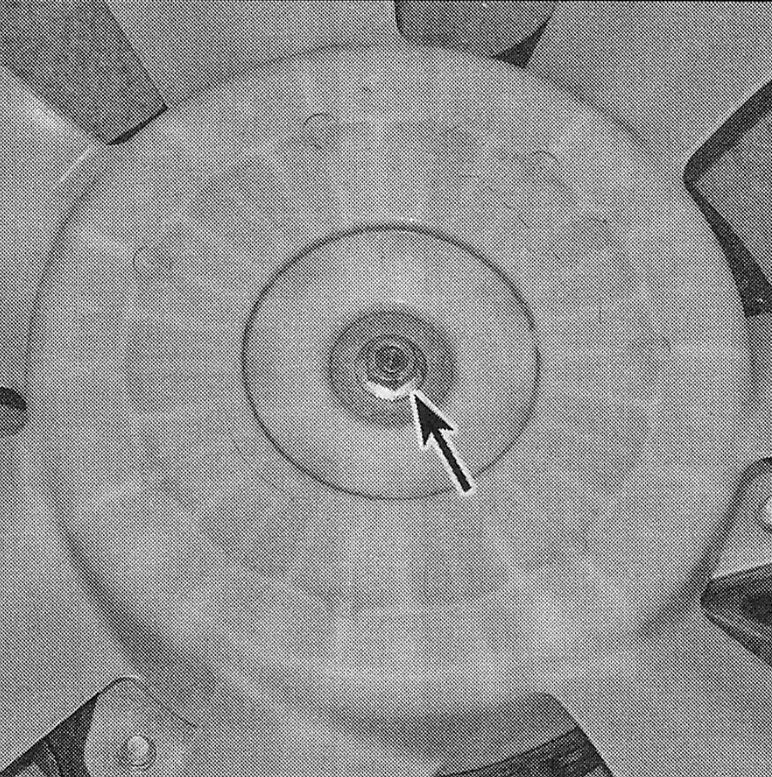
14. To detach the fan from the motor, remove the motor shaft nut (see illustration).
i.14 To remove the fan, unscrew the nut in the center, then pull the fan blade from the motor shaft
15. To detach the fan motor from the shroud, remove the mounting screws (see illustration).
i.15 Engine cooling fan motor mounting screws

16. Installation is the reverse of removal.
17. Refill the cooling system (see Tune-up and routine maintenance).
18. Reconnect the battery (see Engine electrical systems).