Evaporative Emissions Control (EVAP) system — component replacement
EVAP canister purge valve
1. The EVAP canister purge valve is located on the intake manifold, just above the throttle body (1.8L models) or on the left end of the cylinder head (2.4L models).
2. On 2015 and later CR-V models, remove the high-pressure fuel pump cover and bracket (see Fuel pump/fuel gauge sending unit module — removal and installation).
3. On 2014 and earlier CR-V models, remove the engine cover and air filter housing (see Fuel and exhaust systems).
4. On all models, disconnect the electrical connector from the EVAP canister purge valve (see illustration).
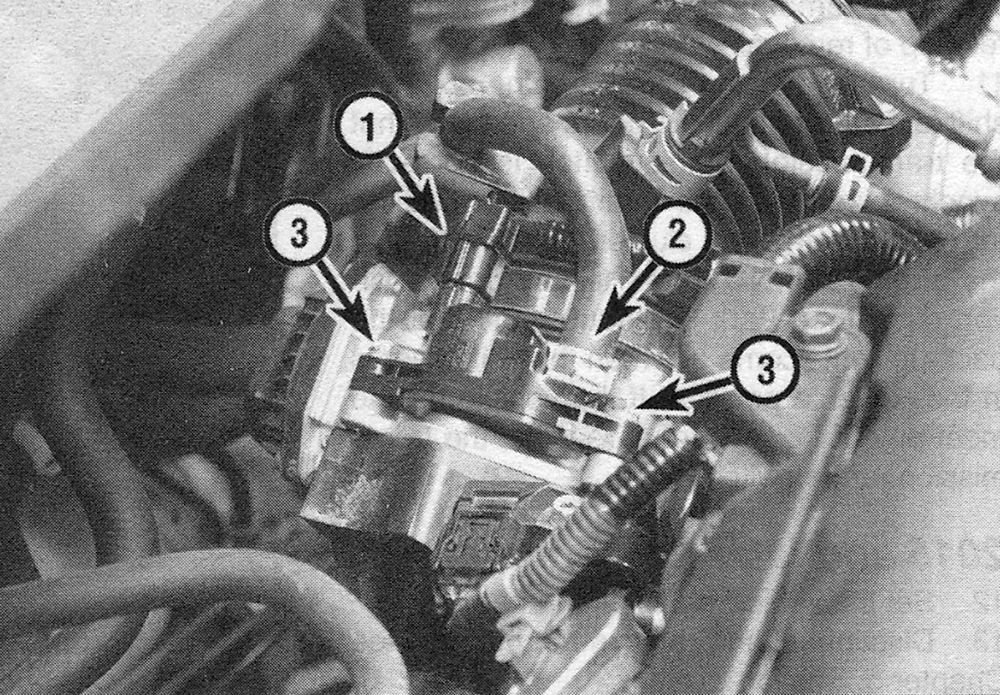
i.4 Canister purge valve details (1.8L Civic shown)
1 Electrical connector
2 Purge hose
3 Mounting screws
5. Disconnect the vacuum hoses from the EVAP canister purge valve.
6. Remove the EVAP canister purge valve mounting screws.
7. Remove the EVAP canister purge valve.
8. Installation is otherwise the reverse of removal.
EVAP canister vent shut valve
9. Raise the vehicle and access the EVAP canister by removing any under covers.
10. Disconnect the electrical connector from the valve (see illustration).
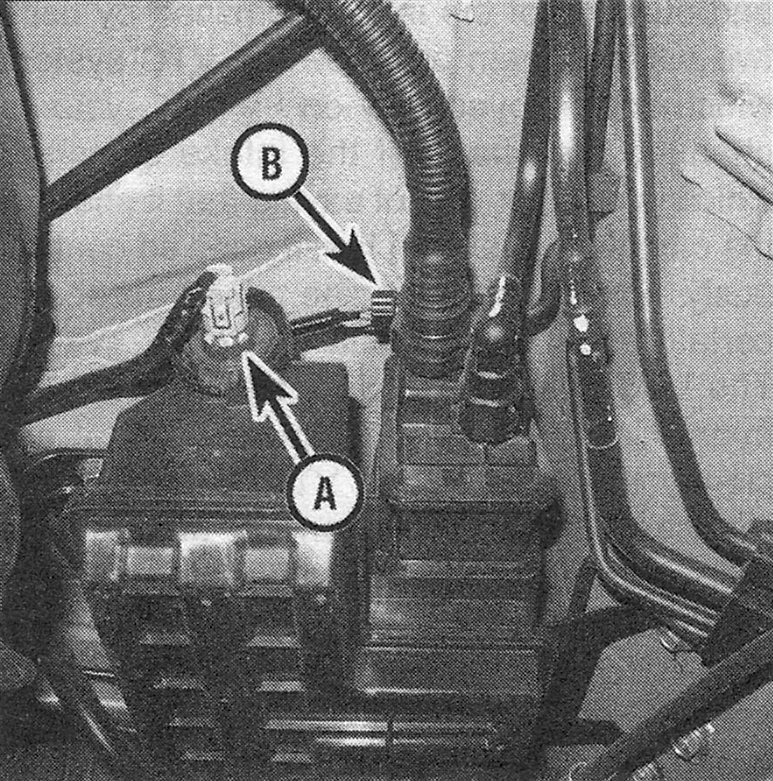
19.10 EVAP canister vent shut valve (A) and the FTP sensor (B) (1.8L Civic shown)
11. Rotate the vent shut valve clockwise and pull the valve from the EVAP canister.
12. Replace the 0-ring on the vent shut valve.
Caution: Do not coat the 0-rings with oil.
13. Installation is the reverse of removal.
EVAP fuel tank pressure (FTP) sensor
14. Raise the vehicle and access the EVAP canister by removing any under covers.
15. Locate the FTP sensor at the side of the EVAP canister and disconnect the electrical connector (see illustration 19.10).
16. Remove the FTP sensor retaining clip and remove the sensor.
17. Replace the 0-ring on the sensor.
Caution: Do not coat the 0-rings with oil.
18. Installation is the reverse of removal.
EVAP canister
19. Raise the vehicle and place it securely on jack stands.
20. Remove the any covers necessary to access the EVAP canister for removal.
21. Disconnect the vapor hose and the electrical connector from the vent shut valve and FTP sensor and disconnect the two vapor hoses from the right end of the EVAP canister (see illustration 19.10).
22. Disengage any vapor hoses that are attached to the sides of the canister.
23. Remove the EVAP canister mounting bolts, then remove the canister.
24. If you’re planning to replace the EVAP canister, be sure to remove the vent shut valve, and any other EVAP system components attached to the canister, and install them on the new canister.
25. Installation is the reverse of removal.