Transaxle range switch — replacement and adjustment
Civic AT and 2014 and earlier CR-V models
1. Set the vehicle’s parking brake.
2. Loosen the lug nuts for the left front wheel. Raise the vehicle and place it securely on jack stands, then remove the wheel.
3. Remove the inner fender splash shield (see Body).
4. Put the shift lever inside the vehicle in the Neutral position.
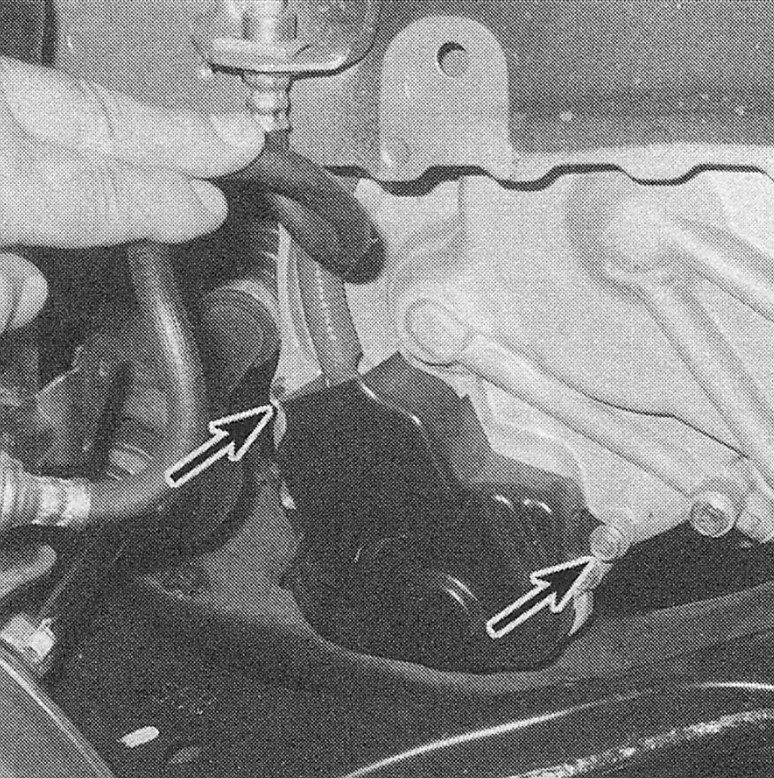
5. Remove the cover from the transmission range switch (see illustration).
i.5 To detach the transmission range switch cover, remove these two bolts
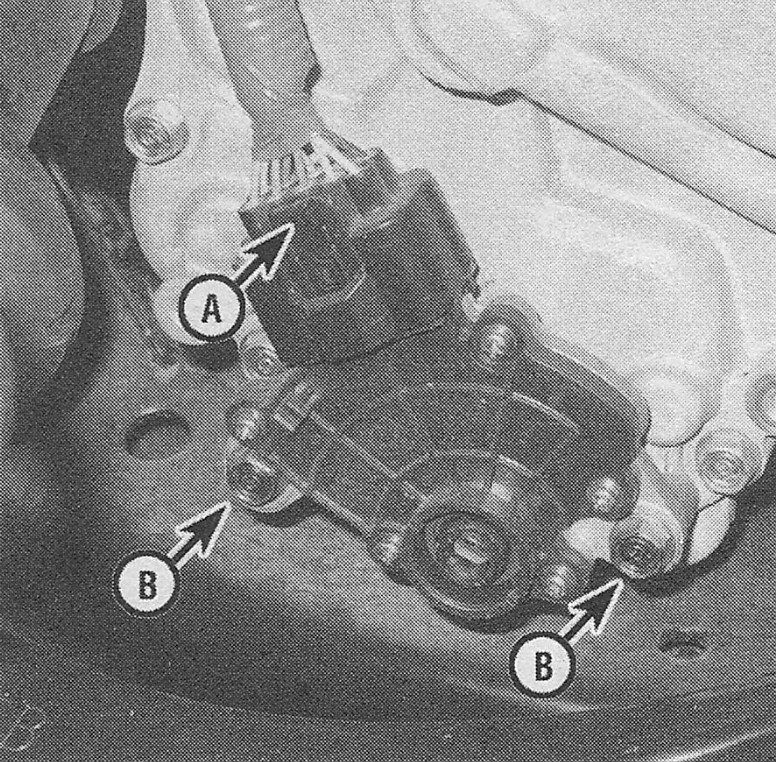
6. Disconnect the electrical connector from the transmission range switch (see illustration).
i.6 To disconnect the electrical connector from the transmission range switch, depress the locking tab (A) and pull off the connector; to detach the transmission range switch from the transaxle, remove the two bolts (B)
7. Remove the transmission range switch mounting bolts and remove the switch (see illustration).
i.7 Once you have removed the transmission range switch from the transaxle, do NOT move the control shaft from the Neutral position (shown)
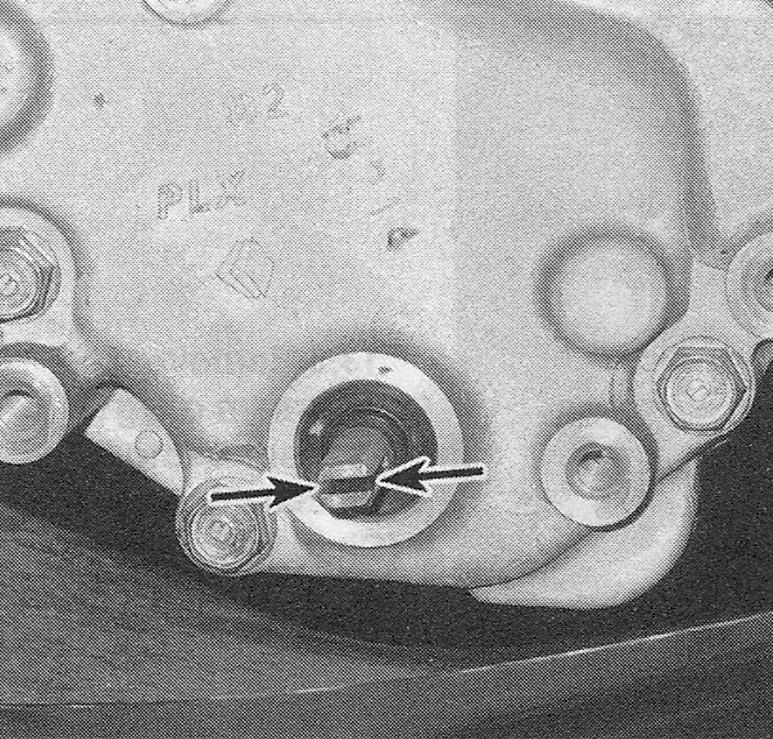
Caution: While the transmission range switch is removed, do NOT rotate the control shaft on the transaxle.
8. Before installing the transmission range switch, make sure that the switch is in the Neutral position. You’ll hear/feel a click when you put the switch into Neutral. Also make sure that the control shaft is in the Neutral position before installing the transmission range switch. To do so, rotate the control shaft in a clockwise direction until it stops. As you rotate the shaft, it clicks into each gear position. Rotate it counterclockwise to the third position (third click), which is Neutral.
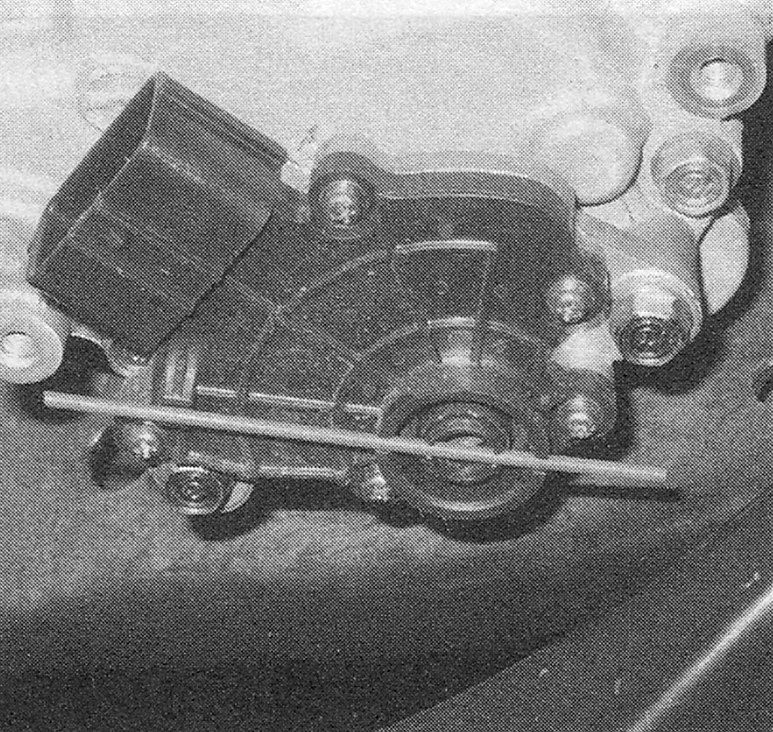
9. Install the transmission range switch and loosely install the switch mounting bolts. Then use a long, thin drill bit or a metal rod to align the control shaft with the rotary frame (see illustration) and to lock them together while you tighten the switch mounting bolts securely.
i.9 When installing the transmission range switch, align the slot in the control shaft with the cutouts in the rotary frame and the switch housing
Note: Be careful not to move the transmission range switch while tightening the switch mounting bolts.
10. The remainder of installation is the reverse of removal.
11. Turn the ignition switch to On, move the shift lever through all the gears and verify that the transmission range switch is correctly synchronized with the gear position indicator on the instrument cluster. Then verify that the engine will NOT start in any gear position other than Park or Neutral, and that the back-up lights come on when the shift lever is in the Reverse position. If the vehicle fails to meet any of these criteria, readjust the transmission range switch.
2015 and later CR-V models
12. Set the vehicle’s parking brake.
13. Disconnect and remove the battery (see Battery — disconnection and reconnection).
14. Remove the air filter housing and intake air pipe below the housing (Air filter housing — removal and installation).
15. Remove the PCM and PCM bracket (see pouring it on the ground or down a drain! 밐èasure the amount of fluid drained and write down this figure for reference w).
16. Disconnect the engine harness clips and brackets and re-position as to allow access to the range switch.
17. Unlock the range switch connector lock and disconnect the connector.
18. Manually shift the transaxle into neutral (N) and remove the control shaft cover.
19. Remove the two bolts and the transaxle range switch from the transaxle.
20. To install, with the transaxle in neutral (N), looking at the transaxle range switch from the top, with the connector at the top right, align the slot on the rotating part of the switch with the N positioning cutout at the top left on the transaxle range switch, then put a 2.0 mm (0.079 in) feeler gauge in the cutouts to hold the transaxle range switch in the N position while it is installed.
21. The remainder of installation is the reverse of removal.
22. Turn the ignition switch to On, move the shift lever through all the gears and verify that the transmission range switch is correctly synchronized with the gear position indicator on the instrument cluster. Then verify that the engine will NOT start in any gear position other than Park or Neutral, and that the back-up lights come on when the shift lever is in the Reverse position. If the vehicle fails to meet any of these criteria, readjust the transmission range switch.
Civic CVT models
23. Set the vehicle’s parking brake.
24. Disconnect the CVT speed sensor connector and any harness clips or bolts and reposition the harness to allow access to the transaxle range switch.
25. With the vehicle in Park (P), disconnect the shift cable from the shift lever (see illustration) and disconnect the shift cable bracket from the transaxle to allow the cable to be re-positioned out of the way.
i.25 Disconnect the shift cable from the shift lever

26. Rotate the shift lever away from Park (P) two clicks to place the transaxle in neutral.
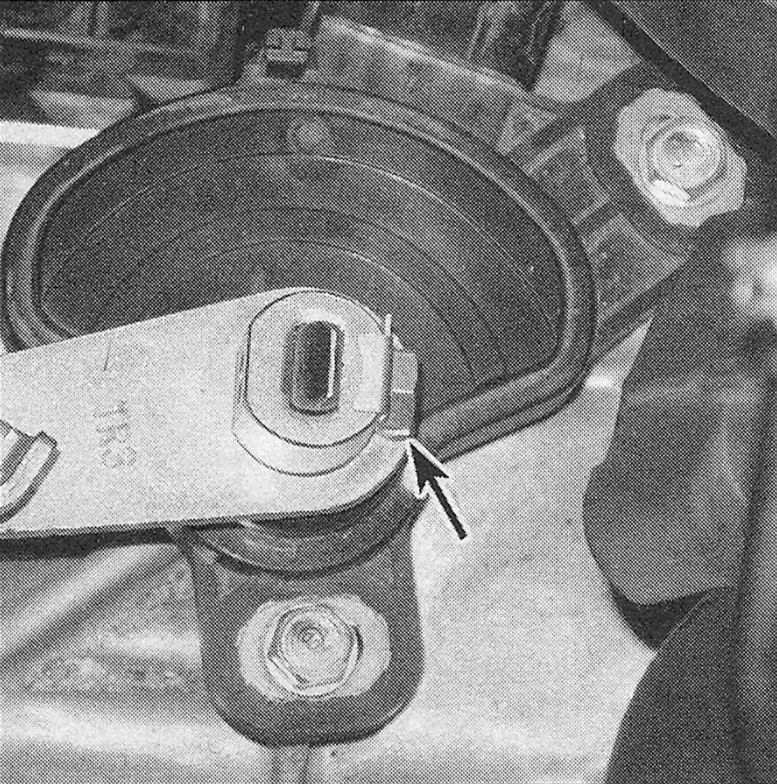
27. Bend back the lock tab and remove the bolt and control lever from the control shaft (see illustration).
i.27 Bend this lock tab to allow the bolt to be removed
28. Remove the transaxle range switch bolts and the control shaft cover. Remove the transaxle range switch from the control shaft.
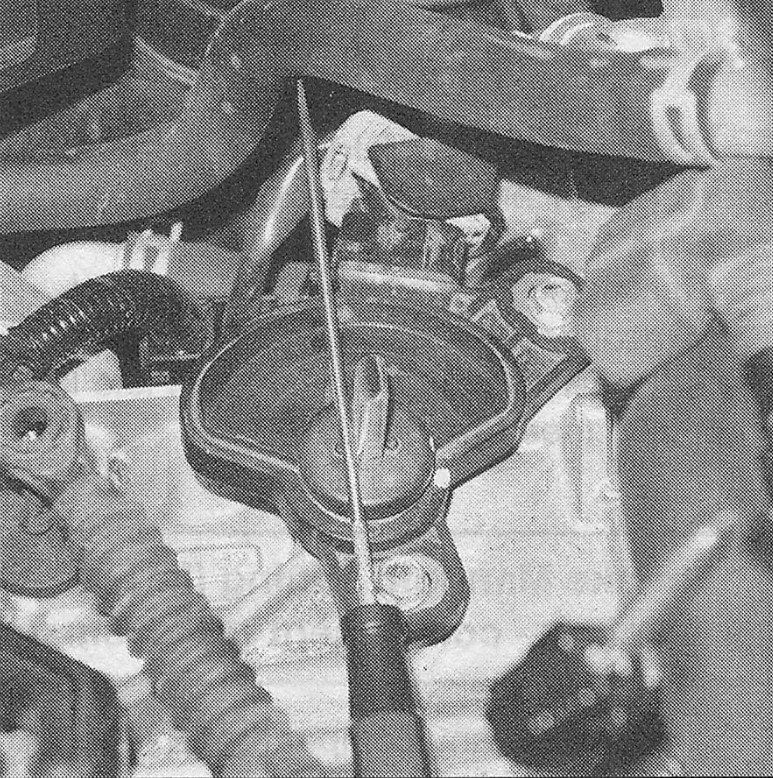
29. To install, align the transaxle range switch in the neutral position and install to the transaxle over the control shaft. Install the bolts loosely and align the range switch as shown and tighten the bolts (see illustration).
i.29 Align the transaxle range switch as shown and tighten the bolts
30. The remainder of installation is the reverse of removal.
31. Turn the ignition switch to On, move the shift lever through all the gears and verify that the transmission range switch is correctly synchronized with the gear position indicator on the instrument cluster. Then verify that the engine will NOT start in any gear position other than Park or Neutral, and that the back-up lights come on when the shift lever is in the Reverse position. If the vehicle fails to meet any of these criteria, readjust the transmission range switch.