Alternator — removal and installation

1. Disconnect the cable from the negative terminal of the battery (see Battery — disconnection and reconnection).

Civic 1.8L models

2. Remove the drivebelt (see Drivebelt check, adjustment and replacement).

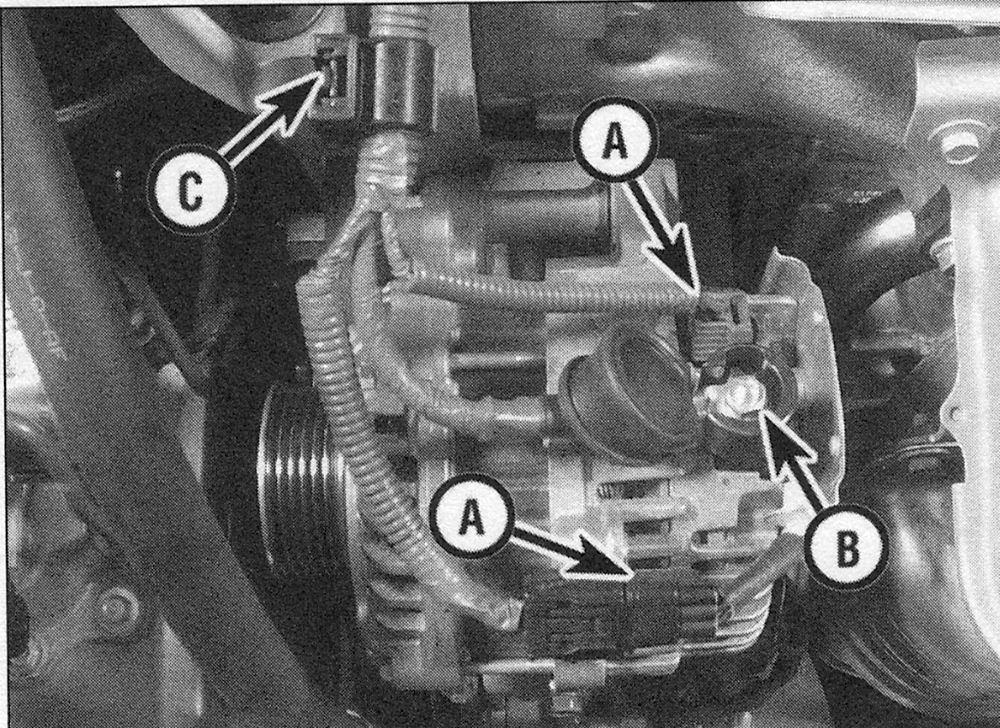
3. Disconnect the electrical connectors and B+ terminal from the alternator (see illustration).

i.3 Disconnect the connectors (A), the B+ terminal (B) and the harness clip (C)

Honda Civic & CRV Engine electrical systems | Alternator - removal and installation

4. Remove the two bolts attaching the alternator to the engine.

5. Remove the alternator from the vehicle.

6. Installation is reverse of removal. Tighten the fasteners to the torque listed in this Chapter’s Specifications.

Civic 2.4L models and CR-V models

7. Remove the drivebelt and the tensioner and idler pulleys and brackets (see Drivebelt check, adjustment and replacement). On 2014 and later CR-V models, only the tensioner assembly requires removal.

8. On Civic, remove the plastic cover above the grill that attaches to the grille and radiator support (see illustration .9).

9. On Civic, disconnect any electrical connectors or harness clips and remove the radiator support (see illustration).

i.9 Remove the plastic cover (A) and the radiator support (B)

Honda Civic & CRV Engine electrical systems | Alternator - removal and installation

10. On Civic models, remove the air conditioning condenser fan assembly from the passenger’s side of the radiator (see Cooling, heating and air conditioning systems).

11. On all models, remove the bolts attaching the alternator to the engine.

12. Disconnect the electrical connector (s) and B+ terminal from the alternator.

13. Remove the alternator from the vehicle.

14. Installation is the reverse of removal. Tighten the fasteners to the torque listed in this Chapter’s Specifications.

  • Pages

    open all | close all