Fuel tank — removal and installation
Warning: Gasoline is extremely flammable, so take extra precautions when you work on any part of the fuel system. See the Fuel system warnings in Fuel and exhaust systems.
Note: The following procedure is much easier to perform if the fuel tank is empty. The tank has no drain plug, so the fuel must be siphoned from the tank with a siphoning kit, which is available at most auto parts stores. NEVER try to start the siphoning action with your mouth!
1. Relieve the fuel system pressure (see Fuel pressure relief procedure).
2. Disconnect the cable from the negative battery terminal (see Engine electrical systems).
3. Access the fuel pump/fuel gauge sending unit and disconnect the fuel lines and/or the electrical connector (see Fuel pump/fuel gauge sending unit module — removal and installation).
4. Raise the vehicle and support it securely on jack stands.
5. If the fuel tank is empty or nearly empty, it’s not necessary to siphon the remaining fuel from the tank. But if there is a lot of fuel in the tank, drain the fuel by removing the fuel pump/fuel gauge sending unit (see Fuel pump/fuel gauge sending unit module — removal and installation) and siphoning it out through the hole for the pump/sending unit.
Warning: Always siphon fuel into an approved gasoline container. Also, never start the siphoning action by mouth — use a siphoning pump (available at most auto parts stores).
Civic models
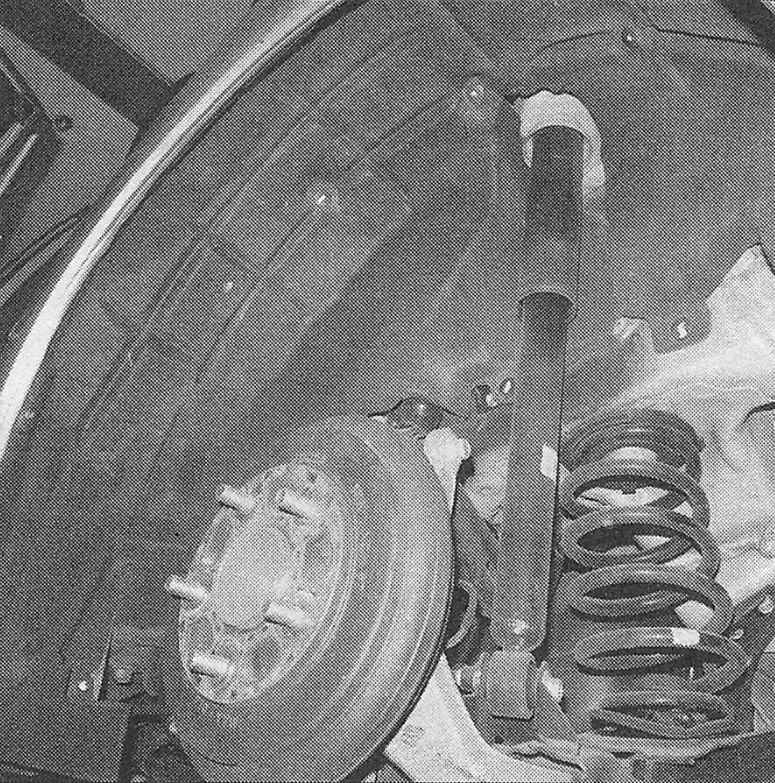
6. Remove the driver’s rear wheel and wheel well liner (see illustration).
i.6 Remove the driver’s rear wheel well liner (2014 Civic shown)

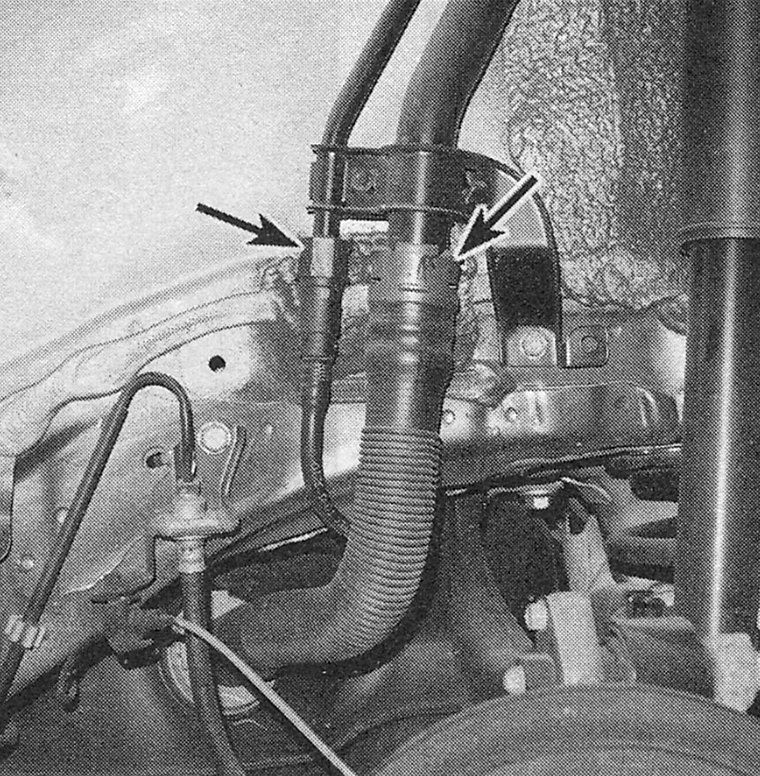
7. Disconnect and remove the fuel filler neck hose and the fuel tank vapor hose (see illustration). Inspect these two hoses for cracks, tears and other deterioration. If either hose is damaged or worn, replace it.
i.7 Disconnect the fuel filler neck hose and the fuel tank vapor hose quick connect fittings (2014 Civic shown)

8. Remove the lower rear cover mounting fasteners and pull the back of the cover down, if equipped.
9. Disconnect the fuel line quick-connect fittings located at the front of the tank.
10. Remove the fuel tank shield.
11. Support the fuel tank with a transmission jack. If you don’t have a transmission jack, use a floor jack. If you’re going to use a floor jack, put a piece of plywood between the jack head and the fuel tank to protect the tank.
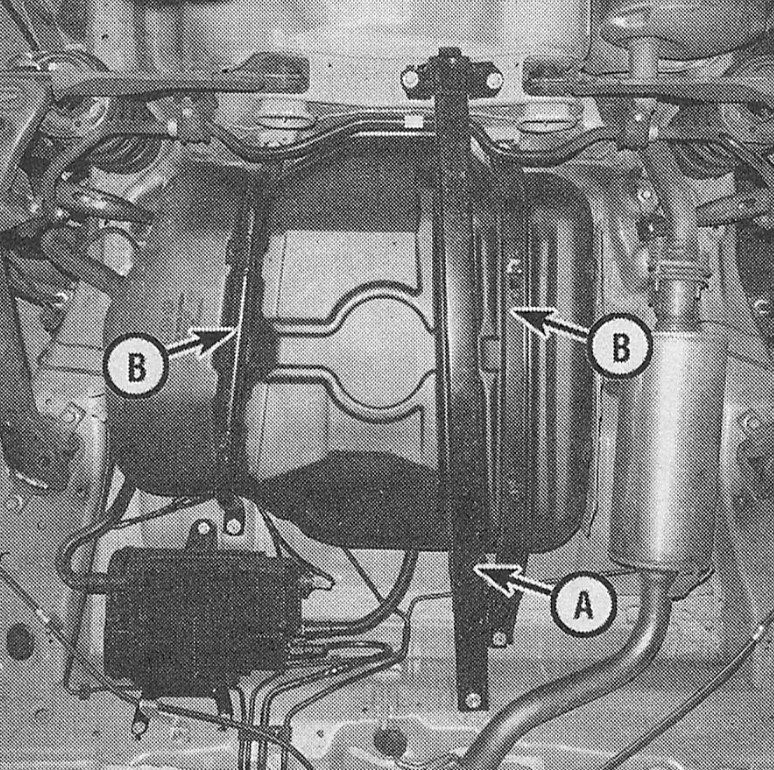
12. Remove the rear underfloor bar and unbolt the fuel tank retaining straps (see illustration) and remove them.
i.12 To remove the fuel tank from the underside of the vehicle, remove the underfloor bar (A) and fuel tank straps (B)

13. If equipped, remove the fuel tank baffle plates.
14. Carefully lower the fuel tank.
15. If you need to remove the fuel pump/fuel gauge sending unit module, but haven’t yet done so, see Fuel pump/fuel gauge sending unit module — removal and installation.
16. Installation is the reverse of removal.
CR-V models
17. Remove the driver’s rear wheel.
18. Remove the left and right vehicle undercover panels.
19. Remove the exhaust pipe mounting bolts and pipe.
20. On 4WD models remove the driveshaft (see Clutch and driveline).
21. Remove the fuel tank guard fasteners and guard at the front of the tank.
22. Clean the area around the fuel filler neck hose and the fuel tank vapor hose at the fuel tank. Disconnect the fuel filler neck hose and the fuel tank vapor hose quick-disconnect fittings.
23. Disconnect the fuel tank vapor hose quick-disconnect fitting from the front of the fuel tank.
24. Support the fuel tank with a transmission jack. If you don’t have a transmission jack, use a floor jack. If you’re going to use a floor jack, put a piece of plywood between the jack head and the fuel tank to protect the tank.
25. Unbolt the fuel tank retaining straps and remove them.
26. Carefully lower the fuel tank.
27. If you need to remove the fuel pump/fuel gauge sending unit module, but haven’t yet done so, refer to Fuel lines and fittings — general information and disconnection.
28. Installation is the reverse of removal.