Hub and bearing assembly (rear) — removal and installation
Warning: Dust created by the brake system is harmful to your health. Never blow it out with compressed air and don’t inhale any of it. Do not, under any circumstances, use petroleum-based solvents to clean brake parts. Use brake system cleaner only.
Note: The rear hub and bearing are combined into a single assembly. The bearing is sealed for life and requires no lubrication or attention. If the bearing is worn or damaged, replace the entire hub and bearing assembly.
1. Loosen the rear wheel lug nuts, raise the rear of the vehicle and support it securely on jack stands. Block the front wheels to prevent the vehicle from rolling. Remove the wheel.
2. If you’re working on an AWD CR-V model, remove the drive axle/hub nut.
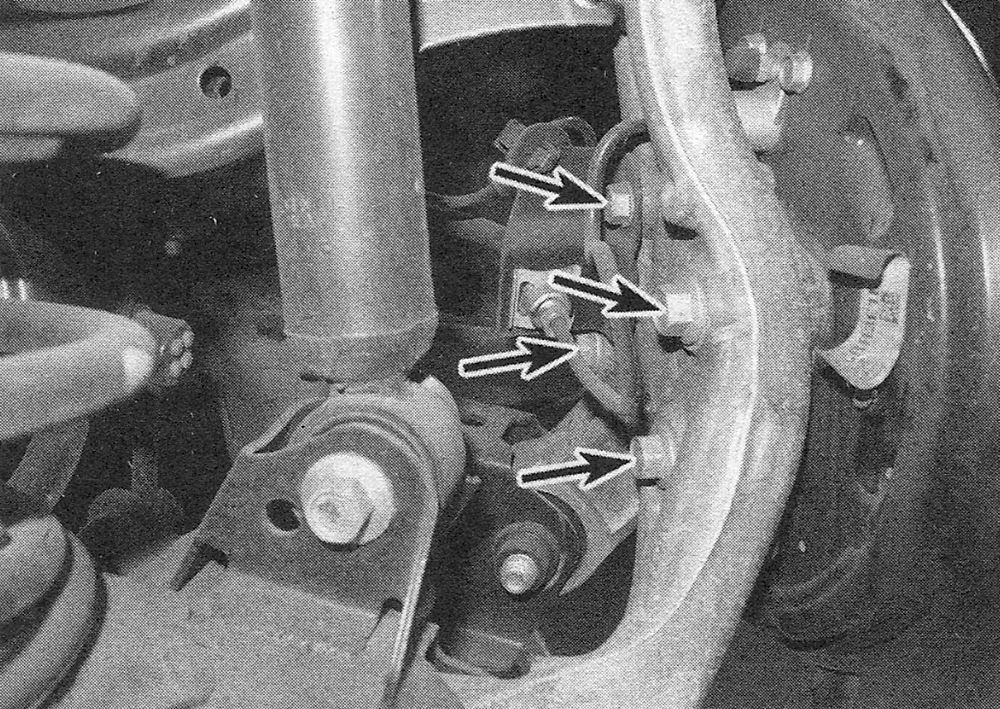
4. From the backside of the knuckle, remove the four retaining bolts securing the hub assembly to the knuckle (see illustration).
i.4 Hub assembly retaining bolts
5. Remove the hub and bearing assembly from the spindle.
6. If equipped, remove the 0-ring.
7. Installation is the reverse of removal, noting the following points:
) Install a new 0-ring (if applicable) and tighten the hub bolts to the torque listed in this Chapter’s Specifications.
) On models with rear disc brakes, tighten the caliper mounting bracket bolts to the torque listed in the Brakes Specifications
) On AWD CR-V models, tighten the drive axle/hub nut to the torque listed in the Clutch and driveline Specifications.
) Install the wheel and lug nuts. Lower the vehicle and tighten the lug nuts to the torque listed in the Tune-up and routine maintenance Specifications