Strut / spring assembly — replacement
Warning: Struts and/or coil springs must be replaced in pairs — never replace just one of them.
1. If the struts or coil springs exhibit the tell-tale signs of wear (leaking fluid, loss of damping capability, chipped, sagging or cracked coil springs) explore all options before beginning any work. The strut/shock absorber assemblies are not serviceable and must be replaced if a problem develops. However, strut assemblies complete with springs may be available on an exchange basis, which eliminates much time and work. Whichever route you choose to take, check on the cost and availability of parts before disassembling your vehicle.
Warning: Disassembling a strut is potentially dangerous and utmost attention must be directed to the job, or serious injury may result. Use only a high-quality spring compressor and carefully follow the manufacturer’s instructions furnished with the tool. After removing the coil spring from the strut assembly, set it aside in a safe, isolated area.
Disassembly
2. Remove the strut and spring assembly (see Strut assembly (front) — removal, inspection and installation). Mount the strut assembly in a vise. Line the vise jaws with wood or rags to prevent damage to the unit and don’t tighten the vise excessively.
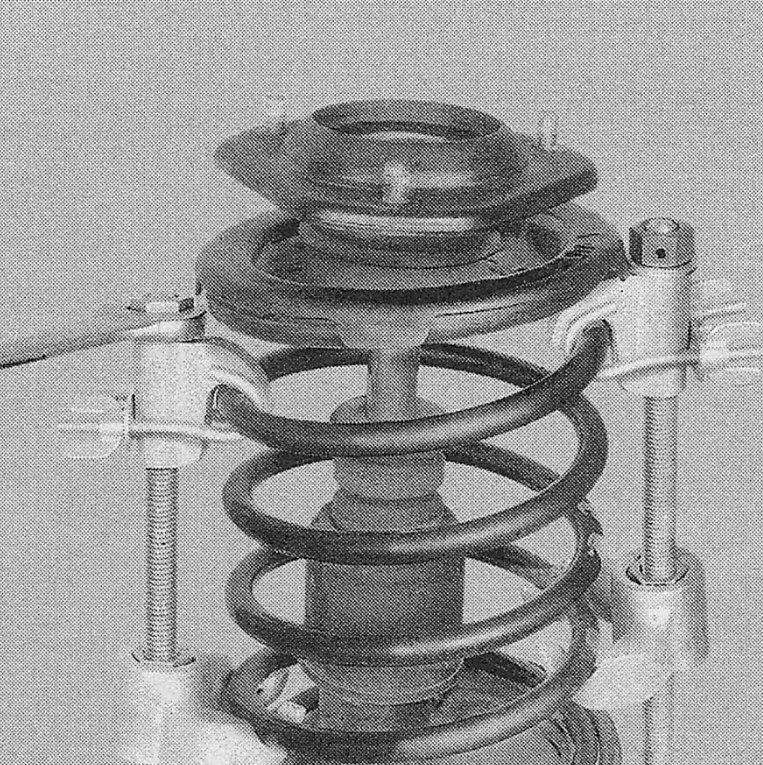
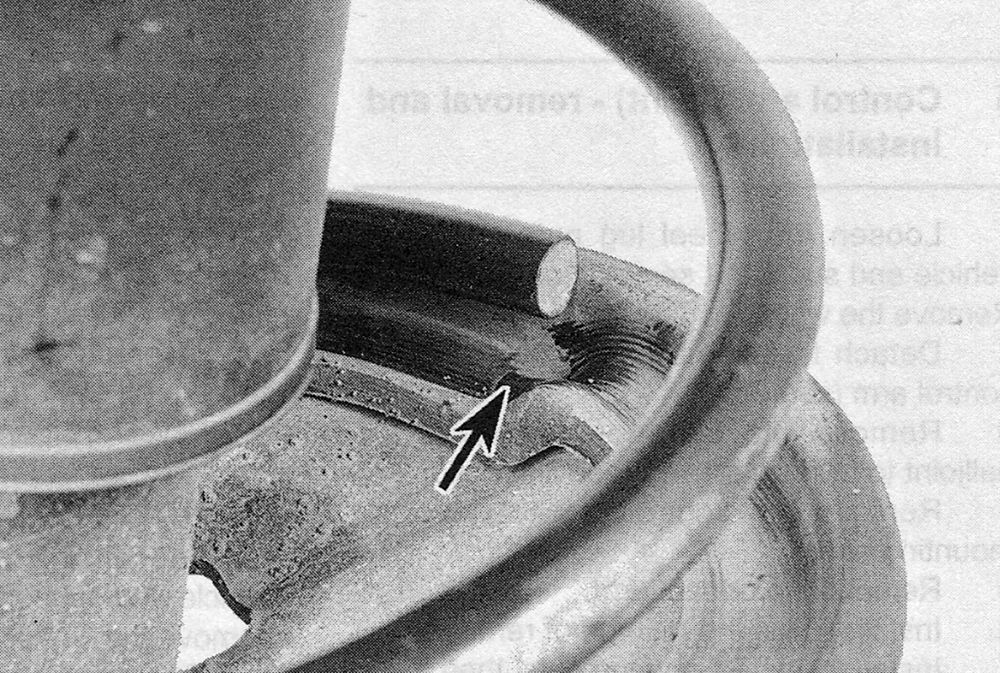
3. Following the tool manufacturer’s instructions, install the spring compressor (which can be obtained at most auto parts stores or equipment yards on a daily rental basis) on the spring and compress it sufficiently to relieve all pressure from the upper spring seat (see illustration). This can be verified by wiggling the spring.
i.3 Install the spring compressor following the tool manufacturer’s instructions ; compress the spring until all pressure is relieved from the upper spring seat (you can verify the spring is loose by wiggling it)
4. Hold the damper rod with an Allen wrench, and unscrew the damper rod nut with a box-end wrench.
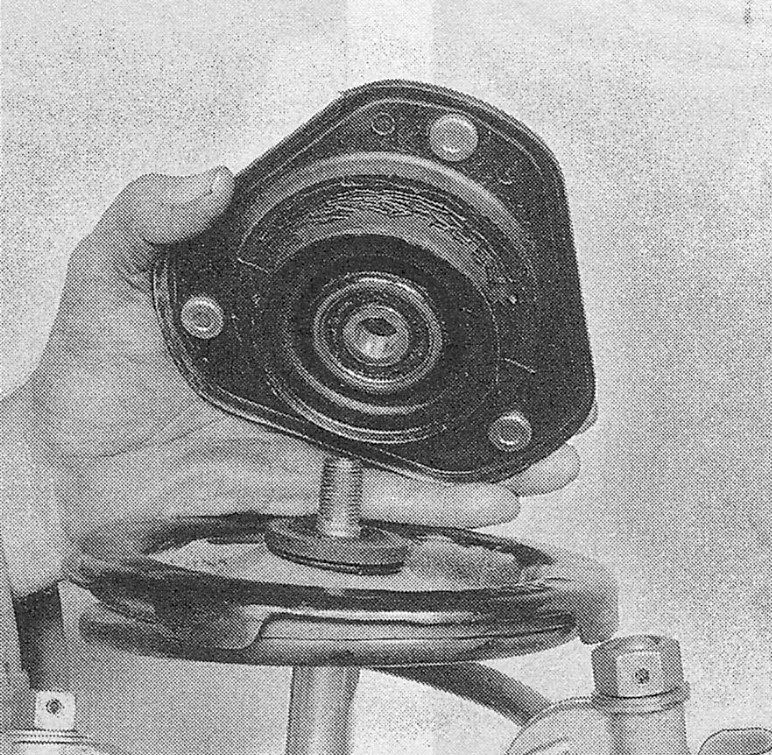
5. Remove the nut and upper mount (see illustration). Lay the parts out in the exact order in which they are removed. Inspect the bearing in the suspension support for smooth operation. If it doesn’t turn smoothly, replace the upper mount. Check the rubber portion of the upper mount for cracking and general deterioration. If there is any separation of the rubber, replace it.
i.5 Lift the upper mount off the damper rod
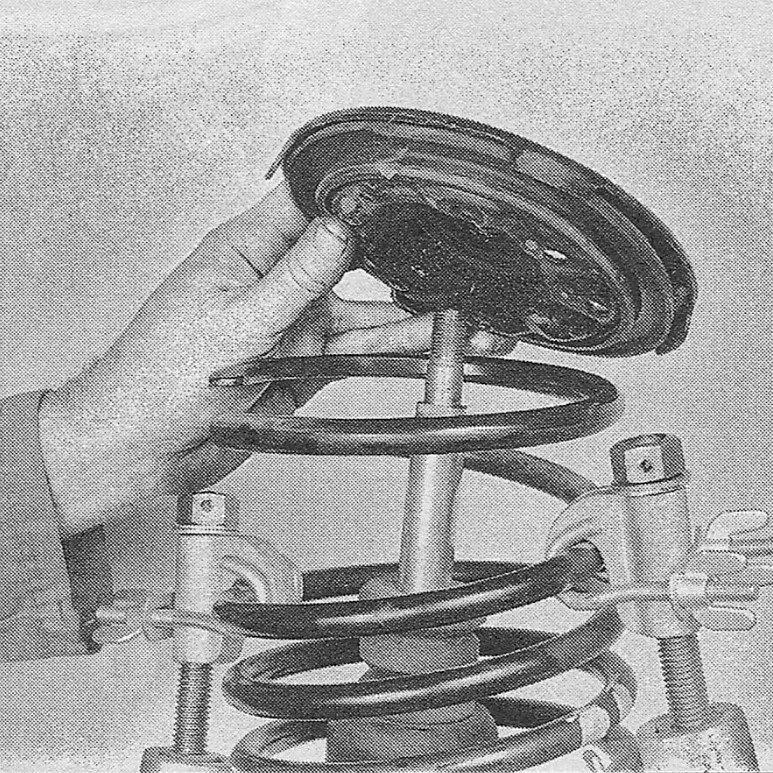
6. Remove the upper spring seat from the damper rod (see illustration). Check the spring seat for cracking and hardness; replace it if necessary. Remove the upper insulator from the damper shaft.
i.6 Remove the upper spring seat and insulator from the damper rod
7. Carefully lift the compressed spring from the assembly (see illustration) and set it in a safe place.
i.7 Remove the compressed spring from the strut/shock absorber assembly — keep the ends of the spring pointed away from your body
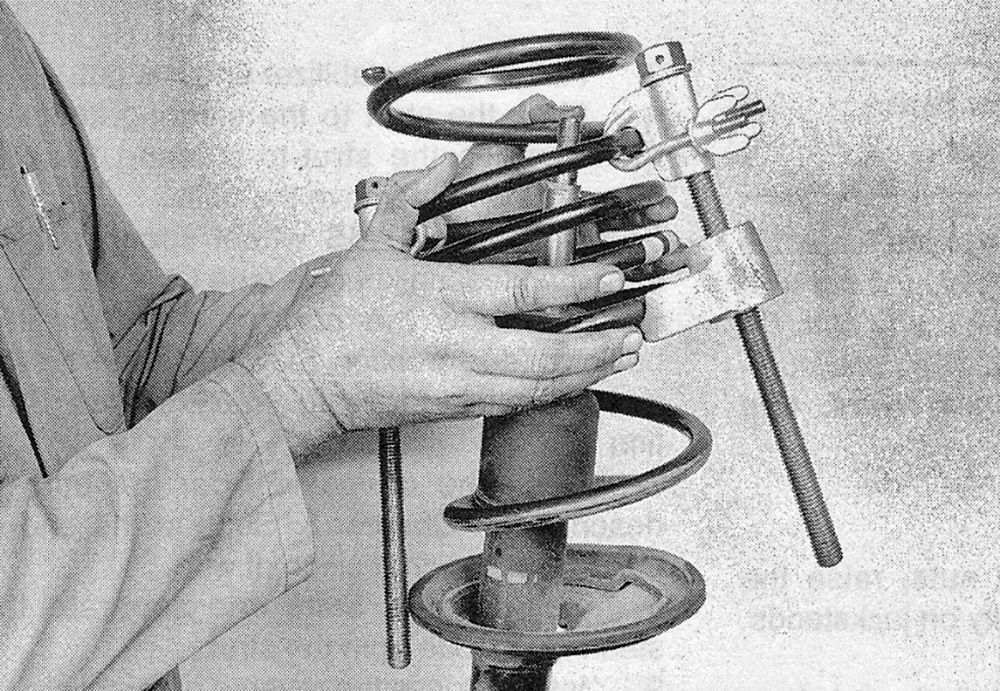
Warning: When removing the compressed spring, lift it off carefully and set it in a safe place. Keep the ends of the spring away from your body.
Note: If you are disassembling both struts, mark the springs LEFT and RIGHT so you don’t mix them up (they’re different).
8. Remove the dust cover plate and dust cover.
9. Slide the rubber bump stop off the damper rod. Check the bump stop for cracking and general deterioration. If there is any deterioration of the rubber, replace it.
Reassembly
10. Extend the damper rod to its full length and install the rubber bump stop, dust cover and dust cover plate.
11. Carefully place the compressed coil spring onto the lower seat of the damper, with the end of the spring resting in the lowest part of the seat (see illustration).
i.11 When installing the spring, make sure the end fits into the recessed portion of the lower seat
12. Install the upper insulator and spring seat.
13. Install the bearing and suspension support.
14. Install the washer and damper rod nut and tighten it to the torque listed in this Chapter’s Specifications. Remove the spring compressor tool.
15. Install the strut/spring assembly (see Strut assembly (front) — removal, inspection and installation).