Drivebelt check, adjustment and replacement
Warning: The electric cooling fan(s) on these models can activate at any time the ignition switch is in the on position. Make sure the ignition is Off when working in the vicinity of the fan(s).
Check
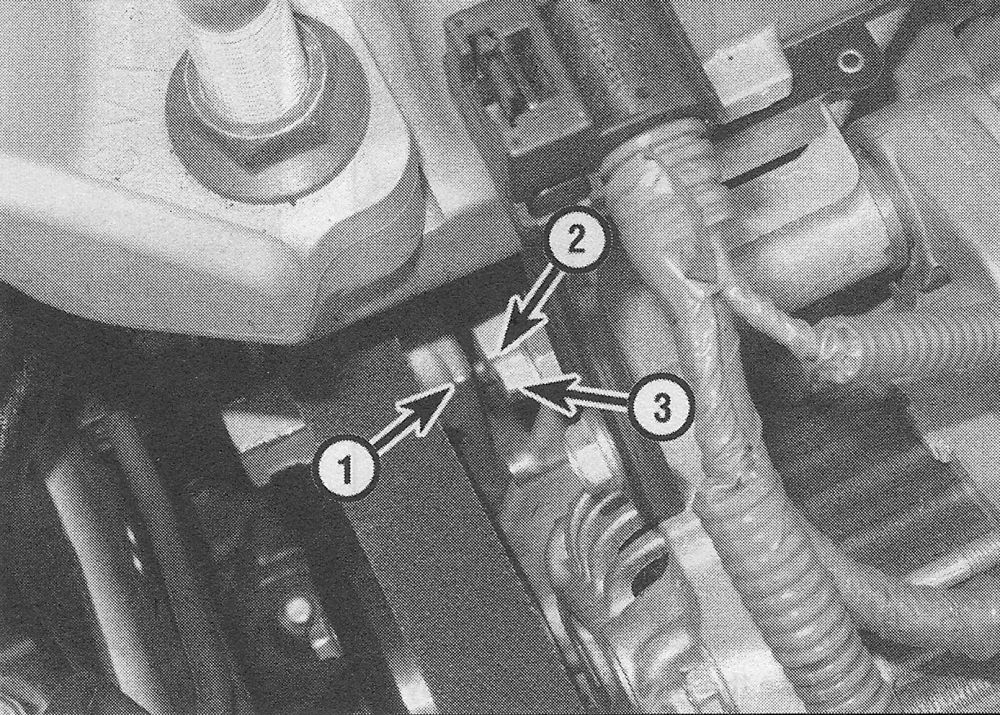
1. The drivebelts are located at the front of the engine and play an important role in the operation of the vehicle and its components. Due to their function and material makeup, the belts are prone to failure after a period of time and should be inspected and adjusted periodically to prevent major damage. No adjustment is necessary because all models are equipped with an automatic drivebelt tensioner. Locate the tensioner pointer (see illustration) and start the vehicle. If the indicator moves or fluctuates excessively, the tensioner needs to be replaced.
i.1 Automatic drivebelt tensioner details (1.8L engine shown)
1 Tensioner arm mark
2 New belts
3 Worn belts
2. A single drivebelt is used to turn the alternator, water pump, and air conditioning compressor.
Note: All engines use a hydraulic type auto-tensioner. The wrench must be rotated slowly for at least three seconds to move the tensioner pulley.
3. With the engine turned off, open the hood and locate the drivebelts at the front of the engine. Use a flashlight to carefully check each belt. Check for a severed core, separation of the adhesive rubber on both sides of the core and for core separation from the belt side. Inspect the ribs for separation from the adhesive rubber and for cracking or separation of the ribs, torn or worn ribs or cracks in the inner ridges of the ribs (see illustration). Also check for fraying and glazing, which gives the belt a shiny appearance. Inspect both sides of the belt by twisting the belt to check the underside. Use your fingers to feel the belt where you can’t see it. If any of the above conditions are evident, replace the belt(s).
i.3 Here are some of the more common problems associated with drivebelts (check the belts very carefully to prevent an untimely breakdown)

Replacement
4. Apply the parking brake, loosen the right (passenger’s side) front wheel lug nuts, raise the front of the vehicle and support it securely on jack stands. Remove the wheel, then remove the inner fender splash shield (see Body).
Note: On 1.8L Civic models it isn’t absolutely necessary to remove the wheel and splash shield, but it does make the job easier.
5. The automatic tensioner must be released to allow drivebelt replacement. Place a wrench or a socket on the hex casting on the tensioner arm and rotate it counterclockwise on 1.8L models and clockwise on 2.4L models, until the belt can be removed (see illustration). Remove the belt and slowly release the tensioner. Install the new belt, then rotate the tensioner to allow the belt to slip over it. Release the tensioner slowly until it contacts the drivebelt.
i.5 Place a wrench or a socket on the tensioner pulley bolt and rotate it counterclockwise on 1.8L models and clockwise on 2.4L models
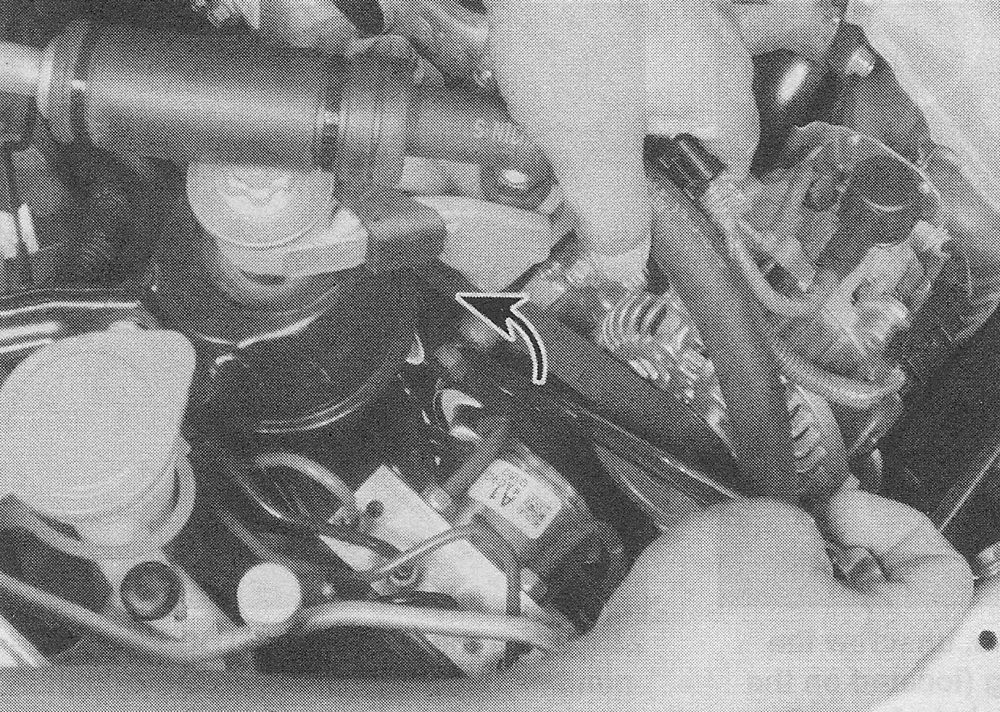
Note: All engines use a hydraulic type auto tensioner, the wrench must be rotated slowly for at least three seconds to move the tensioner pulley.
6. When installing the belt, make sure the belt is centered on the pulleys.
7. Install the splash shield, wheel and lug nuts. Lower the vehicle and tighten the lug nuts to the torque listed in this Chapter’s Specifications.
Automatic tensioner replacement
8. Remove the drivebelt (see Steps 4 and 5).
1.8L engines
9. Remove the alternator (see Engine electrical systems).
10. Remove the water pump pulley mounting fasteners (see Cooling, heating and air conditioning systems).
11. Remove the automatic tensioner fasteners and tensioner assembly.
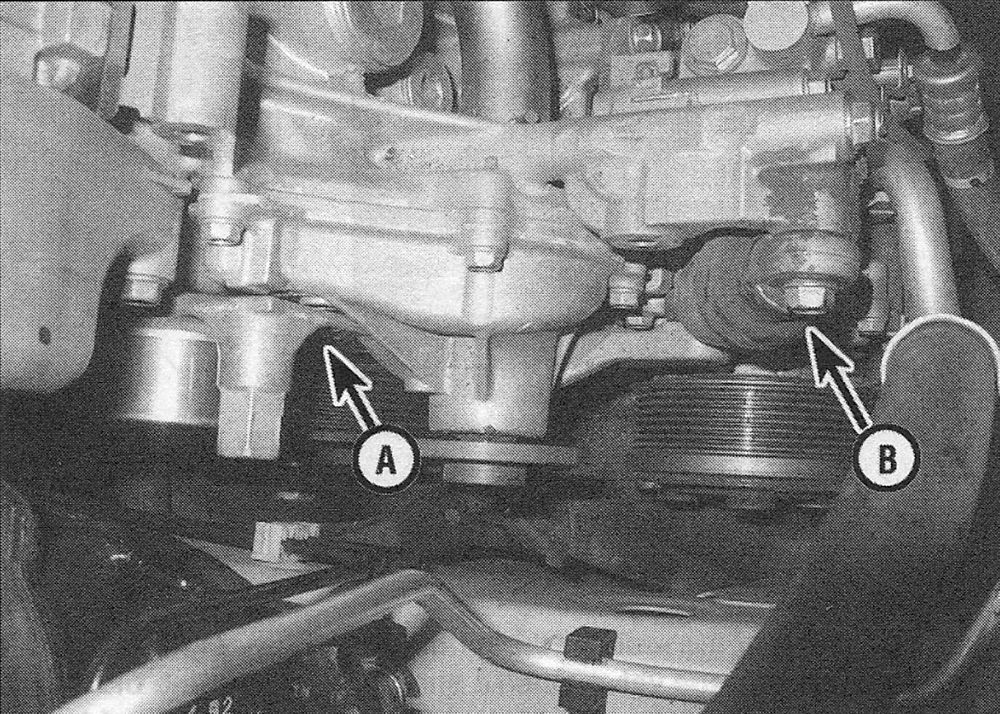
12. Install the tensioner and fasteners (see illustration) and tighten to the torque listed in this Chapter’s Specifications.
i.12 1.8L engine automatic tensioner mounting bolts
A 10 mm mounting bolt
B 8 mm mounting bolt
13. Place a wrench or a socket on the tensioner (see illustration 19.5). Slowly compress the tensioner downward, holding it for three seconds. Push the tensioner slowly upward and hold for three seconds.
14. Repeat this procedure three times to bleed the tensioner assembly.
15. The remaining installation is the reverse of removal.
2.4L engines
16. If you’re working on a 2014 and earlier 2.4L engine, remove the idler pulley mounting bolts, then remove the pulley.
17. Unscrew the mounting bolts and remove the tensioner.
18. Installation is the reverse of removal.