Engine oil and oil filter change
1. Frequent oil changes are the best preventive maintenance the home mechanic can give the engine, because aging oil becomes diluted and contaminated, which leads to premature engine wear.
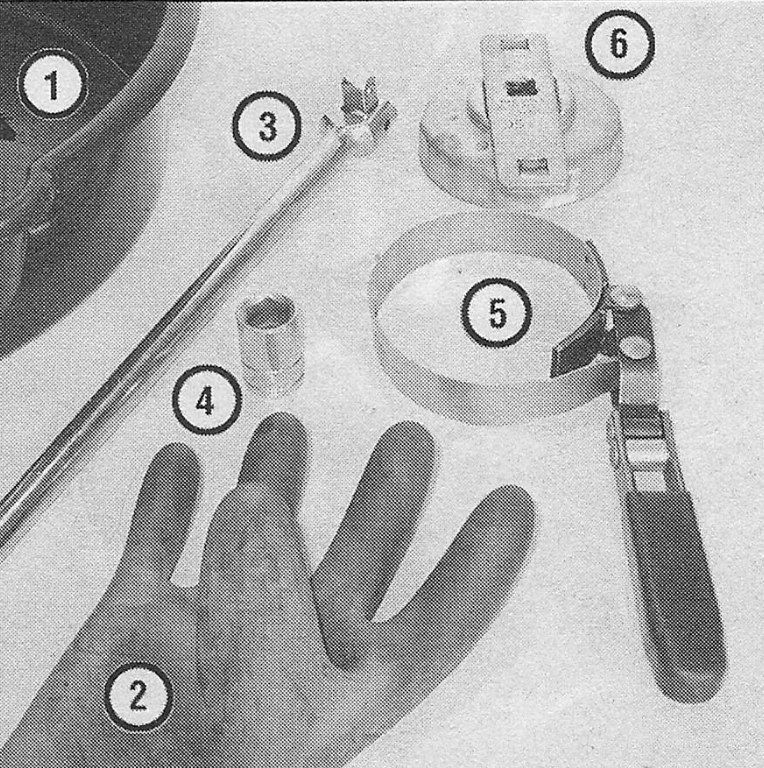
2. Make sure you have all the necessary tools before you begin this procedure (see illustration). You should also have plenty of rags or newspapers handy for mopping up any spills.
6.2 These tools are required when changing the engine oil and filter
1 Drain pan — It should be fairly shallow in depth, but wide to prevent spills
2 Rubber gloves — When removing the drain plug and filter, you will get oil on your hands (the gloves will prevent burns)
3 Breaker bar — Sometimes the oil drain plug is tight, and a long breaker bar is needed to loosen it
4 Socket — To be used with the breaker bar or a ratchet (must be the correct size to fit the drain plug — six-point preferred)
5 Filter wrench — This is a metal band-type wrench, which requires clearance around the filter to be effective
6 Filter wrench — This type fits on the bottom of the filter and can be turned with a ratchet or breaker bar (different-size wrenches are available for different types of filters)
3. Access to the underside of the vehicle is greatly improved if the vehicle can be lifted on a hoist, driven onto ramps or supported by jack stands.
Warning: Do not work under a vehicle which is supported only by a hydraulic or scissors-type jack.
4. If this is your first oil change, get under the vehicle and familiarize yourself with the locations of the oil drain plug and the oil filter. The engine and exhaust components will be warm during the actual work, so try to anticipate any potential problems before the engine and accessories are hot.
5. Park the vehicle on a level spot. Start the engine and allow it to reach its normal operating temperature. Warm oil and sludge will flow out more easily. Turn off the engine when it’s warmed up. Remove the filler cap from the valve cover.
6. Raise the vehicle and support it securely on jack stands.
Warning: Never get beneath the vehicle when it is supported only by a jack. The jack provided with your vehicle is designed solely for raising the vehicle to remove and replace the wheels. Always use jack stands to support the vehicle when it becomes necessary to place your body underneath the vehicle.
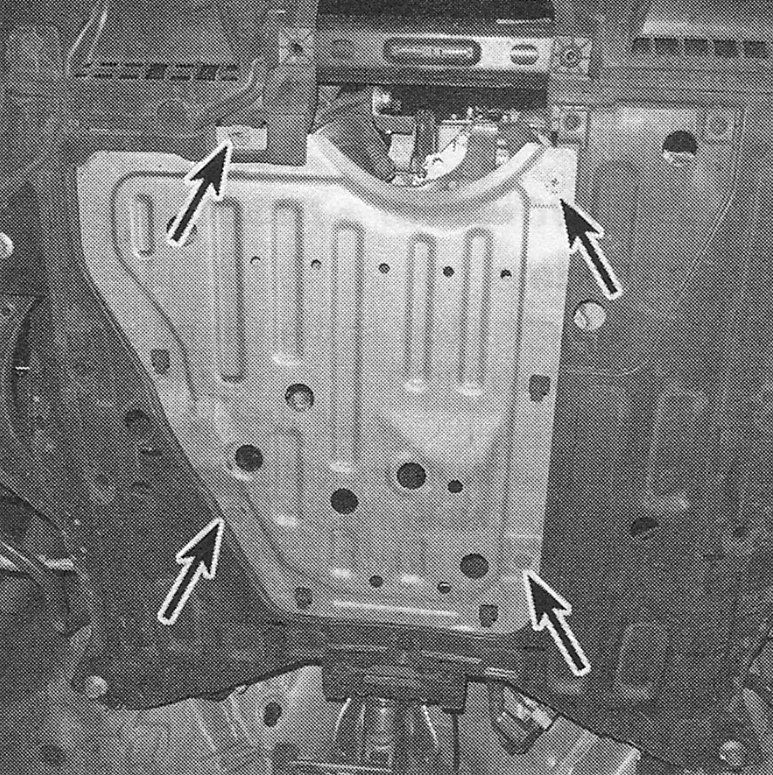
7. Remove center portion of the under-vehicle splash shield (see illustration).
6.7 Splash shield fastener locations
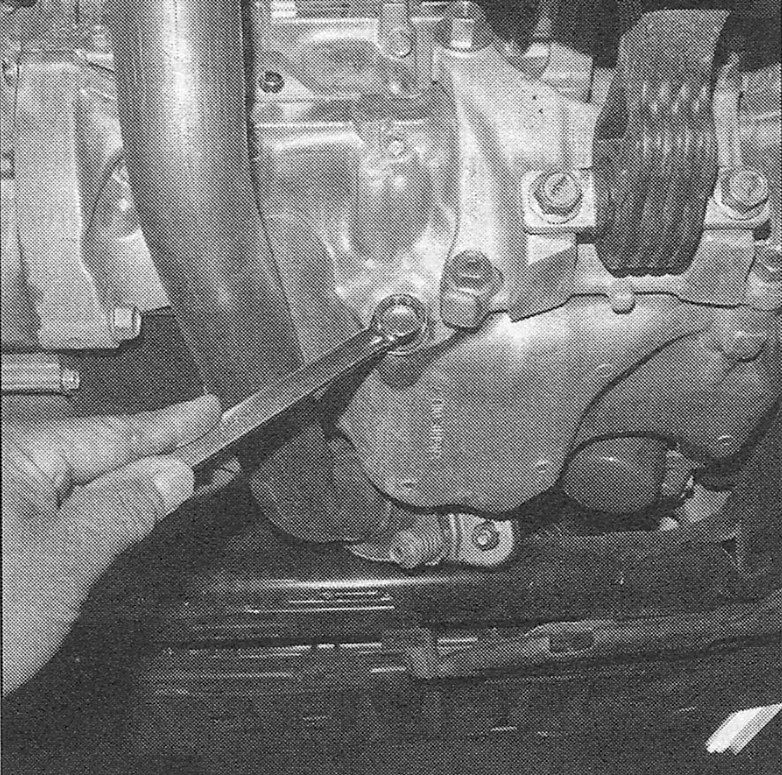
8. Being careful not to touch the hot exhaust components, place the drain pan under the drain plug in the bottom of the pan and remove the plug (see illustration). You may want to wear gloves while unscrewing the plug the final few turns if the engine is hot.
6.8 Use the proper size box-end wrench or socket to remove the oil drain plug and avoid rounding it off
9. Allow the old oil to drain into the pan. It may be necessary to move the pan farther under the engine as the oil flow slows to a trickle. Inspect the old oil for the presence of metal shavings and chips.
10. After all the oil has drained, wipe off the drain plug with a clean rag. Even minute metal particles clinging to the plug would immediately contaminate the new oil.
11. Clean the area around the drain plug opening, reinstall the plug and tighten it too the torque listed in this Chapter’s Specifications.
12. Move the drain pan into position under the oil filter.
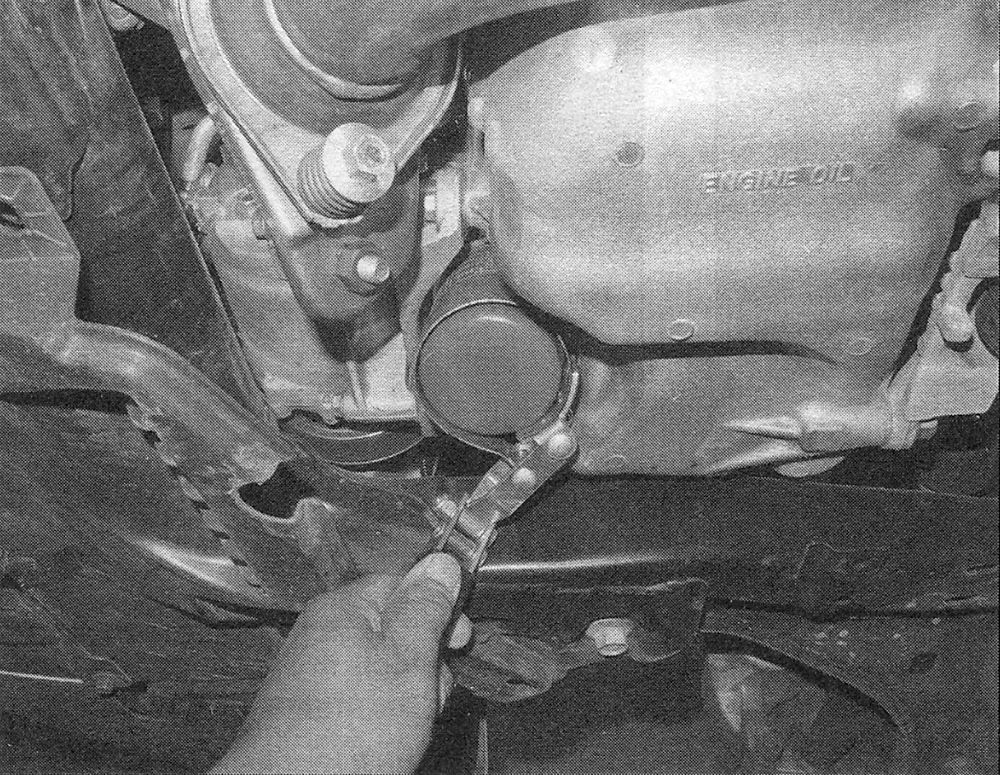
13. Loosen the oil filter (see illustration) by turning it counterclockwise with an oil filter wrench. Once the filter is loose, use your hands to unscrew it from the block. Keep the open end pointing up to prevent the oil inside the filter from spilling out.
6.13 Use an oil filter wrench to remove the filter (1.8L model shown, other models similar)
Warning: The exhaust system may still be hot, so be careful.
14. With a clean rag, wipe off the filter mounting surface. If a residue of old oil is allowed to remain, it will smoke when the engine is heated up. Also make sure that none of the old gasket remains stuck to the mounting surface. It can be removed with a scraper if necessary.
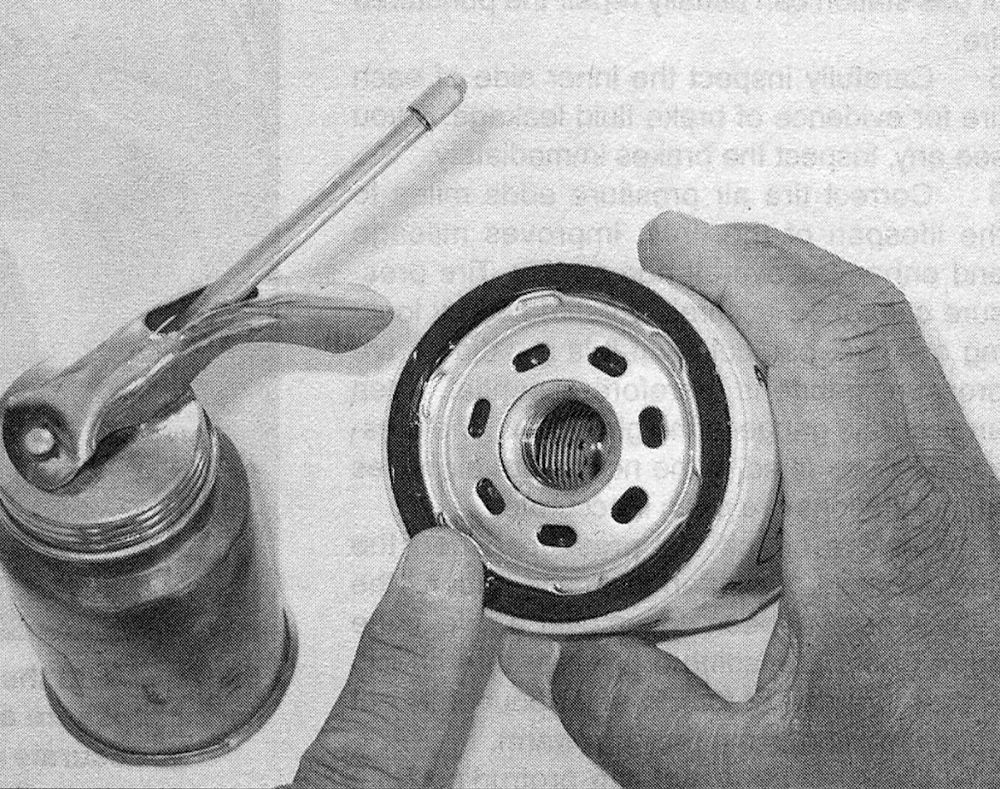
15. Compare the old filter with the new one to make sure they are the same type. Smear some clean engine oil on the rubber gasket of the new filter (see illustration).
6.15 Lubricate the oil filter gasket with clean engine oil before installing the filter on the engine
16. Attach the new filter to the engine, following the tightening directions printed on the filter canister or packing box. Most filter manufacturers recommend against using a filter wrench due to the possibility of overtightening and damaging the seal.
17. Remove all tools, rags, etc., from under the vehicle, being careful not to spill the oil in the drain pan, then lower the vehicle.
18. Add new oil to the engine through the oil filler cap in the valve cover. Use a funnel, if necessary, to prevent oil from spilling onto the top of the engine. Pour three quarts of fresh oil into the engine. Wait a few minutes to allow the oil to drain into the pan, then check the level on the oil dipstick (see Fluid level checks). If the oil level is at or near the upper hole on the dipstick, install the filler cap hand tight, start the engine and allow the new oil to circulate.
19. Allow the engine to run for about a minute, then turn it off. Look under the vehicle and check for leaks at the oil pan drain plug and around the oil filter. If either is leaking, tighten the plug or filter.
20. Wait a few minutes to allow the oil to trickle down into the pan, then recheck the level on the dipstick and, if necessary, add enough oil to bring the level to the upper hole.
21. During the first few trips after an oil change, make it a point to check frequently for leaks and proper oil level.
22. The old oil drained from the engine cannot be reused in its present state and should be disposed of. Check with your local auto parts store, disposal facility or environmental agency to see if they will accept the oil for recycling. After the oil has cooled it can be drained into a container (capped plastic jugs, topped bottles, milk cartons, etc.) for transport to one of these disposal sites. Don’t dispose of the oil by pouring it on the ground or down a drain!
Oil life indicator — resetting Civic models
23. Turn the ignition to the on position but do not start the vehicle.
24. Push the select/reset button repeatedly until the engine oil life indicator comes on.
25. Once the display is on, press and hold the select/reset button for 10 seconds. The display should go to the reset display mode (start blinking).
26. Press and hold the select/reset button again for more than five seconds. The display reset mode will disappear and the engine oil life display will reset to 100 percent.
CR-V models
27. Turn the ignition to the «ON» position but do not start the vehicle.
28. Push the select/reset knob repeatedly until the engine oil life appears on the screen.
29. Press and hold the select/reset knob for 10 seconds.
30. Turn the select/reset knob until «oil life» is displayed. When the display starts blinking, push the select/reset knob.
31. When the engine oil life and maintenance item code begins to blink, push the select/reset knob; the engine oil life should reset to «100» and the maintenance item code should disappear.